Programming 2
Course Description
In this course, you'll build off of what you learned in Programming 1.
- You will use the tools you've learned to build more advanced programs: programs that read from the internet, display information visually, and interact with databases.
- You'll deepen our knowledge of software fundamentals - learning about object-oriented software, how to recover from errors, and how data is structured.
- Finally, you will begin to explore the philosophy of writing software. This means going beyond "does my program compute the right thing", but to ask if a program is well organized, if it will be readable by other programmers, and if it will it be re-usable in other projects.
By the end of the course, you will understand what objects and classes are (in other words, writing object-oriented programs), you will be able to write more advanced programs: interacting with data sources, using a language called SQL, and creating graphics to visualize data. You will also be structuring your code in more-professional ways. Along the way you'll pick up tips on how to investigate programs that aren't working correctly, and gain experience reading and understanding code that other people have written.
Everything in the course will be valuable for doing real-world work in the field.
You aren't on this journey alone. We will collaborate, and we'll communicate in discord and office hours to help answer questions.
Instructor
- David Walter
- david@kibo.school
Please contact on Discord first with questions about the course.
This course also has a Teaching Assistant, who will have their own office hours and who you can reach out to for additional assistance.
The Teaching Assistant and their contact information is:
- Ayomide Onifade
- ayomide.onifade@kibo.school
Live Class Time
Note: all times are shown in GMT.
- Wednesdays at 4:30 PM - 6:00 PM GMT
Office Hours
- Instructor: Fridays at 4:30 PM - 5:30 PM GMT
- Teaching Assistant: Saturdays at 3:00 PM - 4:00 PM GMT
How the Course Works
There are multiple ways you'll learn in this course:
- Read and engage with the materials on this site
- Attend live class and complete the activities in class
- Complete practice exercises to learn and internalize the concepts
- Complete assignments and projects to demonstrate what you have learned
Active engagement is necessary for success in the course! You should try to write lots of programs, so that you can explore the concepts in a variety of ways.
You are encouraged to seek out additional practice problems outside of the practice problems included in the course.
Live Classes
Each week, you will have a live class (see course overview for time). You are required to attend the live class sessions.
Video recordings and resources for the class will be posted after the classes each week. If you have technical difficulties or are occasionally unable to attend the live class, please be sure to watch the recording as quickly as possible so that you do not fall behind.
First join the Replit team to access the below links.
| Week | Topic | Live Class | Materials |
|---|---|---|---|
| 1 | Object Oriented Programming | Replit | |
| 2 | Memory & References | PythonTutor | |
| 3 | Inheritance | Replit | |
| 4 | Files, JSON, and APIs | Replit | |
| 5 | Review & Practice | Replit | |
| 6 | Collections | Gist | |
| 7 | Errors and Testing | Gist | |
| 8 | Writing Good Code | Git | |
| 9 | Applying What You've Learned 1 | CodeCheck Practice | |
| 10 | Applying What You've Learned 2 | Git |
Assessments
Your overall course grade is composed of these weighted factors:
- 10% Practice
- 40% Assignments
- 25% Midterm Project
- 25% Final Project
Practice
Throughout the course, there are practice exercises that are recommended each week. We will not be asking you to submit evidence of completing all of these practice exercises, but we will ask for you to submit some. Just because we ask that you submit some exercises but not others, this is not an indication of their relative importance. You should strive to do as much practice as possible. As with anything, practice is how you develop mastery.
Additional Practice
If you finish the exercises and assignments (and you are up to date on your other courses), you can continue to practice programming.
We recommend that you start with the Exercism Python track. If you complete it, and complete the Python exercises, then you can move on to the other resources.
These sites host programming problems to solve. They are often educational, and can help when it is time to prepare for technical interviews. Sometimes the problems are poorly written or hard to understand, in which case it might be a problem to skip over for now.
Practice Tips
- It's good to look at other solutions, but only after you've tried solving a problem. If you come up with a solution that works, try to notice how someone else solved the same problem, and what you might do to revise your solution.
- It can be good to try solving the same problem a second time, after some days or weeks have passed. Has the problem gotten easier, now that you have solved it before?
- It's fun to solve problems with friends. If you have a solution you really like, you can share it with the squad or community. Remember to use spoiler tags so that you don't ruin the problem in case someone else wants to try it.
- Practice should be challenging, but you shouldn't spend hours stuck on a problem without making progress. If you are stuck, take a break, ask for help, try another problem, and return to the problem later.
- Take a break! It's often helpful to walk around, drink water, eat a bite of food, then return to a problem refreshed. Some problems that seem impossible become very easy when approached with a fresh mind.
Assignments
Each week you will be given an Assignment, where you'll practice the concepts covered in the readings and lessons. The assignments let you practice with the topics you covered that week, explore applications and connections, and check your own understanding of the material.
Assignments will be distributed via GitHub classroom, and you will be asked to write significant code. Upon completion of the assignments, they will be submitted to Gradescope for grading.
Projects
You will have a midterm project and a final project in this course. Projects are larger in scale and will give you an opportunity to work with larger amounts of code to solve more complex problems. You will be given two weeks to complete each project. They represent a significant portion of your grade, and so it is important that you start these projects as early as possible.
Late Policy
-
Late assignments will be accepted up to 48 hours after the original due date, but a late penalty of 10% will be applied for each day the assignment is late.
-
If a student has a legitimate reason for being unable to submit an assignment on time (e.g. illness, family emergency), they may request an extension by sending an email to the instructor. Such requests must be made at least 24 hours before the original due date. The instructor will review each request and decide whether to grant an extension on a case-by-case basis.
-
If an extension is granted, the new due date will be determined by the instructor and communicated to the student. Late penalties will still apply if the assignment is not submitted by the new due date.
Getting Help
If you have any trouble understanding the concepts or stuck on a problem, we expect you to reach out for help!
Below are the different ways to get help in this class.
Discord Channel
The first place to go is always the course's help channel on Discord. Share your question there so that your Instructor and your peers can help as soon as we can. Peers should jump in and help answer questions (see the Getting and Giving Help sections for some guidelines).
Message your Instructor on Discord
If your question doesn't get resolved within 24 hours on Discord, you can reach out to your instructor directly via Discord DM or Email.
Office Hours
There will be weekly office hours with your Instructor and your TA. Please make use of them!
Tips on Asking Good Questions
Asking effective questions is a crucial skill for any computer science student. Here are some guidelines to help structure questions effectively:
-
Be Specific:
- Clearly state the problem or concept you're struggling with.
- Avoid vague or broad questions. The more specific you are, the easier it is for others to help.
-
Provide Context:
- Include relevant details about your environment, programming language, tools, and any error messages you're encountering.
- Explain what you're trying to achieve and any steps you've already taken to solve the problem.
-
Show Your Work:
- If your question involves code, provide a minimal, complete, verifiable, and reproducible example (a "MCVE") that demonstrates the issue.
- Highlight the specific lines or sections where you believe the problem lies.
-
Highlight Error Messages:
- If you're getting error messages, include them in your question. Understanding the error is often crucial to finding a solution.
-
Research First:
- Demonstrate that you've made an effort to solve the problem on your own. Share what you've found in your research and explain why it didn't fully solve your issue.
-
Use Clear Language:
- Clearly articulate your question. Avoid jargon or overly technical terms if you're unsure of their meaning.
- Proofread your question to ensure it's grammatically correct and easy to understand.
-
Be Patient and Respectful:
- Be patient while waiting for a response.
- Show gratitude when someone helps you, and be open to feedback.
-
Ask for Understanding, Not Just Solutions:
- Instead of just asking for the solution, try to understand the underlying concepts. This will help you learn and become more self-sufficient in problem-solving.
-
Provide Updates:
- If you make progress or find a solution on your own, share it with those who are helping you. It not only shows gratitude but also helps others who might have a similar issue.
Remember, effective communication is key to getting the help you need both in school and professionally. Following these guidelines will not only help you in receiving quality assistance but will also contribute to a positive and collaborative community experience.
Screenshots
It’s often helpful to include a screenshot with your question. Here’s how:
- Windows: press the Windows key + Print Screen key
- the screenshot will be saved to the Pictures > Screenshots folder
- alternatively: press the Windows key + Shift + S to open the snipping tool
- Mac: press the Command key + Shift key + 4
- it will save to your desktop, and show as a thumbnail
Giving Help
Providing help to peers in a way that fosters learning and collaboration while maintaining academic integrity is crucial. Here are some guidelines that a computer science university student can follow:
-
Understand University Policies: Familiarize yourself with Kibo's Academic Honesty and Integrity Policy. This policy is designed to protect the value of your degree, which is ultimately determined by the ability of our graduates to apply their knowledge and skills to develop high quality solutions to challenging problems--not their grades!
-
Encourage Independent Learning: Rather than giving direct answers, guide your peers to resources, references, or methodologies that can help them solve the problem on their own. Encourage them to understand the concepts rather than just finding the correct solution. Work through examples that are different from the assignments or practice problems provide in the course to demonstrate the concepts.
-
Collaborate, Don't Complete: Collaborate on ideas and concepts, but avoid completing assignments or projects for others. Provide suggestions, share insights, and discuss approaches without doing the work for them or showing your work to them.
-
Set Boundaries: Make it clear that you're willing to help with understanding concepts and problem-solving, but you won't assist in any activity that violates academic integrity policies.
-
Use Group Study Sessions: Participate in group study sessions where everyone can contribute and learn together. This way, ideas are shared, but each individual is responsible for their own understanding and work.
-
Be Mindful of Collaboration Tools: If using collaboration tools like version control systems or shared documents, make sure that contributions are clear and well-documented. Clearly delineate individual contributions to avoid confusion.
-
Refer to Resources: Direct your peers to relevant textbooks, online resources, or documentation. Learning to find and use resources is an essential skill, and guiding them toward these materials can be immensely helpful both in the moment and your career.
-
Ask Probing Questions: Instead of providing direct answers, ask questions that guide your peers to think critically about the problem. This helps them develop problem-solving skills.
-
Be Transparent: If you're unsure about the appropriateness of your assistance, it's better to seek guidance from professors or teaching assistants. Be transparent about the level of help you're providing.
-
Promote Honesty: Encourage your peers to take pride in their work and to be honest about the level of help they received. Acknowledging assistance is a key aspect of academic integrity.
Remember, the goal is to create an environment where students can learn from each other (after, we are better together) while we develop our individual skills and understanding of the subject matter.
Academic Integrity
When you turn in any work that is graded, you are representing that the work is your own. Copying work from another student or from an online resource and submitting it is plagiarism. Using generative AI tools such as ChatGPT to help you understand concepts (i.e., as though it is your own personal tutor) is valuable. However, you should not submit work generated by these tools as though it is your own work. Remember, the activities we assign are your opportunity to prove to yourself (and to us) that you understand the concepts. Using these tools to generate answers to assignments may help you in the short-term, but not in the long-term.
As a reminder of Kibo's academic honesty and integrity policy: Any student found to be committing academic misconduct will be subject to disciplinary action including dismissal.
Disciplinary action may include:
- Failing the assignment
- Failing the course
- Dismissal from Kibo
For more information about what counts as plagiarism and tips for working with integrity, review the "What is Plagiarism?" Video and Slides.
The full Kibo policy on Academic Honesty and Integrity Policy is available here.
Course Tools
In this course, we are using these tools to work on code. If you haven't set up your laptop and installed the software yet, follow the guide in https://github.com/kiboschool/setup-guides.
- GitHub is a website that hosts code. We'll use it as a place to keep our project and assignment code.
- GitHub Classroom is a tool for assigning individual and team projects on Github.
- Visual Studio Code is an Integrated Development Environment (IDE) that has many plugins which can extend the features and capabilities of the application. Take time to learn how ot use VS Code (and other key tools) because you will ultimately save enormous amounts of time.
- Anchor is Kibo's Learning Management System (LMS). You will access your course content through this website, track your progress, and see your grades through this site.
- Gradescope is a grading platform. We'll use it to track assignment submissions and give you feedback on your work.
- Woolf is our accreditation partner. We'll track work there too, so that you get credit towards your degree.
Core Reading
The following materials were key references when this course was developed. Students are encouraged to use these materials to supplement their understanding or to diver deeper into course topics throughout the term.
- Downey, A (2015). Think Python, How to Think Like a Computer Scientist. Green Tea Press (209 pp.)
- Severance, D. C. R. (2016). Python for Everybody: Exploring Data in Python 3. Chapters 12-17 (90 pages)
Supplemental Reading
This course references the following materials. Students are encouraged to use these materials to supplement their understanding or to diver deeper into course topics throughout the term.
- Sweigart, A (2019). Automate the Boring Stuff with Python, 2nd e. No Starch Press. Ch 7-12 (138 pp.)
- Fisler, K.; Krishnamurthi, S.; Lerner, B.; Politz, G. (2023). A Data-Centric Introduction to Computing
- Felleisen, M.; Findler, R. B.; Flatt, M.; Krishnamurthi, S. (2022). How to Design Programs: An Introduction to Programming and Computing, 2nd e. MIT Press.
Object Oriented Programming
You have never seen my car, but if I gave you the keys and asked you to do me a favor and move my car, you can probably imagine what that process would look like. You'd enter the door, put the keys in the ignition, hit the gas and use the wheel to direct the car to its destination.
You would probably be very surprised if my car had 7 wheels, or had a stirring wheel in the backseat, or had two wings - as cool of a feature as that would be.
In other terms, without knowing any details about my specific car, what you can imagine is good enough for you to plan how to use it. While all cars can be different, they all fit into some abstract idea of what a car is, and what a car should be able to do
What does this have to do with software? It turns out a whole lot! So far, we have been focusing on writing small solutions to small problems. As you move forward in your learning journey, you will see that developers around the world are tackling extremely complex challenges, and creating a lot of code to help each other out.
A lot of code is written only to be used by other developers - we've started benefiting from that last term by importing other modules, for example being able to create random numbers by using import random then calling random.randint
We can go beyond that by using a technique called Object-Oriented-Programming, or OOP for short. In OOP we define a class to capture abstract ideas about what we are trying to model. A Car class would define information about all cars: What can they do? what information should we know about them?
An object is a specific instance of a class, in other words, it's how we would represent my car in code, your car would require a different object, but they would both be able to do similar things since they are both instances of the Car class. We will spend plenty of time this week practicing this concept
Preview
Here is what we will be exploring this week:
- How can we define a class in Python?
- How do we customize the data and behaviour of objects?
- What are some common pitfalls when writing OOP code?
Why does this matter?
OOP as a style of programming is widespread in all modern languages, and helps us define How other developers should use our code. Getting familiar with OOP is crucial to be able to read, understand, and contribute to most of modern code that is written today.
What is Object-Oriented Programming?
Objects and Methods
Objects
Objects are specific instances of a class. Going back to our initial example, my car could be represented by an object, your car by a different object, but they are both cars at the end of the day.
An object has internal data and behavior.
The internal data is what makes the object different from others. My car is red, yours is black. My car is manual, yours is automatic, etc.
The behavior is what we can do with the object. My car can turn on, turn right, left, honk. Similarly, your car should be able to do the same.
This logic applies to code you have seen before:
When you have a string like name = 'Michael', name has some internal data (which stores the letters) and some behavior (it knows how to be joined onto another string, split into smaller strings, and so on).
When you have an int, like number = 5, number has some internal data (which stores the value 5) and some behavior (it knows how to be added, subtracted and multiplied).
The strings and integerss you use every day are examples of objects. There is a class that defines the behavior of all strings, and allows you to create specific strings you depending on the problem you are trying to solve. Similarly, there is a class defining the behavior of all integers,
If you run print(type(5)) in the console, it will show <class 'int'>. And if you run print(type('hello')), it will show <class 'str'>. This is a handy tool to use if you are unsure what kind of object you are dealing with.
We can have a list, like list_of_students = ['Ola', 'Mo', 'Keno']. list_of_students has internal data (which stores the names as strings) and behavior (you can write list_of_students.append(other_name) to add a name).
Every List you have created is also an object! This suggests that there is a class that defines the behavior of all Lists. Unsurprisingly, print(type(list_of_students)) shows <class 'list'>
Methods and behaviour
Notice what happens when we write list_of_students.append(other_name): In plain english, we are asking Python to append some variable other_name to the list list_of_students
What would happen if we were to just type append(other_name) in our code? It seems like there would be missing information: Where are we appending this new data? Go ahead and try it, Python will give you an error message.
Methods are special functions that are "attached" to an object. They only work when paired up with that object. This is how we get to design how objects of a given class get to behave.
Check your understanding:
Look through your assignments and notes for Programming 1: Can you identify some methods and objects?
What will the result be for each line when the code is evaluated?
>>> type(67.4)
>>> type(["hello"])
>>> type(None)
>>> [type([]), type({})]
First, try to predict the result. Then, enter each line in the Python console to check your guess.
Solution:
type(67.4)
# <class 'float'>

type(["hello"])
# <class 'list'> don't get distracted by the String! This is still a list

type(None)
# <class 'NoneType'> this is a special class for None only.

[type([]), type({})]
# [<class 'list'>, <class 'dict'>] here we check the type of a list, then the type of a dictionary, and store both results in a list.
What's next?
Many of the types you are familiar with are defined by a class behind the scenes. In the next section, we will learn how to create our own Classes, define Methods within them, then instantiate a new Object.
Creating a Class
Class syntax
If you want to define a new type of object, that isn't a list, dictionary, or anything built-in, you can create your own. When you create a class you will need to provide python with the following information:
- A name for your class.
- What the data that each object stores should be.
- All the behavior we want the objects to be able to do. In other words, define methods for objects of your class.
To define a class in Python we follow this pattern:
class MyClass:
#<-> Note the indentation of all our code below
    def __init__(self, param_1, param_2...):
        self.data_1 = param_1
        self.data_2 = param_2 * 7
        self.data_3 = "some_default_value"

    def method_1(self):
        # We can define a behavior in this method

    def method_2(self, param_1):
        # We can define a different behavior in this method.
Let's break this down:
classis a keyword that should be followed by the name of the class. Note that everything related to our class is indented under theclass MyClass:statement__init__is a special method, often called the constructor. This is the method that defines what we need to create a new object of our class We will dig a lot deeper into the__init__method soon.selfis a keyword that you will see in all methods of our class. When you use theselfvariable within a method, you get to access the data of the object the method was called upon. This is a very crucial concept we will cover more in examples below.
Let's build our first class.
Our first class
Let's say we are writing a program that draws points on the screen. To represent where to draw each point, we need to have the x coordinate and the y coordinate. The x coordinate will be the number of pixels from the left side of the screen, and the y coordinate will be the number of pixels from the bottom of the screen.
Ideally, if my_point was a point object, I'd want it to know it's x and y coordinate. If I were to represent my_point, it would be convenient if I could type print(my_point.x) and see the x-coordinate of my point.
Let's do just that:
class Point:
    def __init__(self, initial_x, initial_y):
        self.x = initial_x
        self.y = initial_y
With these few lines of code, it's now possible for us to define points:
Let's dig deeper into what is going on here: We call x and y the attributes of Point objects. These represent the data stored in each object and they can be accessed and manipulated directly. For example we can modify my_point's x coordinate:
my_point.x = 11
print(my_point.x) # prints 11
These attributes were defined and set up inside our Constructor, the __init__ method. The line self.x = initial_x is telling python two different things:
- The object we are creating should have an attribute called
x - The value of that attribute should be the parameter
initial_x
Similarly, we do the same for the y-coordinate of the point.
It is up to you what the attributes of your objects should be, and how you will initialize them. This is part of the fun of programming in this style: Figuring out what you need to solve the problem at hand.
You may be wondering, where is our constructor method called? It is not obvious at a first glance, but the constructor is used in this line:
my_point = Point(4, 7). Using the name of your class, followed by all the parameters defined in __init__ besides self, is how you create an object of a custon class.
Check your understanding:
What do you think would happen if you were to execute this line of code:
Make a prediction about what will be printed, then test it out yourself.
Solution:
We will get an error! more specifically, an _AttributeError_, as the Point class does not have an attribute called _z_ defined in its constructor.Our first methods
The main thing we want to do with these points is move them around the screen, so let's build new behavior, new methods to achieve that.
class Point:
    def __init__(self, initial_x, initial_y):
        self.x = initial_x
        self.y = initial_y

    def move_right(self):
        self.x += 1

    def move_left(self):
        self.x -= 1

    def move_up(self):
        self.y += 1

    def move_down(self):
        self.y -= 1
Now on top of storing data, our objects have behaviour. Here's what it would look like to use the Point class now:
start.move_up() calls the move_up method defined in the class. It is like calling a function, it's just that this is a function attached to the object.
Understanding self:
This section is not about self awareness, but about clarifying the use of the keyword self
Note that in our definition of the move_right method, self looks like a parameter, however we called the method as start.move_right() without providing any parameters. Here self refers to the object we called the method upon. When we execute start.move_right(), self is effectively start. If we call my_point.move_right(), self is effectively my_point.
That's why we don't need to provide the parameter between parentheses, python knows what object to use in place of self by looking at the object before the '.'
How does it work in our Constructor though? Well there is no object yet, so inside our __init__ method, self refers to the object we are busy creating
Slides: Point class explanation
Click through the slides to see an explanation for each line of the Point class
What's next?
In the next section, we will go over some common bugs and errors you may encounter with your classes, before building another example class.
Bugs to Watch Out For
Video
A video with warnings about common bugs that we might accidentally run into:
What we saw in the video:
- If the indentation isn't right, errors can happen. For example, methods need to be indented to the right to be inside the class.
- If the name of the initializer method is
init(), or anything that's not__init__(), it won't be called and won't work. - If a method doesn't have
selfas the first argument, this can cause the error messagetakes 0 positional arguments but 1 was given. - If you don't spell all attributes correctly, you might get an attribute not found error.
- If you forget to add parentheses when creating a class, it won't work.
- If you don't use capital letters for a class, the code will be harder to understand.
It's not always easy
It isn't always easy to know how to make classes and methods. It's like how for functions, there isn't a clear way to decide what should be inside a function, and what the function should be called. Programmers often ask themselves questions like:
- "What should this class be called?"
- "Should I add the code as a method on this class, or a method on another class?"
- "Should these lines of code be a method, or should they be a function in another file?"
- "Should the method do both of these things, or should there be two different methods?"
It's normal to find it difficult answering these questions. The goal is for the program to be understandable by other people. We will do our best and keep working!
Practical uses of Classes
What's the point of a point?
We've built a point class, which we could use to display elements on a grid, but we don't have the tools to do that quite yet.
However, we can still think of other uses for our class. What can we build now that we have a definition of a point? We could define a line using two points, or a triangle using three points, a circle using a point and a radius. We could define an arbitrary shape as a list of points. Old school video game programmers relied on this a lot!
Let's see how we can build a simple Rectangle class. What we want out of objects of this class is to:
- Display enough information that we can easily picture where our rectangle is on a grid.
- Move the rectangle around.
- Check if a point is within the rectangle or not.
Let's start with our data. How would you define the attributes of Rectangle objects? Think about it for a few minutes before reading ahead.
There is no one way to make this work, you could provide your constructor with:
- The coordinate of the top-left corner of the rectangle, it's width, and it's length.
- The coordinate of the top-left corner and bottom-right corner of the
Rectangle
Luckily, we already have a good way of storing coordinates by using our Point class. Let's try and implement the first strategy.
The Rectangle class
class Rectangle:
	def __init__(self, corner_point, width, height):
		self.top_left_corner = corner_point
		self.width = width
		self.height = height
So how would we represent this rectangle?
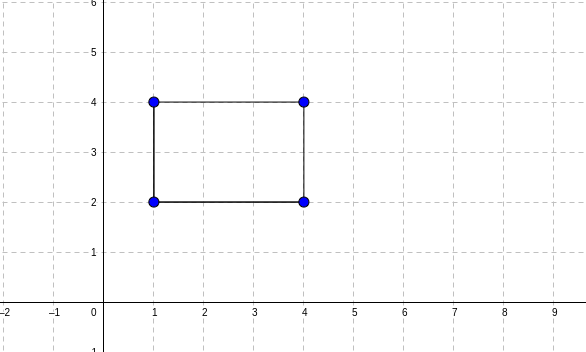
We can provide our constructor with a Point object, and two numbers for the width and height
This is an example of composition: You can use objects as attributes of other, more complex objects. This helps us leverage all the code we have writen before, as we will see in just a moment.
For example if we wanted to have a move_up method for our rectangle, we could just leverage the fact that we can move a point:
class Rectangle:
	def __init__(self, corner_point, width, height):
		self.top_left_corner = corner_point
		self.width = width
		self.height = height

	def move_up(self):
		self.top_left_corner.move_up()
So we can now move up the entire rectangle:
Notice here that the Point class has a method called move_up, and so does the Rectangle class. This is not an issue though, as Python can tell which definition to use based on the type of the object the method is called on.
When we call the move_up method on our rectangle, it will then call the move_up method of the Point class on the specific point that represents our top left corner of the rectangle.
Displaying information about classes
We've been accessing attributes of our top left corner using lines like print(my_rectangle.top_left_corner.x) What would happen if we just tried to print our top_left_corner directly?
print(my_rectangle.top_left_corner)
# outputs <__main__.Point object at 0x7f97f49937c0>
That's odd! we see that we are dealing with a Point object, which is sensiblle, but then we get this mess of characters. We will dig into what they mean next week, but for now let's focus on how to better present the data.
Turns out, this is such a common problem that python already has a solution for it. the __str__ method is a special method of a class that lets you define how to convert it to a String. This means that you can define what shows up when you print an instance of that class.
Let's define an __str__ method for the point class:
With this change, we reap the benefit not only when interacting with Point objects directly, but also when using other classes that use Point objects.
print(my_rectangle.top_left_corner) # outputs (1, 4)
Check for understanding:
How would you modify the Rectangle class so that we can print a Rectangle object directly and see meaningful information?
Solution:
It's really up to you how to describe a rectangle, as long as you can easily identify it. Your solution should be something along the lines of:
    def __str__(self):
        return f"A rectangle of width {self.width}, height {self.height}, and with a top left corner positioned at {self.top_left_corner}"
What's next?
In the next section you will find multiple practice exercises, as well as your first assignment! You will be asked to create increasingly more complex classes and methods.
Next week, we will keep working with classes and objects, unveil the mystery of the numbers that showed up when we print an object, and learn better techniques to debug our code.
Practice: OOP
Required Practice
Complete the exercises using the link below:
https://codecheck.io/assignment/2310081532dztxwg8yin41b92yweib7fzkl
When you start the exercise, you will be given a CodeCheck ID. You must save this ID and the private URL so that you can return to your work later! If you don't save the private URL (which contains the CodeCheck ID), you will have to start the exercise from the beginning. We will re-use this site throughout the term, so I recommend creating a document on your computer where you will save the private URLs for the whole term.
After you have completed the exercise, submit your CodeCheck ID to GradeScope using the following link:
/assignments/practice__oop.pdf
For submission to Anchor, please take a screen capture of each of your solutions (5 in total for this assignment) and submit them below.
Additional Practice
If you'd like more practice with classes and objects, you can try these practice resources:
Exercism:
- https://exercism.org/tracks/python/exercises/ellens-alien-game
- https://exercism.org/tracks/python/exercises/bank-account
- https://exercism.org/tracks/python/exercises/ledger
- https://exercism.org/tracks/python/exercises/custom-set
- https://exercism.org/tracks/python/exercises/complex-numbers
- https://exercism.org/tracks/python/exercises/rational-numbers
Class and Object Exercises from How to Think Like a Computer Scientist
- Class and Object questions from MIT's Python course
- Exercises from Object Oriented Programming in Python
Assignment 1: Banking Basics
In this assignment, we will create a class that models bank accounts. We will build a constructor, a custom way to display bank account information, as well as the basic operations one can do with an account: Deposit and withdraw money.
Provided Code
Clone your repo using this link: https://github.com/kiboschool/programming2-w1-bank-accounts
main.py is where you will do the work. It has an incomplete Account class where you will have to create 4 methods.
test.py is used for testing. You will not need to read it or modify it. Use python3 test.py to run the tests. At the beginning they should all fail.
Step 1: Initializing Accounts
in main.py, complete the Account class
Objects of this class must have the following two attributes:
- owner: This is a string that represents who owns the account. This should be a parameter to your constructor
- balance: This is a number that represents the amount of money in the account. This should always be zero by default
Create a constructor, i.e the __init__ method, that would enable us to create objects that fit the above description.
my_account = Account("Mehdi")
print(my_account.owner) # Shows Mehdi
print(my_account.balance) # Shows 0
Once you've convinced yourself that your code is correct. Run python3 test.py: You should pass 1/7 tests
Step 2: Displaying Account Info
Let's make it easier to see what is going on in our account. Define an __str__ method to display details of an account.
We want to be able to do the following:
print(my_account)
# Display "Mehdi's account balance is 0"
Recall that the __str__ method needs to return a string, not print it!
Once you've convinced yourself that your code is correct. Run python3 test.py: You should pass 2/7 tests
Step 3: Depositing to the account
At this point, we have stressed Mehdi enough with an empty bank account. Let's build a way to put some money in it.
Define a deposit method that takes one parameter called amount, and increases the balance by that amount.
We should be able to do the following in our code now:
print(my_account)  # Display "Mehdi's account balance is 0"
my_account.deposit(100)
print(my_account)  # Display "Mehdi's account balance is 100"
There is a catch however! if the parameter is Negative, we should just ignore the operation altogether. our deposit method is meant to only put money in our account, it should never decrease our balance. The behaviour we want is:
print(my_account)  # Display "Mehdi's account balance is 0"
my_account.deposit(-10)
print(my_account)  # Display "Mehdi's account balance is 0"
# WE IGNORE NEGATIVE INPUTS
Once you've convinced yourself that your code is correct. Run python3 test.py: You should pass 4/7 tests
Step 4: Withdrawing from the account
Unfortunately, everything that goes up must come down. Let's figure out how to withdraw money from the account.
Define a withdraw method that takes one parameter called amount, and decreases the balance by that amount. As with deposit we want to ignore negative numbers.
There is something tricky about this method though: With deposit, we happily welcome any amount. Here though, we can not withdraw money we do not have.
Therefore a withdrawal may or may not work, it will depend on how much we have in our balance. Your method needs to be able to do the following:
- If we can withdraw the provided amount: change the balance, and return True
- If we can not withdraw the provided amount: do not change the balance and return False
- If the amount provided is negative: do not change the balance and return False
We should be able to do the following in our code now:
print(my_account)  # Display "Mehdi's account balance is 0"
my_account.deposit(100)
print(my_account)  # Display "Mehdi's account balance is 100"

print(my_account.withdraw(20)) #Displays True
print(my_account)  # Display "Mehdi's account balance is 80"

# WE IGNORE NEGATIVE INPUTS
print(my_account.withdraw(-20)) #Displays False
print(my_account)  # Display "Mehdi's account balance is 80"

# We do not make withdrawals if they exceed the balance.
print(my_account.withdraw(200)) #Displays False
print(my_account)  # Display "Mehdi's account balance is 80"
Once you've convinced yourself that your code is correct. Run python3 test.py: You should pass 7/7 tests
Optional challenge: Putting it all together
The final step to having a useful bank account is being able to transfer our balance to other people's accounts.
Define a transfer method that takes two parameters: an amount, and another account that will serve as the recipient. If possible, we will withdraw the amount from the initial account, and deposit the same amount to the recipient.
This is a bit tricky, as the withdrawal may or may not work. This is why we will want this method to also return a boolean for us: True if the transfer succeeded, and False otherwise:
- If we can withdraw the provided amount: change both account's balance, and return True
- If we can not withdraw the provided amount: do not change either account's balance and return False
- If the amount provided is negative: do not change either account's balance and return False
Grading
| Criteria | Proficient | Competent | Developing |
|---|---|---|---|
| Coding Style (20%) | |||
| 1. Indentation and Formatting | Code is consistently well-indented and follows PEP 8 formatting guidelines. | Code is mostly well-indented and follows PEP 8 guidelines with minor deviations. | Code lacks consistent indentation and does not follow PEP 8 guidelines. |
| 2. Naming Conventions | Meaningful and consistent variable/function/class names following PEP 8 conventions. | Mostly meaningful names, with occasional inconsistencies. | Variable/function/class names are unclear or inconsistent. |
| 3. Comments and Documentation | Comprehensive comments and clear documentation for major functions and complex logic. | Adequate comments explaining major sections of code. | Lack of comments or insufficient documentation. |
| 4. Appropriate Use of Language Constructs | Demonstrates advanced understanding and appropriate use of Python language constructs (e.g., list comprehensions, generators). | Generally applies language constructs correctly, with occasional lapses. | Misuses or misunderstands key language constructs. |
| Persistence (50%) | |||
| 5. Completeness | Evidence that all components of the assignment were attempted. All functionality present. | Evidence that most elements of the assignment were attempted. Most functionality present. | Little evidence of completion of work. Incomplete or major functionality missing. |
| 6. Timeliness | Assignment started early (based on GitHub data). GitHub commits show steady progress. Submitted on time. | Assignment is submitted late but GitHub data demonstrates an early or reasonable start date, with significant iteration on arrival to solution (i.e., multiple commits showing progress) | Submitted late. GitHub repository data shows late start and minimal iteration. |
| 7. Use of Resources | Assignment is fully complete and provides all functionality. If assignment is not fully complete, student attended office hours (or additional help sessions) and/or asked high quality and timely questions on Discord. | Assignment is not fully complete and there is minor evidence of effort to get assistance on assignment (e.g., office hours attendance or Discord discussions). | Assignment is incomplete and no evidence of seeking assistance. |
| Correctness (30%) | |||
| 8. Test Cases | Percentage of automated test cases that pass. |
Evidence of Persistence:
In the event that you are unable to get your program fully functional, you will receive partial credit based on your evidence showing the amount of effort that went into learning the underlying concepts to complete the assignment or that you persistently sought appropriate assistance. Examples of persistence may include, but is not limited to, the following: Git commit history showing evolution of your program, attendance to office hours (Instructor or TA), asking thoughtful questions in the appropriate Discord forums, formation of study groups, completion of additional practice exercises, reading of third-party resources, etc.
To receive partial credit, you must create a file called
PERSISTENCE.mdin your GitHub repo alongside theREADME.mdfile, and include your evidence of persistence, for example, links to your Discord questions, narrative explaining dates and times of office hour sessions that you attended and what you learned, links to resources that you referenced, links to ChatGPT conversations that you initiated (focusing on concepts not just getting answers), etc. The better you can demonstrate your work on learning, the easier it will be to provide partial credit, so be thorough. Make sure that file is properly committed to your repo, and included in your Gradescope submission.
Submitting Your Assignment
- When you are done,
commitandpushyour code to your remote repository. (Note: In general, you should commit and push frequently, so that you have a backup of your work, so that there is evidence that you did your on work, and so that you can return to a previous state easily.) - Upload your submission in Gradescope via this link: https://www.gradescope.com/courses/544003/assignments/2991606
- Upload the zip archive of your assignment to Anchor below.
How does our code remember?
Let's think about this code snippet:
limit = 10
result = []
for i in range(limit):
	result.append(i)
What do you think it would produce? We will get a list of 10 elements, going from 0 to 9. This should be similar to code you've seen a lot since you started with Kibo.
What happens if I change the limit to 100? We would go from 0 to 99. What about a limit of 1000? We would go from 0 to 999
How about a limit of 1 billion? how about 1 trillion? 1 quintillion?? Logically, we know what numbers should be there, but could our computers keep track of all of that?
I strongly recommed you do not try to run this loop with a large limit. it will crash your computer!
Every variable our code keeps track of takes a tiny bit of space in memory. We need to store this data so we can use it later, manipulate it, return it as a result of a function call, and so many other things.
This week, we will introduce some high level concept of how Python handles memory, and see how it impacts our ability to code with objects. After all, an object could be anything. It could contain numbers and booleans and strings and other objects. How does Python manage all of that information?
Preview
Here is what we will be exploring this week:
- How do objects differ from built-in types like Boolean or int in how they are stored?
- How can we look into our code more deeply, and understand exactly what Python is storing in memory at any point in time?
- How can we leverage object references, and what are some issues we should avoid?
Why does this matter?
In the scope of our learning, we will rarely try to solve problems that risk us running out of memory. Nevertheless, it is important as a developer to understand that while we have a lot of resources, they are still limited. We will have other courses dedicated to these issues, but for now, we will focus on a few core concepts.
Memory and boxes
Let's consider a simple scenario. We have two variables, and we want to swap their values.
For example:
Give it a try for a few minutes before continuing with the notes.
If you tried a direct assignment, like
current_player = next_player
then it will be challenging to achieve our goal, as we have lost information. At this point in time, current_player was assigned the valu of next_player. They are both "Dipo", and we lost the information about who the current_player was.
Let's look at the solution using a new tool, Python Tutor. This tool lets us watch our code's execution step by step, and lets us see what's happening in our memory as the code runs. Click the Next button to go through your code line by line
We can see after executing the first 3 steps that we have 3 different variables - effectively 3 different places in memory that hold some information.
We store the information for who the current_player is in the temp variable. The two variables have the same value: If we were to ask Python if the two variables were equal the answer would be True
But the two variables are two separate boxes. They represent two different places in our computer's memory, they just happen to have the same data in them.
We can then carry on copying the data around and get to our objective.
Primitives vs Objects
Let's look at another example. Here we have two variables that are meant to track two different concepts (My birthday is the 11th of the month, and I have 11 players on my football team) but they just happen to have the same value. Let's see what happens when we modify one:
Step through the code step by step: Notice here that as we modify one of the variables, the other one remains unchanged. This might feel very obvious, and I agree! you'd hope that modifying one variable wouldn't have side effects on other variables.
We do have to be careful though, let's look at another example.
This examples is very similar: We have two variables that serve different purposes - in this case I have one list for the people I want to invite to my birthday party, and another list for the people who play on my team - but they share the same value.
Step through the code and observe what happens as we modify one of these variables:
Notice that after we append "Messi" to the list of players, we also end up adding him to the list of party guests! What's going on?
The visualization is what gives us a hint here: the players_on_team variable and party_guests variable both show arrows going to the same place: An object, more specifically a list.
There is only one list object in the code we shared
We however, have two variables that point to that same object, which is represented by the arrow in the visualization.
The arrow makes sense as a symbol, but behind the scenes, both our players_on_team and party_guests hold the location in memory where the object is stored. They are not the object itself, they are the address where we can find the object.
Different programmin languages and communities refer to this kind of variable in diffrent ways, they are all effectively equivalent: You can call these "arrows" an object reference, or a pointer to an object, or the address of the object
When we say:
party_guests = players_on_team
We are creating a new variable. The value of the variable is going to be the same as players_on_team. So the value will be a reference to the list players_on_team is referencing as well.
Note that we can easily avoid this issue by making sure we create two different objects: Observe how differently this code behaves:
Now when we execute the second line of code, we create a brand new list, and store a brand new reference, a brand new arrow for it. We can modify the first list without worry about affecting the second.
Understanding how objects are made
The same approach we've had before applies for our custom objects. We will look into more examples in the next section, but for now, take a moment to focus on this key concept: How are objects made?
- We will put aside some space in memory for our object.
- We will initialize our variables - basically executing the code we wrote in init
- We will return a reference to the object created.
Let's watch this in action:
- After step 1, Python recognizes that we've defined a new class
Point, and defined a method within it (__init__). Note that there are references being used here, but let's not focus on those for now. - After step 2, we are trying to construct a new object. Our code moves to executing the
__init__method. Note thatselfis a reference to a Point Instance - We've already put aside some memory for a Point. - Steps 3-5 initialize our instance variables. Our point is getting its coordinates stored in memory.
- Step 6 we can now see that we have a
new_pointvariable that is a reference to the Point object we've just seen created
Equality
Take a look at the code below, and take a guess as to what it will output:
Bear in mind when it comes to objects: Having the same value, the same content, is not the same as being the same object
By default, when we use == to compare variables that point to objects, what we are comparing is the address they contain. In the example above, basic_point == shared_reference is True because they share the same address. basic_point == same_coordinates is False because they are different points, so the addresses are different.
We will look into ways of customizing how equality is tested, but for now, let's keep learning about how objects are handled in memory
Memory and Objects
Aliasing
Consider the code:
a = Point(0, 0)
b = a
a and b refer to the same object.Any changes to a will show up in b, and vice versa. This is called aliasing. a and b are like two nicknames for the same person.
a = Point(0, 0)
b = a

print(a.x) # 0
print(b.x) # 0
a.move_right()

# both a and b were changed!
print(a.x) # 1
print(b.x) # 1
Aliasing isn't always a problem. Sometimes, you want two names for the same object, but be careful. Aliasing is a common source of bugs!
Function parameters
Aliasing will also happen when you pass an object as a parameter to a function. When you pass the object as a parameter, the object that the function operates on is the same.
def move_right_twice(point):
    point.move_right()
    point.move_right()

a = Point(0, 0)
move_right_twice(a)
print(a.x) # 2
The object a gets changed, because the point in the function is the same as a. This is usually what you want, but you need to be aware of it.
Example: Reflecting a point
Let's write a helper function that gets the reflected version of a point.
We'll reflect across the y axis, flipping the point from left to right. We need a point that is the same as the original but with the x coordinate multiplied by -1, so that points on the left are reflected to the right, and points on the right are reflected to the left.
# the code here is wrong!
def get_reflected_point(point):
    point.x *= -1
    return point
The get_reflected_point is not written correctly! The math is correct and it does return a reflected point as we wanted. But it has "side effects" - it modifies the original point. In this case, we don't want aliasing. The place that calls this function will probably not expect the original point to be changed - see what happens:
first_point = (3, 3)
reflected_point = get_reflected_point(a)

print(reflected_point.x) # shows -3, just like we want
# but it also did something we didn't want
print(first_point.x) # this also shows -3. our original was modified.
The solution is that get_reflected_point() should make a copy first, and change the copy.
Copying
This is a way to avoid aliasing.
import copy
a = Point()
b = copy.deepcopy(a)
Now a and b are completely separate instances.
So, this is a better way to write get_reflected_point:
def get_reflected_point(point):
    import copy
    copied_point = copy.deepcopy(point)
    copied_point.x *= -1
    return copied_point
This time, the program works as expected:
point = (3, 3)
reflected_point = get_reflected_point(point)

print(reflected_point.x) # shows -3, just like we want.

print(point.x) # this shows 3, our original is left intact.
Frames and Scopes
You are in Programming 2 now, and one of our key goals is to get you to be able to have conversations with other engineers and developers.
We want to go a bit deeper with the content. The visualizations we saw in the previous section have some terms that we haven't defined yet. Let's explore them and what they mean. In particular, let's talk about what a frame is: Let's consider a very simple example:
Let's click through our example step by step:
- Step 1: Shows that we store the variable
xin the global frame. - Step 2: Prints
x, unsurprisingly we see 10 in our outpt - Step 3: Defines the function
my_function. Note that this is also in the global frame, and that it's a reference. - Step 4: We call our function, so our code jumps to where it is defined
- Step 5: Notice in our visualization that you can see
my_functionin blue under the global frame. As we execute a function, we create a new frame. These are called Stack Frames - Step 6: We store a variable
yin our function's stack frame. This is important info! Not all data is stored in the same place. - Step 7: We want to print
y, and we can find its value in our function's stack frame. - Step 8: We return from the function, as its job is done. Notice that when you click to execute this step, the new stack frame we have created will be deleted
- Step 9: As we get into our final step, we want to print the value of
yagain, but take a look at our frames:yis nowhere to be found! As you click Next here, we will get an error.
Let's look at a few different examples:
Do names matter?
The way you name your variable matters for readability. Every variable is created with a purpose, and the name should reflect it.
That being said, let's look at scenarios where two different variables have the same name: The following code is exactly the same as the previous example, except this time our function defines a variable called x instead of y:
Our first few steps are the same: We have a global variable x, and a function. We ultimately call the function and it creates its own stack frame.
What happens when we execute Step 6? Well we end up with a new variable, also called x, within the function's stack frame. This variable will only exist as long as we are still inside the function. So we can say the scope of this x is the function my_function
Once we finish executing the function, that x, with value 5, completely disappears!
So when we execute the final line of code, Python looks for x and finds a variable with that name in the global frame
As a rule of thumb, Python typically looks for a variable's name by:
- looking at the current frame.
- If not found, looking at the global frame.
- If not found, raising an error.
Is the data gone forever?:
In the previous examples, we have looked at stack frames being created, variables being stored within that stack frame, then being deleted as the frame itself was deleted. Does that mean we can never get information out of a stack frame?
Well that would be the same as saying we can't get information out of a function, and we both know that's not the case. Let's look at the next example:
Here we define a simple function: take a number as an input, compute that number + 1, then return the result.
We call this function, then store its result in a global variable, before printing it.
In particular let's focus on what happens when we execute Step 2:
- Before we can create our variable in the global scope, we need to figure out what to put in it, so we need to execute and evaluate
add_one(4) - This means creating a frame for the
add_onefunction. There is already a variable defined there: Our parameter! - As we execute Step 3 and 4 we are now ready to return.
- When executing Step 5, notice that there is a new change to our Frame visualization: We put some memory aside for the return value specifically.
Now that we know exactly what the function returns we can finish defining the global_var variable, which we can easily then print.
If you had any lingering confusion about the difference between print and return, this should hopefully clarify it:
printlets you display some information to the terminal. This is meant for Human eyes!returnimmediately ends a function, and makes the value provided available to another frame. This is a tool to connect our code together
Frames on frames on frames:
So far we have only seen examples where we had the global frame then one other one. In practice, we can have many frames active at the same time. This happens when you have functions that call other functions, so in other words it happens a lot!
Before walking through this code. Take a moment and think about two things:
- Firstly, what do you expect to see printed out?
- Secondly, what do you think will happen in terms of frames?
Give it a few minutes before running the code in the tool
So what's going on here?
We define three functions, then make a call to do_math(1, 2). We need to execute this function to figure out what to print.
This immediately creates a new frame for that function. We will then try to create the result variable, but for that, we need to call two other functions. We start by calling the first one, add_one
This creates a new frame (Step 7). Within it, we create a variable called result that stores our calculation, then we return it, deleting the frame.
We are not ready to finish the do_math function yet though, we still need to call mult_two, so we create a new frame. Within it, we create a variable called result that stores our calculation, then we return it, deleting the frame.
Now we are finally able to figure out what result should be in the do_math frame. We're ready to return it to the global frame and print it.
The key takeway here is that none of those variables called result were related to each other, or ran the risk of messing with each other They were each stored within their own frame, they each had their own scope.
Definitions:
So let's formalize our takeaways from this:
A stack frame is a section of memory put aside for a function. The variables needed to execute the function, as well as its parameters, are stored within the stack frame. These are then deleted when the function returns.
The scope of a variable means the area of code where we can interact with the variable. The scope of a variable defined within a given stack frame is only that frame, so once the function is finished, we can no longer interact with the variable.
In Python, the global frame is available throughout the execution of our program. Anything defined within the global frame is therefore accessible throughout the program, and by all other frames. We say such variables have global scope
Knowledge check:
Take some time thinking through the code here before running it. How many frames do you think will exist at once as you execute this program?
It's a good habit to try and visualize it yourself, with pen and paper, before you start running pythontutor
Stop the World!
As an aside, you may be looking at some of our earlier examples and wondering how come we can see all these variables and objects and frames etc. Wouldn't this be helpful while working on assignments and projects?
It indeed would be, and that's exactly why we have access to a debugger
A debugger stops the execution of the program at a breakpoint, and you can view variables and step the code forward step by step to see how things change. Since it stops the execution of the program, it's also called 'stop the world' debugging.
Video: Breakpoints and pdb
This video gives a quick intro to the
breakpoint()function and the basics of the pdb debugger
Key points:
- add a breakpoint with
breakpoint() - Python will stop at the breakpoint when you run the program
- Basic pdb commands: help, where, print, next, step, continue, quit
For a more in-depth tutorial, see this Python debugger crash course
Debugging in the IDE
As an alternative to running pdb in the terminal, you can also run an interactive debugger from your IDE.
This video from NeuralNine explains how to use an interactive debugger from the IDE Python.
- Set a breakpoint by clicking on the sidebar
- Run the program in 'debug' mode
- The program stops at the breakpoint
- While it is stopped, you can look at the variables, evaluate expressions, or run the code forward step by step to see how the variables change after each line executes.
This can help us solve all kinds of problems. In fact, this is a good time to define the kind of problems we can run into in this video:
Types of Bugs
The video introduces terms for different kinds of bugs:
- Syntax Errors
- Runtime errors
- Logic errors
Syntax errors are (usually) easy: the program won't run at all, and it often tells you where the mistake is.
Runtime Errors are a little harder: the program runs, but crashes, and prints out a bunch of information about the error and what was happening up to that point. This means you have to recreate the bug to figure out how it happened, but 1) it's clear there is a bug and 2) you have a starting point for investigating.
Logic errors are harder still. First, it's not obvious that you have a bug at all. Next, if you only have the erroneous results of the program, you have to go find more information in order to figure out where the error is in your code.
The video also mentions some of the tools and processes of debugging. Specifically, the process is about finding information, forming hypotheses, and testing your hypotheses. That's (more or less) the scientific method!
Finding information:
The first question you should be able to answer clearly, for yourself and whoever might be helping you, is: "What is wrong?"
Are we dealing with a Syntax error? A runtime error? or a Logic error?
Where in the code is it happening? Luckily syntax and runtime errors tend to come with error messages that point at a specific line. Logic errors, however are harder to track. This is where using the debugger we introduced above is very helpful: Step through the code with the debugger, saying outloud what you expect would happen each step: Where do you find a difference between your expectation and what the code did?
Forming Hypotheses
After you've gathered information, you need to make a guess about what is going wrong. Sometimes, it's easy to come up with lots of potential ideas. Other times, it's hard to come up with any guesses at all.
If you get stuck, it's worth checking your assumptions again and gathering more data, and seeing if that helps. If you're still stuck, it's often helpful to share your bug with a friend, or take a break and come back to the bug fresh.
Testing your Hypothesis
Remember: Science is about disproving hypotheses. Not proving them! The key question is "What evidence would show that this idea is false?".
When you are debugging, you will find information about your program and how it runs. As you do, you'll come up with hypotheses for how it might be going wrong. When you do, you can't trust that you know for sure that you have correctly identified the error. You have to try to disprove that it is the error.
Testing your hypothesis usually means changing the code and running it again. It's really helpful to have a minimal reproducible example when you do. If it's easy to repeat the bug, then you can quickly check the results of your change.
Tips for experiments:
- Test only one thing at a time
- Say out loud (or write down) what your hypothesis is, and why you think your change will help you tell if your hypothesis is wrong.
- Make experiments quick and repeatable
Often, beginners will try changing random things (or nothing at all) and rerun the code to see what happens. This is not testing a hypothesis! Your changes should help you find out if your hypothesis about your code is correct.
This blog post from CS Professor John Regehr lays out a scientific approach to debugging, and is a strongly recommended read.
Practice: Python debugger
Follow these 5 mini-exercises to practice navigating code using the Python debugger:
Practice: OOP
Required Practice
Complete the exercises using the link below:
https://codecheck.io/assignment/2310122319f0cwmszh83xxjnzt515anebwy
When you start the exercise, you will be given a CodeCheck ID. You must save this ID and the private URL so that you can return to your work later! If you don't save the private URL (which contains the CodeCheck ID), you will have to start the exercise from the beginning. We will re-use this site throughout the term, so I recommend creating a document on your computer where you will save the private URLs for the whole term.
After you have completed the exercise, submit your CodeCheck ID to GradeScope using the following link:
For submission to Anchor, please take a screen capture of each of your solutions (5 in total for this assignment) and submit them below.
Additional Practice
If you'd like more practice with debugging, you can try these practice resources:
Rectangle Area Bug
Practice using pdb to debug a small function. Clone this repo and follow the steps in the Readme to solve the bug.
"Spot the error"
Sometimes, you can read some code and spot what is going wrong. Practice training your eye to spot bugs by reading these debugging exercises on dev.to.
Bug Postmortem
You'll encounter authentic bugs all the time as you build software.
Was there a bug you encountered in your last project? What caused it? How did you solve it?
A Postmortem is a process for analyzing what happened in an incident. Try writing an incident report that explains the bug. Include:
- A high-level summary of what happened
- A root cause analysis. What were the origins of failure? Why do you think this happened?
- Steps taken to diagnose, assess, and resolve. What actions were taken? Which were effective? Which were detrimental?
- A timeline of significant activity
- Learnings and next steps. What went well? What didn’t go well? How do you prevent this issue from happening again?
Debugging Mysteries
Debugging is about investigating. Finding out information, forming hypotheses, testing them, and checking what you learned. This exercise is about building up the mindset for debugging, but is not directly applicable to Python
The Debugging Mysteries are guided, interactive debugging stories. You'll debug 5 mysterious problems.
These mysteries are mostly about networking, and touch on software concepts you may not have seen yet. Still, the debugging process is the same! Find out information, form hypotheses, and test them.
Assignment 2: Jukebox
Introduction
A Jukebox is an old music player (see https://en.wikipedia.org/wiki/Jukebox). In the time before mp3 players or smartphones, bars and restaurants would have a music player that allowed minimal song selection.
In this project, we will do something different: We will provide you code! It is, however, up to you to figure out if it works well. You will have to read methods, understand what they should do, as well as what they actually do, and fix any errors you find in your way. You will have to write a little bit of code, but this assignment mostly tests your ability to read code and debug it.
Provided Code
Clone your repo using this link: https://github.com/kiboschool/programming2-w2-debugging
jukebox.py is where our JukeBox class is defined. This is where you are expected
to do your work.
test_jukebox.py is a test file. Your aim will be to make sure all the tests pass. Unfortunately, very few of them do at the moment. To help you focus, most of the tests are commented out. Each step in the assignment will ask you to bring back some of the tests.
main.py is a demo of the JukeBox class. It should run perfectly by the end of the assignment, and you can find what the output of this file should look like further down these instructions. Feel free to add some of your own code here to test the class, but changes to this file will not influence your grade.
Testing
Run the unit tests with python -m unittest or pytest.
You can inspect or run main.py to see an interactive use of the Jukebox class.
A working sample run of main.py has this output:
❯ python main.py
Paused
Playing: Kuna Kuna
Playing: Inauma
Paused
Playing: Vaida
Playing: Sasa Hivi
Playing: McMca
Playing: Dai Dai
Playing: Woman
Playing: Mbona
Playing: Toto
Playing: Kanairo dating
Playing: Wanjapi
Playing: Kuna Kuna
Playing: Kuna Kuna
Playing: Wanjapi
Playing: Kanairo dating
Playing: Toto
Playing: Mbona
Playing: Woman
Requirements
Before we get into the code, let's understand what we want the Jukebox class to do. Pay attention here, understanding this is key to you being able to complete this assignment
A Jukebox needs to keep track of the following data:
songs: This is a list of strings that represent the song titlescurrent_song: This is the index of the currently playing songis_playing: This is a Boolean that represents if the jukebox currently playing or paused.
A Jukebox should have the following methods:
play(): starts playing the Jukebox. This method should make theis_playingattributeTruepause(): pauses the Jukebox. This method should make theis_playingattributeTruenext(): goes to the next song. This modifies thecurrent_songattributeprevious(): goes to the previous song. This modifies thecurrent_songattributecurrent_state(): returns a message indicating whether the jukebox is playing or paused. If it's playing, it should also return the current song that's playing.- If paused: return
"Paused" - If playing: return
"Playing: [Song name]"with the name of the current song
- If paused: return
copy_song_list(): returns a copy of the JukeBox's song list.
When created, a JukeBox should not start playing.
The first song to play should be the first song in the list.
Our song list should loop. This means that:
- Calling the
next()method when we are on the last song should take us to the first song - Calling the
previous()method when we are on the first song should take us to the last song
Take your time reading the above, then let's get started testing and fixing the provided code
Step 1: Do we even have a jukebox?
Our first milestone is to make sure that we can create a JukeBox object.
Run the unit tests with python -m unittest or pytest. You should see that 1 test ran. The test creates a JukeBox object and checks that all its attributes were initialized correctly.
Unfortunately this test failed!.
You will be shown an error message: NameError: name 'self' is not defined
Use your intuition and the debugger to figure out what could be wrong with our JukeBox class definition.
Work on this until you see that the test passes, then move on to the next milestone.
Step 2: Playing/Pausing
In this milestone we want to make sure that we can change the state of the JukeBox object.
Open the test_jukebox.py file, and remove the comments between lines 16 and 26, then run the tests again
Run the unit tests with python -m unittest or pytest. You should see that 3 tests ran in total, with one new failure:
assert player.current_state() == "Paused"
AssertionError
When we expected our `current_state()`` to be "Paused", we got something different. Once again, investigate and debug the class to find the issue.
Work on this until you see all 3 tests passing, then move on to the next milestone.
Step 3: Please don't stop the music
In this milestone we want to make sure that we can move through our song list.
Open the test_jukebox.py file, and remove the comments between lines 21 and 41, then run the tests again. Luckily everything should pass now! This tells us that we can move to the next song, and go back to the previous song.
Note that if these new tests failed, that means you modified the next() and previous() method incorrectly, make sure they pass before moving forward.
But wait. next() and previous sound easy to handle, but remember we want our song list to loop around, so when we hit next() on the last song we go to the first. When we hit previous() on the first song we go to the last.
Remove the comments between lines 45 and 59, then run the tests again. Both new tests will fail. How can we improve the next() and previous() methods to make them pass?
Work on this until you see all 7 tests passing, then move on to the next and final milestone.
Step 4: Reference problems
We are almost there! comment out the final test, from lines 62 to 66, and run tests again. You should see it fail.
The issue with this final test is that while our copy_song_list() method returns a list that is indeed similar to the song list, it is not returning a different object. Based on what we learned this week, how can we make sure that the method returns a copy of the song list, not a reference to it?
Work on this until you see all 8 tests passing.
Grading
| Criteria | Proficient | Competent | Developing |
|---|---|---|---|
| Coding Style (20%) | |||
| 1. Indentation and Formatting | Code is consistently well-indented and follows PEP 8 formatting guidelines. | Code is mostly well-indented and follows PEP 8 guidelines with minor deviations. | Code lacks consistent indentation and does not follow PEP 8 guidelines. |
| 2. Naming Conventions | Meaningful and consistent variable/function/class names following PEP 8 conventions. | Mostly meaningful names, with occasional inconsistencies. | Variable/function/class names are unclear or inconsistent. |
| 3. Comments and Documentation | Comprehensive comments and clear documentation for major functions and complex logic. | Adequate comments explaining major sections of code. | Lack of comments or insufficient documentation. |
| 4. Appropriate Use of Language Constructs | Demonstrates advanced understanding and appropriate use of Python language constructs (e.g., list comprehensions, generators). | Generally applies language constructs correctly, with occasional lapses. | Misuses or misunderstands key language constructs. |
| Persistence (50%) | |||
| 5. Completeness | Evidence that all components of the assignment were attempted. All functionality present. | Evidence that most elements of the assignment were attempted. Most functionality present. | Little evidence of completion of work. Incomplete or major functionality missing. |
| 6. Timeliness | Assignment started early (based on GitHub data). GitHub commits show steady progress. Submitted on time. | Assignment is submitted late but GitHub data demonstrates an early or reasonable start date, with significant iteration on arrival to solution (i.e., multiple commits showing progress) | Submitted late. GitHub repository data shows late start and minimal iteration. |
| 7. Use of Resources | Assignment is fully complete and provides all functionality. If assignment is not fully complete, student attended office hours (or additional help sessions) and/or asked high quality and timely questions on Discord. | Assignment is not fully complete and there is minor evidence of effort to get assistance on assignment (e.g., office hours attendance or Discord discussions). | Assignment is incomplete and no evidence of seeking assistance. |
| Correctness (30%) | |||
| 8. Test Cases | Percentage of automated test cases that pass. |
Evidence of Persistence:
In the event that you are unable to get your program fully functional, you will receive partial credit based on your evidence showing the amount of effort that went into learning the underlying concepts to complete the assignment or that you persistently sought appropriate assistance. Examples of persistence may include, but is not limited to, the following: Git commit history showing evolution of your program, attendance to office hours (Instructor or TA), asking thoughtful questions in the appropriate Discord forums, formation of study groups, completion of additional practice exercises, reading of third-party resources, etc.
To receive partial credit, you must create a file called
PERSISTENCE.mdin your GitHub repo alongside theREADME.mdfile, and include your evidence of persistence, for example, links to your Discord questions, narrative explaining dates and times of office hour sessions that you attended and what you learned, links to resources that you referenced, links to ChatGPT conversations that you initiated (focusing on concepts not just getting answers), etc. The better you can demonstrate your work on learning, the easier it will be to provide partial credit, so be thorough. Make sure that file is properly committed to your repo, and included in your Gradescope submission.
Submitting Your Work
Your work must be submitted Anchor for degree credit and to Gradescope for grading.
For coding tasks involving Github Classroom:
- Ensure that you
commitandpushyour local code changes to your remote repository. (Note: In general, you should commit and push frequently, so that you have a backup of your work, so that there is evidence that you did your own work, and so that you can return to a previous state easily.) - Upload your submission to Gradescope via the appropriate submission link by selecting the correct GitHub repository from the drop-down list.
- Export a zip archive of your GitHub repository by visiting your repo on GitHub, clicking on the green
Codebutton, and selecting "Download Zip". - Upload the zip file of your repository to Anchor using the form below.
For cases where you answer questions on Gradescope:
- Complete the work in Gradescope by navigating tot he appropriate link.
- Export it as a pdf using th Google Chrome plugin: https://gofullpage.com/. This plugin will do multiple screen captures while scrolling through your document, and then stitch them into a pdf that you can download.
- Upload the generated pdf to Anchor using the form below.
For any work completed outside of GitHub or Gradescope:
- Take either screen captures of your work or export a pdf showing your complete work.
- Submit the materials to Gradescope via the appropriate submission link for the course.
- Upload the screen captures or pdf files to Anchor using the form below.
Note: Anchor submissions can occur at any time during the term, but it is critical that you upload all of your work to Anchor before the last day of the term. Gradescope submissions must be submitted before the deadline (or the late deadline, if applicable).
Be Lazy!
Coding is hard. We will all get better at it over time, and this week's topic will very much be about making ourselves more efficient in our coding.
Since programming 1, we have looked at scenarios where we can save ourselves time and headaches by using good coding practices. For example, imagine some banking code that relies on knowing an interest rate ratio:
new_balance = balance * 1.05

loan_interest_rate = 1.05 * 3

def is_legal_interest_rate(rate):
	return 0 < rate <= 1.05
If we wanted to update the rate from 1.05 to 1.07, we'd have to look all around our code for 1.05 and change it to the new value. And what if there was some calculation that used the number 1.05 but it had nothing to do with the interest rate? We save ourselves time and headaches by shifting the code to something like this:
interest_rate = 1.05

new_balance = balance * interest_rate

loan_interest_rate = interest_rate * 3

def is_legal_interest_rate(rate):
	return 0 < rate <= interest_rate
That way we can update many aspects of our code by modifying a single variable.
The same advantages are achieved by using functions cleverly: compare this code snippet:
# We compute the average of two numbers provided by the user
number_1 = ""
while not number_1.isnumeric():
	print("Please provide the first number")
	number_1 = input()

number_1 = int(number_1)

number_2 = ""
while not number_2.isnumeric():
	print("Please provide the second number")
	number_2 = input()

number_2 = int(number_2)

print((number_1 + number_2) / 2)
with this code snippet:
# We compute the average of two numbers provided by the user
def keep_asking_until_number(message):
	result = ""
	while not result.isnumeric()
		print(message)
		result = input()
	return int(result)

number_1 = keep_asking_until_number("Please provide the first number")
number_2 = keep_asking_until_number("Please provide the second number")

print((number_1 + number_2) / 2)
The second example is much easier to maintain over time: we have a function we can modify, and suddenly many parts of our code get new functionality, instead of us trying to look for every loop we've created in our code to get a number from our user.
So good variable usage help us be effective with our data. Good functions help us be effective with our logic.
Well. Classes are a nice combination of data and logic. How can we be efficient with using them? This week will focus on Inheritance, one of the most common strategies for being able to reuse classes effectively.
Preview
Here is what we will be exploring this week:
- How can we think about modeling real world ideas into classes?
- How can we model related things without repeating our code by using inheritance?
- How do we customize our subclasses and override the behaviour of their parent classes?
Why does this matter?
Being efficient with the code you are writing, minimizing repetition, is something all developers aspire to. OOP is a key feature of not only Python, but nearly all the other languages you will encounter in your studies and career.
Learning to be efficient with OOP code, and using Inheritance smartly, will be key to your ability to write code, read code, and collaborate with other developers.
Models
Imagine that you are creating a video game, where you are driving a car and racing against other cars.
It's a simple game like Mario Kart, where you can press Left on your keyboard to steer left, and Right on your keyboard to steer right.
There are many ways to write the code for the game. It would really make sense to have a class for Car, though, because a Car has its own data and behavior. The data could include attributes like the color, graphics files, max speed, and so on. Depending on the way you chose to write the program, you could also include the current state in the class as attributes, like the current position and current speed. This would be a good way to design the class, because there could be an instance for your car and an instance for each of the other cars you are racing against.

When you write the program, should you compute all of the details for every piece of metal and molecule in the car? Should the program simulate how the gasoline ignites, how the engine works, and how each part of the car bends and compresses as it moves?
No, this would be too much effort. And even if you did go to all of the effort to write the code for all of this, it wouldn't really make the game more fun. Adding the details wouldn't make it a better class. Writing programs takes a lot of time. The more code there is, the harder the program is to read and the probability of having bugs increases. The best programs only include the code that is necessary.
This means that writing good classes involves an extreme amount of simplification.
We call the class Car. But in the real world there are thousands of attributes, and thousands of behaviors, that we won't include in the program. The car class doesn't have a number_of_wheels attribute, or a seatbelt_clicked_in attribute, or a doors_locked attribute.
Let's think about what a car model would entail. What matters depends a lot on your goal:
- If you are building a game, then some information about how a specific car differs from another one in the game would be important.
- If you are building a platform to sell cars, then information about price, age, etc. becomes very important.
- If you are building a ride-sharing platform like Uber, then information about drivers and passengers may be very important.
In all cases, It is still OK to call the class Car, though.
When you take a concept, and only choose a few parts of it to include in your class, this is called making a model. Making a car class that only has the position and speed would be a good example of modelling a car. The car class is simple, but that is completely fine for our game, because that is all that is needed in the game. The model is a simplified (and often extremely simplified) version of a concept.
When you read about Python on other websites, you might come across other people's example classes. For example, people might show a class Animal or a class Dog. These are just highly-simplified models. A simplified model like this could still be useful in a program. Maybe this is part of a program that only needs to have a few attributes and behaviors for each animal.
A model sometimes includes attributes that are different than anything you would see in the real world. For example, a car class might have an id attribute. This is an attribute that is useful to have for the program, but doesn't really correspond with anything in the real world.
Try out your understanding: you are making a program that is a student course enrollment manager. You have a
Studentclass. Can you think of a few attributes of students that are attributes of people in the real world, but don't need to be included in the class? What attributes should be included in the model?
Commonalities between models:
Let's work on a Car class from the perspective of a ride sharing application. Our car will have a few attributes:
- A license number, which uniquely identifies the car.
- An attribute called
available, which is a boolean that tells us whether or not someone could hail the car. For now we will base this on whether or not we have space in the car. - A list of passengers, which tells us how many people are currently in the car. We'll only want to have 3 passengers at most.
Let's think about this though, imagine that our rideshare application takes off, and we suddenly realize that we have some additional use cases:
- Some people really want BIG cars, where they could put up to 6 people instead of our limit of 3.
- Some people are fine just getting on the back of a motor bike. They can only take 1 passenger.
We could create a MotorBike class that is similar to our Car class, and another BigCar class as well.
What would happen if we wanted to change our print statements for all our vehicles to say "We have now picked up the lovely Fatima" instead of just saying "Picking up Fatima"? We would have to go change that in three different methods, in three different classes, possibly in three different files. I don't know about you, but I feel too lazy to do all of that!
Luckily there is a hint here about what we really want to model. We care about Vehicles, so let's create a Vehicle class. We haven't given up on our Car and BigCar and MotorBike classes, but the next section will showcase a new trick for this kind of modeling
Inheritance Syntax:
Let's make some tweaks to our class to make it a bit more generic: We now have a Vehicle class that looks very similar to our Car class.
In our __init__ method, we've added a capacity parameter, that way a vehicle object can keep track of how many max passengers they can have.
This means that we can create Vehicles that have a capacity of 3 passengers, or 1, or 6, or 20! They will all use the same logic.
How about the types of vehicles we have? Cars and BigCars and MotorBikes? It seems like we could just add another attribute to the Vehicle class to track that, something like:
class Vehicle:
	def __init__(self, license, capacity, vehicle_type):
		self.license = license
		self.capacity = capacity
		self.available = True
		self.passengers = []
		self.vehicle_type = vehicle_type
But what happens if we want to add functionality to some types of vehicles, but not others? Say for example that we let our users order food in our apps. We're happy to let cars and bikes deliver that order, but we don't want to use bigcars for that.
def order(self):
	if self.vehicle_type == 'car' or self.vehicle_type == 'bike':
		# place the order
	else:
		# ignore the order
With every new functionality though, we'd have to ask ourselves: Does this apply to all the vehicle types we support? which ones allow it, which ones don't?
Things can get even more annoying if we introduce a new type of vehicle. Imagine if we also want to support Bikes. We'd have to go through all our methods and see if a Bike should or shouldn't be able to perform that action.
There has to be a better way! and there is. Let's talk about Inheritance
Inheritance
Inheritance is one of the pillars of Object-Oriented Programming. It enables us to create a new class that already has all the data and functionality of another class. In this case, we may want to create a Car class that inherits from the Vehicle class.
We leave our Vehicle class unchanged, but we create two new classes: Car and MotorBike.
You will notice that those class definitions are very light: No __init__, only an __str__ method we added to help us demonstrate differences between the various classes.
Here we say that Car is a subclass of Vehicle. We can also say that Car is a children class of Vehicle, or that Car extends Vehicle
Similarly, we say that Vehicle is a parent class to Car.
As you can tell however, the two objects we create for our new classes are able to add passengers and drop them off. That is because a Car object is a Vehicle object, and can do everything a Vehicle can.
This is very helpful! if we make a change to the Vehicle class, all its subclasses will be able to benefit, while we also keep our ability to customize each subclass.
Let's focus on the syntax once again:
def my_subclass(ParentClass):
	# define custom code for the subclass

	# All methods of your parent are by default methods of the subclass
Let's look into this code in Python Tutor to get a sense for what's going on in-memory. To simplify our analysis, we only look at Vehicle and Car:
After Step 1 and Step 2, we see 2 classes defined in our global frame. Note how it's clear to Python that the Car class extends the Vehicle class.
In Step 3, as we create a new Car object, you can see that we call the __init__ method of the Vehicle class. This makes sense because we did not define a specific __init__ for Car, and a Car is a Vehicle so we can rely on that constructor.
In Step 10, we want to print our object. Step 11 takes us to the __str__ method we defined for Car. If we hadn't defined this method, we would look for the __str__ method of the parent class, etc.
In Step 14, we want to use the request method. In Step 15 we see the code jump into the Vehicle class' method definitions and executing the code there!
Conclusion:
We can use inheritance to save ourselves from repeating a lot of similar code.
Inheritance is ideal in scenarios where we have many related models to implement, particularly if model_A is a kind of model_B. We can define model_B, and have model_A inherit methods and data from it.
We can customize our subclasses with their own methods, and we can also call methods from their parent classes. This also applies for grandparent classes, or great-grandparent classes! you can keep this going as much as needed.
What happens in scenarios where we don't want to inherit everything the parent class has to offer? Let's find out in the next section.
Overriding Methods
Click here to follow along on Replit! Please sign up for an account and click here to join the team if you haven't already.
Once you are in Replit, click
Shellon the right, type inpython v1.py, and press Enter to run one of the scripts.
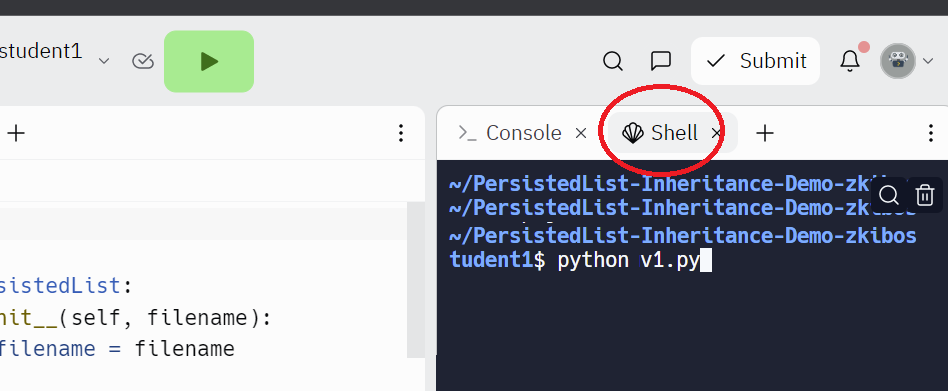
Madlibs
First, let's look at a Madlibs game.
Like the project from Programming 1, this is a game where people get asked to enter a noun or verb, and then they type in any word that come to mind. In the end, the program prints out a silly story. Try running this code in replit, and understand how it works.
We'll walk through see 6 versions of the program, from v1 to v6.
In the replit shell on the right, run python v1.py.
Practice
- Create another
templatearray to create another Madlibs template.- (The only supported word types are NOUN, VERB, and NUMBER).
- There is a fun phrase: "the quick brown fox jumps over the lazy dog". You could make a short template with this, for example replacing "jumps" with "VERB".
Making the game object-oriented
In the past, we've mostly worked with smaller classes that represented simple things.
Classes can represent larger concepts, too, though.
We can put the code that runs the Madlibs game into a class. Just like other objects, there is behavior (asking the user for words, showing the result) and internal data (the results and the game template, which in this case are just held in variables).
One benefit is that we can have two separate games going independently, just by making two objects that are instances of the MadLibsEngine class.
You can run python v2_class.py to run this version of the game.
Adding a feature
What if your friends have a hard time thinking of words to choose, and the game takes too long to get to the end?
We can add a feature to the game:
🤖 An automatic mode that picks words at random from a list - playing the game automatically.
The random module will be perfect for us - it has a useful function called random.choice that returns a random element from a list. Also, we can use random.randint(1, 100) to get a random number between 1 and 100.
We'll make a new class MadLibsEngineRandom that still has a method called get_noun, but this time gets the word from a list. We'll keep both classes around because we still want to be able to play the traditional game sometimes too.
Please run python v3_two_classes.py to run this version of the game.
Overriding
The two classes have a lot in common. The play method is the same for both of them. Repeated code isn't good in general, it takes up space and clutters up the program.
You may have anticipated what to do - we have two classes that act similarly - the solution is to use inheritance!
See the code in v4_override.py.
We can make a parent class called MadLibsEngineParent. It can have the play method there and the child classes will inherit it.
There are two child classes. One of them is the MadLibsEngineInteractive class that plays the traditional game, and one of them is the MadLibsEngineRandom class that chooses words randomly.
All three of the classes have methods with the same name (get_noun, get_verb, and get_number), but they do different actions.
-
We know that inheriting from a class will let a child class use methods from the parent class.
-
So what happens when a child class defines a method with the same name as a method on the parent class?
-
We say that the child class's method overrides the parent class method. The parent class method doesn't get called.
You can think of the method call as looking where to go, starting from the child class. If it doesn't find anything there, it will go up to the parent class and try looking there. Only if it has reached the top and not found any method with that name, then will Python raise an error.
Practice
- Add testing
MadLibsEngineParent.- Then run the game, by calling play on an instance of the child class.
- By looking for the print call you added, notice which method(s) on the parent do get called, and which method(s) do not get called because they have been overridden by a child class.
Adding bigger words
We have another feature. We'd like to use a different word list if the user wants, a word list with longer words to use for nouns. We need to make a MadLibsEngineRandomWithBigNouns class.
Inheritance works great for this, because we only need a few lines of code.
The resulting program is in v5_override_broken.py. But the program doesn't work, and it isn't really clear why. It's true that only one of the methods was overridden - but that isn't the problem, when get_verb and get_number are called they'll just use the versions in MadLibsEngineRandom.
Everything looks right, why doesn't the program work?
Calling into the parent class
It turns out that the __init__ method can be overridden.
The __init__ on MadLibsEngineRandomWithBigNouns is overriding the __init__ on MadLibsEngineRandom, so that one is never getting called!
In this case we want both the child and the parent version of the method to be called - not like the default behavior with overriding where only the child version is called.
The solution is in v6_override_fixed.py.
There's a special line of code, super().__init__(), that ends up calling __init__ on the parent class. This way both are run, like we want.
The term super class means essentially the same thing as parent class.
The program works! We now have a good demonstration of inheritance and method overriding.
Video
Please continue the video here, from 5 minutes onward, for more information about overriding.
Be careful overriding
Notice that when we override methods, we need to be careful. We want the overridden method in the child class to do conceptually the same action. It should receive the same parameters and act like the the method from the parent class. If the child class needs a method that has a different meaning, it'd be better to not override and to create a different method.
You have a class that retrieves weather forecast data from an API on the internet. You write a get_temperature() method that returns the current temperature in degrees celsius. We then find another API for weather forecast data that has different features - in addition to the wind speed and wind direction you were already getting, it will give you more precipitation information, and so you'd like to add it to your program too.
This is a good case for inheritance. The other API could be in an inherited class, because it has similar behavior. The get_wind_speed() and get_wind_direction() methods could be overridden and take data from the new source. Imagine, though, that this new API doesn't provide the current temperature, it gives the estimated daily high temperature and daily low temperature. Shouldn't you override get_temperature() and put the data there, since it's still returning a temperature?
💡No, this would not be a good idea. Bugs will appear in your program if two classes both have a method with the same name, but they aren't actually referring to the same concept.
You could instead add a new method with a name such as get_daily_high_temperature(), to show that it isn't the same type of temperature being returned.
Inherited classes are linked
You can visualize a child class as being linked to a parent class.
A class can inherit from a class that itself inherits from a different class - there can be a link to a link to a link. This is an inheritance tree.
When you call a method on an object, if the method is there, it will be run. But if it isn't there, Python will follow the link upwards to look for methods that got inherited from the parent class. It's following links, hopping from one class to another. (It is only at the end, if the method isn't there, when Python raises an error.)
A structure with links like this is sometimes called a tree or a hierarchy.
Seeing at the structure, and visualizing Python looking upwards, explains why overriding a method blocks the parent version of the method from being called. The child version is there and there's no need to look further.
Video on Inheritance
Please watch the first 5 minutes of this video. It contains detailed information about inheritance in Python.
Conclusions
-
Inheritance is the ability to define a new class that is a modified version of an existing class.
-
This relationship between classes—similar, but different—is one of the reasons to use inheritance, because otherwise the code would be duplicated. To define a new class that inherits from an existing class, you put the name of the existing class in parentheses. When a new class inherits from an existing one, the existing one is called the parent and the new class is called the child.
-
It's possible that, if used excessively, inheritance can make programs difficult to read. When a method is called, it is sometimes not clear where to find its definition. The relevant code may be spread across several files.
-
In some cases, though, you can express a child class as being a type of the base class. For example, a
Caris a type of aVehicle. For cases like this, inheritance reflects the natural structure of the concepts, which makes the design easier to understand.
Practice: Inheritance
Required Practice
Complete the exercises using the link below:
https://codecheck.io/assignment/23101915021tkeaxvkwlcg8j73pkzba8f18
When you start the exercise, you will be given a CodeCheck ID. You must save this ID and the private URL so that you can return to your work later! If you don't save the private URL (which contains the CodeCheck ID), you will have to start the exercise from the beginning. We will re-use this site throughout the term, so I recommend creating a document on your computer where you will save the private URLs for the whole term.
After you have completed the exercise, submit your CodeCheck ID to GradeScope using the following link:
/assignments/practice__inheritance.pdf
For submission to Anchor, please take a screen capture of each of your solutions (5 in total for this assignment) and submit them below.
Additional Practice
Here are some other options to gain additional practice as well:
Assignment 3: Banking Returns
In this assignment, we will expand on the work we did on Week 1, and see how we can model different types of Bank Accounts using Inheritance.
Provided Code
Clone your repo using this link: https://github.com/kiboschool/programming2-w3-inheritance-acounts
main.py is where you will do the work. You will be expected to define three different subclasses there.
test.py is used for testing. You will not need to read it or modify it. Use python3 test.py to run the tests. At the beginning they should all fail.
If all tests pass by the time you submit you will earn full marks.
account.py contains a working implementation of the account class from Week 1. You are not expected to modify this file at all.
The Account class
As a quick refresher, let's go over the class:
- An
Accountobject has two attributes: anownerwhich is a string, and abalancewhich is the amount of money stored in the account. - we have an
__str__()method, but it is not very helpful. You should ideally never see its output as you define the__str__()methods of our subclasses. - we have a
deposit()method which adds money to our balance. - we have a
withdraw()method which removes money from our balance if possible. This method returns True if the withdrawal was successful, and False otherwise. - We have a
transfer()method, which may be unfamiliar: This takes an amount and another account as a parameter - we call this account the recipient. We can thenwithdrawmoney from our account todepositit in the recipient. This should only work if it's possible for us towithdrawthe money in the first place. Make sure to study this method carefully, as you will need it later on.
Similarly to withdraw(), transfer() returns True if the transfer was successful and False otherwise.
Step 1: Checkings Account
Let's start with the simplest type of accounts, the checkings account. Create a subclass of Account called CheckingAccount and update it's __str__ method so that our output would look like this:
test_checking = CheckingAccount("Mehdi")
print(test_checking) # Display: Mehdi's Checking Account. Balance = 0
Convince yourself that CheckingAccount objects are able to handle the deposit, withdraw and transfer method.
Once you've convinced yourself that your code is correct. Run python3 test.py: You should pass 4/14 tests
Step 2: Customizing Savings Account
Savings accounts are interesting because they accrue interest. The bank will multiply your balance by a small factor called the interest rate, and add it to your account every month, or every year, depending.
Let's Create a savings account subclass of Account. It should have the following customizations:
- Its init method should also include an interest rate parameter, and it should have a new attribute for the interest rate.
- Its str method should clearly display that this is a savings account.
- It should have a new method, accrue_interest, which multiplies the balance by the interest value.
test_saving = SavingsAccount("Mehdi", 1) #1% interest rate

print(test_saving) # Display: Mehdi's Savings Account. Balance = 0

test_saving.deposit(200)
test_saving.accrue_interest() # Should increase our balance by 1%, in other words 2

print(test_saving) # Display: Mehdi's Savings Account. Balance = 202
Convince yourself that SavingsAccount objects are able to handle the deposit, withdraw and transfer method.
Once you've convinced yourself that your code is correct. Run python3 test.py: You should pass 7/14 tests
Step 3: How do banks make money if they give you money?
If bans provide us interest, how do they make money? Well there are many strategies banks use, but one tricky one is that they charge users for making transfers.
Now Checking Accounts usually get free transfers, but Savings Accounts do not, since the bank spends money on them for interest. Let's replicate this in our code.
Modify the withdraw method for the SavingsAccount class only. If we try to withdraw money from the account, or transfer it to someone else, the account's balance should be reduced by an additional 5
test_saving = SavingsAccount("Mehdi", 1) #1% interest rate

print(test_saving) # Display: Mehdi's Savings Account. Balance = 0

test_saving.deposit(100)
test_saving.withdraw(10) # This should really remove 15

print(test_saving) # Display: Mehdi's Savings Account. Balance = 85

test_saving.transfer(20, test_checking)# This should really remove 25 from test_saving
Once you've convinced yourself that your code is correct. Run python3 test.py: You should pass 9/14 tests
Step 4: LockedAccount
Another strategy banks use to make money is by holding your money for a long time. Some banks offer locked accounts: You can put money there, and it accrues interest like a savings account, but you are not allowed to take the money out for some amount of time.
Let's create a LockedAccount class. It should have the following customizations:
- Its init method should also include an interest rate parameter, and it should have a new attribute for the interest rate.
- Its str method should clearly display that this is a savings account.
- It should be able to accrue_interest, which multiplies the balance by the interest value.
- Calling
withdraw()ortransfer()on an account like this should always return False, and should not
Hint: What should the parent class of LockedAccount be? What saves you the most time?
test_locked = LockedAccount("Mehdi", 5) #5% interest rate

print(test_locked) # Display: Mehdi's Locked Account. Balance = 0

test_locked.deposit(100)

print(test_locked.withdraw(10)) # Display False
print(test_locked.transfer(20, test_checking))# Display False

test_locked.accrue(interest)

print(test_locked) # Display: Mehdi's Locked Account. Balance = 105
Once you've convinced yourself that your code is correct. Run python3 test.py: You should pass 14/14 tests at this point!
Grading
| Criteria | Proficient | Competent | Developing |
|---|---|---|---|
| Coding Style (20%) | |||
| 1. Indentation and Formatting | Code is consistently well-indented and follows PEP 8 formatting guidelines. | Code is mostly well-indented and follows PEP 8 guidelines with minor deviations. | Code lacks consistent indentation and does not follow PEP 8 guidelines. |
| 2. Naming Conventions | Meaningful and consistent variable/function/class names following PEP 8 conventions. | Mostly meaningful names, with occasional inconsistencies. | Variable/function/class names are unclear or inconsistent. |
| 3. Comments and Documentation | Comprehensive comments and clear documentation for major functions and complex logic. | Adequate comments explaining major sections of code. | Lack of comments or insufficient documentation. |
| 4. Appropriate Use of Language Constructs | Demonstrates advanced understanding and appropriate use of Python language constructs (e.g., list comprehensions, generators). | Generally applies language constructs correctly, with occasional lapses. | Misuses or misunderstands key language constructs. |
| Persistence (50%) | |||
| 5. Completeness | Evidence that all components of the assignment were attempted. All functionality present. | Evidence that most elements of the assignment were attempted. Most functionality present. | Little evidence of completion of work. Incomplete or major functionality missing. |
| 6. Timeliness | Assignment started early (based on GitHub data). GitHub commits show steady progress. Submitted on time. | Assignment is submitted late but GitHub data demonstrates an early or reasonable start date, with significant iteration on arrival to solution (i.e., multiple commits showing progress) | Submitted late. GitHub repository data shows late start and minimal iteration. |
| 7. Use of Resources | Assignment is fully complete and provides all functionality. If assignment is not fully complete, student attended office hours (or additional help sessions) and/or asked high quality and timely questions on Discord. | Assignment is not fully complete and there is minor evidence of effort to get assistance on assignment (e.g., office hours attendance or Discord discussions). | Assignment is incomplete and no evidence of seeking assistance. |
| Correctness (30%) | |||
| 8. Test Cases | Percentage of automated test cases that pass. |
Evidence of Persistence:
In the event that you are unable to get your program fully functional, you will receive partial credit based on your evidence showing the amount of effort that went into learning the underlying concepts to complete the assignment or that you persistently sought appropriate assistance. Examples of persistence may include, but is not limited to, the following: Git commit history showing evolution of your program, attendance to office hours (Instructor or TA), asking thoughtful questions in the appropriate Discord forums, formation of study groups, completion of additional practice exercises, reading of third-party resources, etc.
To receive partial credit, you must create a file called
PERSISTENCE.mdin your GitHub repo alongside theREADME.mdfile, and include your evidence of persistence, for example, links to your Discord questions, narrative explaining dates and times of office hour sessions that you attended and what you learned, links to resources that you referenced, links to ChatGPT conversations that you initiated (focusing on concepts not just getting answers), etc. The better you can demonstrate your work on learning, the easier it will be to provide partial credit, so be thorough. Make sure that file is properly committed to your repo, and included in your Gradescope submission.
Submitting Your Work
Your work must be submitted Anchor for degree credit and to Gradescope for grading.
For coding tasks involving Github Classroom:
- Ensure that you
commitandpushyour local code changes to your remote repository. (Note: In general, you should commit and push frequently, so that you have a backup of your work, so that there is evidence that you did your own work, and so that you can return to a previous state easily.) - Upload your submission to Gradescope via the appropriate submission link by selecting the correct GitHub repository from the drop-down list.
- Export a zip archive of your GitHub repository by visiting your repo on GitHub, clicking on the green
Codebutton, and selecting "Download Zip". - Upload the zip file of your repository to Anchor using the form below.
For cases where you answer questions on Gradescope:
- Complete the work in Gradescope by navigating tot he appropriate link.
- Export it as a pdf using th Google Chrome plugin: https://gofullpage.com/. This plugin will do multiple screen captures while scrolling through your document, and then stitch them into a pdf that you can download.
- Upload the generated pdf to Anchor using the form below.
For any work completed outside of GitHub or Gradescope:
- Take either screen captures of your work or export a pdf showing your complete work.
- Submit the materials to Gradescope via the appropriate submission link for the course.
- Upload the screen captures or pdf files to Anchor using the form below.
Note: Anchor submissions can occur at any time during the term, but it is critical that you upload all of your work to Anchor before the last day of the term. Gradescope submissions must be submitted before the deadline (or the late deadline, if applicable).
Data from beyond our code
This week, we stop our focus on OOP, and move on to other areas of software development. While we will still read and write OOP code, let's start talking about data.
So far, all applications we have written or seen rely on data we provided ourselves, either by defining it as a variable, or by providing user input to our program.
This week, we will learn how to grab data from two new sources: Firstly we will deal with file-related operations. Handling files is a great way of making sure your code's result can be saved for the long term!
Secondly, we will learn a technique for grabbing information from the internet directly. This really broadens the options available to us!
Preview
Here is what we will be exploring this week:
- What is the syntax for reading from and writing to files?
- How can we use this to make data from our code persist?
- How can we fetch information from the internet to use in our code?
Why does this matter?
Without file interactions, everything would have to happen immediately: If you wanted to type an essay, you could never quit the software you are using to edit it until you are done. Imagine if your machine crashes or its battery runs out? Your work would be deleted! Storing data into files that we can refer to later on is something we take for granted, and is absolutely necessary to learn.
There is a wealth of useful information and functionality available to us, often for free, on the internet. We can leverage this for personal use and professional projects.
Saving and Reading Data
Following along in the code
The next few lessons walk through the steps to build a project using files and nested data structures.
When there is a tutorial video, you can click the "Open Project" link to see the code, open it in VSCode, and follow along with the video.
You will learn much more if you type out the code along with the tutorial.
Weather forecast
Let's write a program to display the weather forecast for a city. We'll show the estimated temperature and wind speed.
For the first version of our program, the user will type in a city name, and we will show them the estimated temperature for the next 3 days.
This is the data structure we will use for the weather forecast for a city:
forecast = [
    {
        "day" : 1,
        "temperature": 23,
        "wind_speed": 1.37
    },
    {
        "day" : 2,
        "temperature": 20,
        "wind_speed": 0.25
    },
    {
        "day" : 3,
        "temperature": 21,
        "wind_speed": 0.83
    },
]
forecast is a list. Each entry is a dictionary that contains 3 keys: "day", "temperature", "wind_speed"
Our program stores the location data with GPS latitude and longitude coordinates, like 2.1° North, 5.6° West. GPS coordinates are similar to x and y coordinates on a graph, but are coordinates for a globe. Every location on the planet can be referred to by its latitude and longitude coordinates.
Software programs often use GPS coordinates like this to identity a location.
The full data structure looks like this,
all_forecasts = {
    "9.02N,7.31E" : [
        {
            "day" : 1,
            "temperature": 23,
            "wind_speed": 1.37
        },
        {
            "day" : 2,
            "temperature": 20,
            "wind_speed": 0.25
        },
        {
            "day" : 3,
            "temperature": 21,
            "wind_speed": 0.83
        }
    ],
    "1.3S,36.85E":
    [
        {
            "day" : 1,
            "temperature": 20,
            "wind_speed": 0.73
        },
        {
            "day" : 2,
            "temperature": 18,
            "wind_speed": 0.96
        },
        {
            "day" : 3,
            "temperature": 19,
            "wind_speed": 1.29
        }
    ],
    "5.63N,0.39W":
    [
        {
            "day" : 1,
            "temperature": 15,
            "wind_speed": 1.31
        },
        {
            "day" : 2,
            "temperature": 13,
            "wind_speed": 0.24
        },
        {
            "day" : 3,
            "temperature": 16,
            "wind_speed": 0.83
        }
    ]
}
all_forecast is a dictionary. It uses a GPS coordinate as a key, and a forecast, as shown previously, as its entry
Walkthrough Part 1: Showing the Forecast
This walkthrough demonstrates retrieving data from the nested structures, and displaying it.
Click Open Project to get the code and follow along in VSCode.
&color=blue)
Walkthrough Part 2: Saving the current city
This walkthrough demonstrates reading and writing json files.
Practice: Change the current city (Optional)
At the end of the program, ask the user if they would like to change the current city. If they type yes, let them type in a city, and then store that as the current city.
Syntax Summary
Opening a file is simple with the with open() syntax.
with open('path/to/your/file', mode) as f:
- mode is a string that tells python what we want to do with the file. Setting mode to
'r'means we want to read the file. - setting mode to
'w'means we want to write to the file. You should think of this as overwriting! any existing content will be removed! - seting mode to
'a'means we want to append to the file. This will add whatever you write to the end of the file. fhere is just a variable name that represents our file, we can replace thatfwith anything that would make more sense!
Reading and writing from a file is straightforward:
f.read()returns the entire content of a file.f.write("some content")will write the string "some content" to the file. If our mode waswthat would be all what the file says. If the mode was append, we would add it to the bottom of the file.
You can also read the content of the file line by line. The simplest way to do so is with the following syntax:
with open('path/to/your/file', 'r') as f:
    for line in f:
        # line will contain the first line in the first iteration of the loop, the second line in the next, etc.
Alternatively, you can use the readline() method. f.readline() returns the first line of the file the first time you call it, the second line the second time you call it, etc.
There are many more methods you can use for handling files you can read about here
Now handling json is a bit different. You could open a json file the same way as above, but in the case of json we know the data is structured, so we can get a data structure out of the file - for example a dictionary - instead of going through a list of strings!
import json
with open('my_json_file.json', 'r') as example:
    example_content = json.load(example)
Note here that we first must import the json library - this contains many useful methods beyond the ones we cover here to deal with jsons. You can read the json documentation here
Once we open the file, we can use the load method of the json library to directly turn its content into a data structure! If the json in the file represented a list, we would get a list! if it represented a dictionary, we would get a dictionary!
This also means that we should be able to directly store lists or dictionary as json files, and we can!
import json
with open('json_output.json', 'w') as example:
    example_content = json.dump(example)
Persistence
In our previous example, we deliberately saved our data at the end of the process. We can create an even smoother experience for our users in some cases. Instead of waiting for them to save, we auto-save their work for them as they do it. That way, if something were to go wrong and the program or the machine it's running on crashes, they won't use much work.
We will approach this in a bit of an abstract way: Many programs use lists right? Let's create a new class, PersistedList, which works exactly like a List, but always saves its content to a file.
Click here to follow along on Replit! Please sign up for an account and request to join the team if you haven't already.
Once you are in Replit, click
Shellon the right, type inpython main_v1.py, and press Enter to run one of the scripts.

# main_v1.py

class PersistedList:
  def __init__(self, filename):
    self.filename = filename
    self.internal_list = []

    if os.path.exists(filename):
      with open(self.filename, 'r') as f:
        file_contents = f.read()
        if file_contents:
          self.internal_list = file_contents.split('\n')

  def append(self, incoming_string):
    self.internal_list.append(incoming_string)
    with open(self.filename, 'w') as f:
      new_file_contents = '\n'.join(self.internal_list)
      f.write(new_file_contents)

  def insert(self, position, incoming_string):
    self.internal_list.insert(position, incoming_string)
    with open(self.filename, 'w') as f:
      new_file_contents = '\n'.join(self.internal_list)
      f.write(new_file_contents)
This code does work, but it's not as good as it could be.
Let's add some improvements. There is some repeated code. We can add a helper method to reduce the repetition.
We don't expect outside users of the class to need to call this persist() method. It's an internal method to help the other methods work.
# main_v2_helper.py

class PersistedList:
  def __init__(self, filename):
    self.filename = filename
    self.internal_list = []

    if os.path.exists(filename):
      with open(self.filename, 'r') as f:
        file_contents = f.read()
        if file_contents:
          self.internal_list = file_contents.split('\n')

  def persist(self):
    with open(self.filename, 'w') as f:
      new_file_contents = '\n'.join(self.internal_list)
      f.write(new_file_contents)

  def append(self, incoming_string):
    self.internal_list.append(incoming_string)
    self.persist()

  def insert(self, position, incoming_string):
    self.internal_list.insert(position, incoming_string)
    self.persist()
Our program has a big flaw: Things would be challenging if we allowed strings inside our list to contain a new line. Imagine if our list contained the string "a\nb": This would write the character 'a', then a new line, then the character 'b'. If we wanted to load this list back into code, without context for what the list was originally, we would load the list ['a', 'b'], since we said we would put each entry from the list in its own line.
We can make a new, more reliable version of the Persistedlist that saves to json, which is a good way of solving the problem: Because we can save data structures, and load json files directly into data structures, we don't usually care about formatting too much. the load and dump methods are design to take care of writing the correct things, and can handle whitespace issues like newlines within strings correctly. Storing ["a\nb"] as json, you would see:
["a\nb"]
Imagine that we still need to keep the original PersistedList around though, because there are older parts of the program that still need to use that format.
In professional software development, backwards compatibility is something to be aware of. If this is a program running on a customer's device, it can be hard to change the way data is stored on disk, even if it's not stored in the best way. This is because customers on their own devices will already have a lot of data stored in the old format.
So we only need to change the name of our existing class to make it a bit more clear what it does:
# main_v3_two_classes.py

import os
import json

class PersistedListIntoLines:
  def __init__(self, filename):
    self.filename = filename
    self.internal_list = []

    if os.path.exists(filename):
      with open(self.filename, 'r') as f:
        file_contents = f.read()
        if file_contents:
          self.internal_list = file_contents.split('\n')

  def persist(self):
    with open(self.filename, 'w') as f:
      new_file_contents = '\n'.join(self.internal_list)
      f.write(new_file_contents)

  def append(self, incoming_string):
    self.internal_list.append(incoming_string)
    self.persist()

  def insert(self, position, incoming_string):
    self.internal_list.insert(position, incoming_string)
    self.persist()
And we can create a new, very similar class that can persist lists into Json:
class PersistedListIntoJson:
  def __init__(self, filename):
    self.filename = filename
    self.internal_list = []

    if os.path.exists(filename):
      with open(self.filename, 'r') as f:
        self.internal_list = json.load(f)

  def persist(self):
    with open(self.filename, 'w') as f:
      json.dump(self.internal_list, f)

  def append(self, incoming_string):
    self.internal_list.append(incoming_string)
    self.persist()

  def insert(self, position, incoming_string):
    self.internal_list.insert(position, incoming_string)
    self.persist()
Our program is pretty long, now, and there's again repeated code. Our two classes are very similar, so perhaps we can leverage inheritance?
First we create a class that carries all the shared logic:
# main_v4_inheritance.py

import os
import json

class PersistedListGeneral:
  def append(self, incoming_string):
    self.internal_list.append(incoming_string)
    self.persist()

  def insert(self, position, incoming_string):
    self.internal_list.insert(position, incoming_string)
    self.persist()
Now we can inherit from it! The children classes only need to define the persist method
class PersistedListIntoLines(PersistedListGeneral):
  def __init__(self, filename):
    self.filename = filename
    self.internal_list = []

    if os.path.exists(filename):
      with open(self.filename, 'r') as f:
        file_contents = f.read()
        if file_contents:
          self.internal_list = file_contents.split('\n')

  def persist(self):
    with open(self.filename, 'w') as f:
      new_file_contents = '\n'.join(self.internal_list)
      f.write(new_file_contents)


class PersistedListIntoJson(PersistedListGeneral):
  def __init__(self, filename):
    self.filename = filename
    self.internal_list = []

    if os.path.exists(filename):
      with open(self.filename, 'r') as f:
        self.internal_list = json.load(f)

  def persist(self):
    with open(self.filename, 'w') as f:
      json.dump(self.internal_list, f)
Now, we no longer have the repeated code.
An instance of PersistedListIntoLines will still have the append and insert methods, because it has inherited those methods from the GenericPersistedList class.
An instance of PersistedListIntoJson will still have the append and insert methods, because it has inherited those methods from the GenericPersistedList class.Inheritance can be used for many purposes. It's often useful when there are two classes that have the same set of methods, but are in different modes and end up implementing the methods differently.
Practice
Open
main_v4_inheritance.pyin replit. (There is a link to replit at the top of this page).
- At the bottom of the file, create an instance of the
PersistedListIntoLinesclass that saves into the file "fruit.txt"- Use the
appendmethod to add the string "apples" to the list- Use the
appendmethod to add the string "bananas" to the list- (Notice that the append method works even though
PersistedListIntoLinesdoes not have that method. This is because it is using the method fromPersistedListGeneral).- Open "fruit.txt" and see the contents.
Reading data from an internet API
Let's talk about reading data from the internet.
Review: URLs and HTTP
A URL identifies a resource on the internet.
You have seen URLs often, like https://google.com. In your web browser, when
you click on the address bar at the top, you see the URL for the current page. A web
URL always starts with http:// or https://, but sometimes the browser
doesn't show that part.
To retrieve a web page, a program sends a request. Behind the scenes, your web browser is constantly sending out requests to get pages to display.
As you learned in Web Development Fundamentals, websites are built with HTML. The browser sends a request for a URL, and the server, sends back a page of HTML. The browser interprets this HTML code and shows it on the screen.
A Python script can send requests to retrieve a webpage from the internet, just
like your browser can. As you can see in the example, one library you can use to
make requests is urllib.
This code retrieves the homepage of the Kibo website, and writes it to a file:
import urllib.request
def main():
  url = 'https://en.wikipedia.org/wiki/Nigeria'
  results = urllib.request.urlopen(url)
  html_content = results.read().decode('utf-8')
  with open('output.html', 'w') as f:
    f.write(html_content)

main()
Try running this example!
It will create a file named output.html. Open output.html in your editor to
see the HTML code, or open it in your browser to see the rendered webpage.
In this situation, our Python program is acting as the "client" that sends a request to the server. The server sends the response back.
Static and Dynamic pages
Some webpages remain the same over time. Every time I get the contents of "https://en.wikipedia.org/wiki/Nigeria" I get the same HTML code back. The webpage has not changed.
Other webpages can change each time a request comes in. For example when I check my email I always go to the same URL, "https://mail.google.com/mail/u/0/#inbox". But even though each time I am going to the same URL, I will see different items on the page. The server sends back a response with different information.
Or, if I am not logged into my email account, the results will come back with an error saying "unauthorized". The same error will happen if I try to read from mail.google.com in Python. It's trickier to use Python to send requests to webpages where you need to log in; we won't cover how to do that yet.
Practice: Making Requests From Python
- Run the example code above and look at the
output.htmlfile. - Modify the example code so that it gets the Wikipedia page for the country you live in. (You can get the url from your web browser - click on the address bar at the top of your browser to see the url and copy it).
- Modify the code so that it fetches a non-existing url, and run the program. What happens?
Scraping Web Data

Let's imagine that I am growing a tomato plant in a big pot. From my experience growing plants, I know that tomato plants shouldn't be left in cold weather outside, because this can hurt the plant. I'm living in an area where the weather gets cold sometimes.
Every day I open my laptop, go to Google, and search for the weather forecast. I'll see if the forecast will get below 12 degrees celsius in the next few days and make plans to bring the plant inside if I need to.
This is a repetitive task, to open the web browser, search for the forecast, and look for the days with a temperature below a certain amount. Because I can write programs in Python, maybe there is a way I can write a program to check the weather automatically for me!
I could try using the example code earlier on this page. First, I'd find the
right url to call. This url might work:
https://weather.com/en-KE/weather/tenday/l/Nairobi+Nairobi?placeId=e1d0bb735632de2df082e02f88493ef295908714761728c5c7d5d6c76cb2f83e.
Then, I'd have my program request this url. When I get the HTML back, I'd set my
program to look through the HTML to find the temperature information I need.
Theoretically, this plan would work. After all, this is what the web browser is doing behind the scenes to get the data.
There are some problems, though.
- First, when we look at output.html, we see a bunch of junk! It's all html that is designed for a browser to draw on the screen. There is so much extra information involved, it will take us a while to write a program to filter down to what we want.
- Second, once we've written all of that filtering code, the website might make some changes and cause the filtering to not work anymore. Often, websites add a new feature or update the site, and our code will break, until we update it to make the filtering work again.
- Third, many websites don't want programs to automatically look at their data. They try to block Python from getting the website. Programs looking at their data might send many requests, which would slow down the website. Even many Google pages block programmatic access.
Finding data in html that was designed for a browser is called scraping. Since it's so annoying, programmers try to avoid having to do it whenever possible.
Using APIs
Fortunately, some servers are designed for programs connect to them, which eliminates these problems.
This is called an Application Programming Interface: an API. An organization will create a web API by setting up a server that listens for requests to particular URLs. If a program sends a request to one of these URLs, the server sends back data in response.
Many APIs send back data in JSON format, which is perfect for us!
Why this is better than scraping:
- APIs do not send html back, or anything intended to be shown by the browser. They send only the data that you need. For example, instead of sending text and graphics back, they could send just a list of numbers.
- APIs keep their output structure the same. The organization providing an API will be careful not to make changes that would cause your program to stop working. For example, if the API documentation says that the API will respond with a dictionary, it won't change a few weeks later to respond with a list instead.
- An API can monitor how often it is being called, and block anything that is requesting it too often. An API can also restrict access to only authorized users, but we won't need need to worry about that in this project.
You can type an API url into the address bar for your browser and see the results there. But you'll just see raw data, so it isn't very useful. The intention an API is for programs, not people, to see it.
Fortunately for my tomato plant project, there is a free API that any program can send requests to, that will respond with the weather forecast. I can write a program to automatically look at the weather forecast! And the data will be in json format, which we already know how to work with.
Watch the video in the next section, to see how to update the weather program we've been working on to get real weather information from the internet.
Weather API example
Watch the video below, to see how to update the weather program we've been working on to read real weather information from the internet.
Click Open Project to get the code and follow along in VSCode.
&color=blue)
Part 1: Calling the API
Part 2: Completing the Program
Practice: Data I/O
Required Practice
Complete the exercises using the link below. Note that these exercises are additional practice with loops instead of Data I/O. You are encouraged to independently practice with the additional practice items further down.
https://codecheck.io/assignment/23102524384ucfd8gqtlpyc51x8w694510n
When you start the exercise, you will be given a CodeCheck ID. You must save this ID and the private URL so that you can return to your work later! If you don't save the private URL (which contains the CodeCheck ID), you will have to start the exercise from the beginning. We will re-use this site throughout the term, so I recommend creating a document on your computer where you will save the private URLs for the whole term.
After you have completed the exercise, submit your CodeCheck ID to GradeScope using the following link:
/assignments/practice__data_i_o.pdf
For submission to Anchor, please take a screen capture of each of your solutions (5 in total for this assignment) and submit them below.
Additional Practice
For more practice with files and JSON:
- https://pynative.com/python-input-and-output-exercise/#h-exercise-9-check-file-is-empty-or-not
- https://pynative.com/python-input-and-output-exercise/#h-exercise-10-read-line-number-4-from-the-following-file
- https://pynative.com/python-json-exercise/
Assignment 4: Weather API
Provided Code
Clone your repo using this link: https://github.com/kiboschool/programming2-w4-fileio
Setup
Documentation about the API and the format of the responses is available at http://www.7timer.info/doc.php. You will need to reference this material as you complete the assignment.
Just like the videos, we will be adding to the weather API example! You should aim to complete all the following parts. But before you dive into completing the tasks below, spend some time reading the code to familiarize yourself with what is provided.
Part 1: Add a New City
Add a new city. You can usually find the coordinates for a city on the wikipedia page for a city, then look on the panel on the right side for "coordinates".
Once you have the coordinates, format them the same way that the existing
entries are written. Note that "S" or "south" is negative and "N" or "north" is
positive. Add the new city to the list in map_city_to_coords and try it.
Part 2: Wind Direction
Add a feature to the program, so that it shows the wind direction alongside the temperature. Show the wind direction in a descriptive way, for example display "from the southwest" instead of "SW" and "from the north" instead of "N".
Also, you will have to reference the API documentation in order to interpret what the values contained in the API response actually mean.
Once completed, the output displaying the weather data for a particular hour should look like the following:
The temperature is 10 and the wind is approaching at 3.4-8.0m/s (moderate) from the south
Hint: Open the api_output.json file and look for wind. Remember that a
dictionary can contain other dictionaries. It's sometimes easier to get the
data in two steps.
Part 3: Avoid Saving to File
Currently the program saves the json information to a file, and then reads the information back in from the file. This is unnecessary - isn't there a way to get the information without needing to save to a file first? Modify the program so that it doesn't save to a file.
Hints:
- Right now the
get_api_resultsfunction does not need to return anything, but you can change it so that it willreturna value at the end. - The data type returned by the
decode()method is a string. - And remember that there is a function
json.loads()that loads from a string instead of a file.
Grading
| Criteria | Proficient | Competent | Developing |
|---|---|---|---|
| Coding Style (20%) | |||
| 1. Indentation and Formatting | Code is consistently well-indented and follows PEP 8 formatting guidelines. | Code is mostly well-indented and follows PEP 8 guidelines with minor deviations. | Code lacks consistent indentation and does not follow PEP 8 guidelines. |
| 2. Naming Conventions | Meaningful and consistent variable/function/class names following PEP 8 conventions. | Mostly meaningful names, with occasional inconsistencies. | Variable/function/class names are unclear or inconsistent. |
| 3. Comments and Documentation | Comprehensive comments and clear documentation for major functions and complex logic. | Adequate comments explaining major sections of code. | Lack of comments or insufficient documentation. |
| 4. Appropriate Use of Language Constructs | Demonstrates advanced understanding and appropriate use of Python language constructs (e.g., list comprehensions, generators). | Generally applies language constructs correctly, with occasional lapses. | Misuses or misunderstands key language constructs. |
| Persistence (50%) | |||
| 5. Completeness | Evidence that all components of the assignment were attempted. All functionality present. | Evidence that most elements of the assignment were attempted. Most functionality present. | Little evidence of completion of work. Incomplete or major functionality missing. |
| 6. Timeliness | Assignment started early (based on GitHub data). GitHub commits show steady progress. Submitted on time. | Assignment is submitted late but GitHub data demonstrates an early or reasonable start date, with significant iteration on arrival to solution (i.e., multiple commits showing progress) | Submitted late. GitHub repository data shows late start and minimal iteration. |
| 7. Use of Resources | Assignment is fully complete and provides all functionality. If assignment is not fully complete, student attended office hours (or additional help sessions) and/or asked high quality and timely questions on Discord. | Assignment is not fully complete and there is minor evidence of effort to get assistance on assignment (e.g., office hours attendance or Discord discussions). | Assignment is incomplete and no evidence of seeking assistance. |
| Correctness (30%) | |||
| 8. Test Cases | Percentage of automated test cases that pass. |
Evidence of Persistence:
In the event that you are unable to get your program fully functional, you will receive partial credit based on your evidence showing the amount of effort that went into learning the underlying concepts to complete the assignment or that you persistently sought appropriate assistance. Examples of persistence may include, but is not limited to, the following: Git commit history showing evolution of your program, attendance to office hours (Instructor or TA), asking thoughtful questions in the appropriate Discord forums, formation of study groups, completion of additional practice exercises, reading of third-party resources, etc.
To receive partial credit, you must create a file called
PERSISTENCE.mdin your GitHub repo alongside theREADME.mdfile, and include your evidence of persistence, for example, links to your Discord questions, narrative explaining dates and times of office hour sessions that you attended and what you learned, links to resources that you referenced, links to ChatGPT conversations that you initiated (focusing on concepts not just getting answers), etc. The better you can demonstrate your work on learning, the easier it will be to provide partial credit, so be thorough. Make sure that file is properly committed to your repo, and included in your Gradescope submission.
Submitting Your Work
Your work must be submitted Anchor for degree credit and to Gradescope for grading.
For coding tasks involving Github Classroom:
- Ensure that you
commitandpushyour local code changes to your remote repository. (Note: In general, you should commit and push frequently, so that you have a backup of your work, so that there is evidence that you did your own work, and so that you can return to a previous state easily.) - Upload your submission to Gradescope via the appropriate submission link by selecting the correct GitHub repository from the drop-down list.
- Export a zip archive of your GitHub repository by visiting your repo on GitHub, clicking on the green
Codebutton, and selecting "Download Zip". - Upload the zip file of your repository to Anchor using the form below.
For cases where you answer questions on Gradescope:
- Complete the work in Gradescope by navigating tot he appropriate link.
- Export it as a pdf using th Google Chrome plugin: https://gofullpage.com/. This plugin will do multiple screen captures while scrolling through your document, and then stitch them into a pdf that you can download.
- Upload the generated pdf to Anchor using the form below.
For any work completed outside of GitHub or Gradescope:
- Take either screen captures of your work or export a pdf showing your complete work.
- Submit the materials to Gradescope via the appropriate submission link for the course.
- Upload the screen captures or pdf files to Anchor using the form below.
Note: Anchor submissions can occur at any time during the term, but it is critical that you upload all of your work to Anchor before the last day of the term. Gradescope submissions must be submitted before the deadline (or the late deadline, if applicable).
Reviewing What You've Learned
This week is devoted to practicing and applying what you have learned so far in both Programming 1 and Programming 2. Instead of focusing on learning new material for the week, you will devote your time to completing a larger scale project than what you have done so far this term.
Remember to start on this project early! There are multiple steps to complete, and it represents a larger portion of your final grade that prior assignments.
Midterm Project: Numeric Processor
💡 This is an individual project. You are expected to work independently.
If you get stuck, confused, or have trouble with the project, you should use a channel in Discord, or message an instructor.
Numeric Processor
For the midterm project, you will write a program that processes numbers (reading through a data file and performing computation).
Your program will send requests to an API to assist with some of the computation.
This project has a few similarities with the microprocessor simulation project in Programming 1. This time, though, you will be using classes and methods, instead of functions.
Carefully read the README.md file in the project repository for full details of the tasks to complete.

Remember..
- Read the instructions
- Plan before you code
- Debug if you aren't getting the desired output
- Attend office hours if you need additional support
- Ask for help in Discord
Grading
| Criteria | Proficient | Competent | Developing |
|---|---|---|---|
| Coding Style (20%) | |||
| 1. Indentation and Formatting | Code is consistently well-indented and follows PEP 8 formatting guidelines. | Code is mostly well-indented and follows PEP 8 guidelines with minor deviations. | Code lacks consistent indentation and does not follow PEP 8 guidelines. |
| 2. Naming Conventions | Meaningful and consistent variable/function/class names following PEP 8 conventions. | Mostly meaningful names, with occasional inconsistencies. | Variable/function/class names are unclear or inconsistent. |
| 3. Comments and Documentation | Comprehensive comments and clear documentation for major functions and complex logic. | Adequate comments explaining major sections of code. | Lack of comments or insufficient documentation. |
| 4. Appropriate Use of Language Constructs | Demonstrates advanced understanding and appropriate use of Python language constructs (e.g., list comprehensions, generators). | Generally applies language constructs correctly, with occasional lapses. | Misuses or misunderstands key language constructs. |
| Persistence (50%) | |||
| 5. Completeness | Evidence that all components of the assignment were attempted. All functionality present. | Evidence that most elements of the assignment were attempted. Most functionality present. | Little evidence of completion of work. Incomplete or major functionality missing. |
| 6. Timeliness | Assignment started early (based on GitHub data). GitHub commits show steady progress. Submitted on time. | Assignment is submitted late but GitHub data demonstrates an early or reasonable start date, with significant iteration on arrival to solution (i.e., multiple commits showing progress) | Submitted late. GitHub repository data shows late start and minimal iteration. |
| 7. Use of Resources | Assignment is fully complete and provides all functionality. If assignment is not fully complete, student attended office hours (or additional help sessions) and/or asked high quality and timely questions on Discord. | Assignment is not fully complete and there is minor evidence of effort to get assistance on assignment (e.g., office hours attendance or Discord discussions). | Assignment is incomplete and no evidence of seeking assistance. |
| Correctness (30%) | |||
| 8. Test Cases | Percentage of automated test cases that pass. |
Evidence of Persistence:
In the event that you are unable to get your program fully functional, you will receive partial credit based on your evidence showing the amount of effort that went into learning the underlying concepts to complete the assignment or that you persistently sought appropriate assistance. Examples of persistence may include, but is not limited to, the following: Git commit history showing evolution of your program, attendance to office hours (Instructor or TA), asking thoughtful questions in the appropriate Discord forums, formation of study groups, completion of additional practice exercises, reading of third-party resources, etc.
To receive partial credit, you must create a file called
PERSISTENCE.mdin your GitHub repo alongside theREADME.mdfile, and include your evidence of persistence, for example, links to your Discord questions, narrative explaining dates and times of office hour sessions that you attended and what you learned, links to resources that you referenced, links to ChatGPT conversations that you initiated (focusing on concepts not just getting answers), etc. The better you can demonstrate your work on learning, the easier it will be to provide partial credit, so be thorough. Make sure that file is properly committed to your repo, and included in your Gradescope submission.
Submitting Your Work
Your work must be submitted Anchor for degree credit and to Gradescope for grading.
For coding tasks involving Github Classroom:
- Ensure that you
commitandpushyour local code changes to your remote repository. (Note: In general, you should commit and push frequently, so that you have a backup of your work, so that there is evidence that you did your own work, and so that you can return to a previous state easily.) - Upload your submission to Gradescope via the appropriate submission link by selecting the correct GitHub repository from the drop-down list.
- Export a zip archive of your GitHub repository by visiting your repo on GitHub, clicking on the green
Codebutton, and selecting "Download Zip". - Upload the zip file of your repository to Anchor using the form below.
For cases where you answer questions on Gradescope:
- Complete the work in Gradescope by navigating tot he appropriate link.
- Export it as a pdf using th Google Chrome plugin: https://gofullpage.com/. This plugin will do multiple screen captures while scrolling through your document, and then stitch them into a pdf that you can download.
- Upload the generated pdf to Anchor using the form below.
For any work completed outside of GitHub or Gradescope:
- Take either screen captures of your work or export a pdf showing your complete work.
- Submit the materials to Gradescope via the appropriate submission link for the course.
- Upload the screen captures or pdf files to Anchor using the form below.
Note: Anchor submissions can occur at any time during the term, but it is critical that you upload all of your work to Anchor before the last day of the term. Gradescope submissions must be submitted before the deadline (or the late deadline, if applicable).
Organizing Data
This week, we will revisit some familiar data structures: Lists and Dictionaries, as well as introduce two other Data Structures: Sets and Tuples.
Let's be clear about what a Data Structure is before we move forward:
- A data structure is a data organizations, storage, and management format that is usually chosen for efficient access to data.
When should we use a specific data structure over another? well it helps to really understand the problem at hand. You may have already built an intuition for when to use a list or a dictionary, so we will add a few additional tools to your belt with sets and tuples.
Python provides many data structures for us to use, and we will learn in future courses how to build our own. This week we will revisit old known structures and introduce new ones. These are:
This is also an important week to get used to the official python documentation. Each of the links above provides useful information about data structures, and was created by the community that creates and maintains Python!. The link above lists all the methods of the classes. As you think about tackling a specific challenge with a list or a set, you should get into the habit of consulting the documentation to see if there is a solution to that problem already, or at least something that would make your life easier.
We will also look at some advanced tips and tricks with lists and dictionary, so you get more effective at using them, and can read Python code written by others more reliably.
For example, consider this problem: Create a list of all the multiples of 3 that are not also multiples of 4 and are less than 100
Well what if I told you we could achieve the same result in one concise line of code? Try the following yourself:
result = [ number for number in range(100) if number % 3 == 0 and number % 4 != 0 ]
This should yield the exact same result!
The above is an example of what we call Syntactic Sugar - a complicated phrase, but the main thing to remember about it is that it is sweet! examples of syntactic sugar in a language are shortcuts, ways to do a very common operation faster, with fewer lines of code. We will cover a lot of these features of Python this week, alongside new tricks for you to learn.
Preview:
Here is what we will be exploring this week:
- How can we efficiently create lists and dictionary using comprehension syntax?
- How can we recognize what simple data structure is best for a given problem?
- How can we use tuples, sets, counters, and default dictionaries in Python?
Why does this matter?
Next term, we will have a whole class dedicated to data structures. Understanding what data structure to use to tackle the problem you are facing can save you a lot of time and headaches. Being aware of the basic data structures already provided by Python is key to your growth as a developer, and will allow us to tackle more complex problems over the next few weeks!
List Refresher
Let's start with lists, the very first data structure we studied. We know we can instantiate a list like this:
empty_list = []
list_of_numbers = [1,2,3]
We know we can add things to a list using append:
empty_list.append("Hello") # empty_list is now ["Hello"]
list_of_numbers.append(1) # list_of_numbers is now [1,2,3,1]
Indexing:
We know we can use indeces to access and modify data within a list. The index of the first element is 0
list_of_numbers[3] = 4 #list_of_numbers is now [1,2,3,4]
We also know that we should be careful with this index, as it can not be equal or higher than the length of the list:
empty_list[127] = "Would this work?" #This would trigger an IndexError
Interestingly though, indeces are allowed to be negative! That is absolutely not intuitive, but you'll wrap your head around it:
An index of -1 represents the final element of the list. This is convenient as it's easier to type list[-1] instead of list[len(list)-1]if you know you want to interact with the last element of the list.
Similarly, an index of -2 represents the element before last, -3 the element before that, etc. This is our first example of Syntactic Sugar!
So to summarize consider the example below:
alphabet = [ 'a', 'b', 'c', 'd', 'e', 'f', 'g' ]
## Indeces    0 ,  1 ,  2 ,  3 ,  4 ,  5 ,  6
#also valid: -7 , -6 , -5 , -4 , -3 , -2 , -1
Manipulating Lists:
Sometimes we want to extract only some elements from a list. For example, let's build a function that takes a list, and returns a new list that contains all the same content as the input list, except the first and last element.
Think about creating this function -which we will call chop - for a few minutes before checking out the implementation below:
In our function here we use the pop method. (we know it's a method because we see the pattern list.pop(), and we know that a list is an object.)
some_list.pop()removes and returns the last element from a listsome_list.pop(i)removes and returns the element at indexifrom the list, or raise an error ifiis not a good index
Now in our example above, we didn't quite care for the value returned, we just needed to delete the first and last element from a copy of the input list.
Let's pause for a moment: you may or may not know about the pop method, but what can we do with lists really? Remember that you have access to the official python documentation!
Splicing
Now turns out, creating a list that is a smaller version of an existing list is such a common problem that python gives us some nice syntactic sugar again. Check out this new version of the chomp method:
Now this syntax will look weird, but it really saves us some time. To take a sublist from a list you can follow this pattern:
sublist = original_list[start_index:end_index]
Do note that the start_index is included, and that the end_index is excluded.
There is even a third parameter that lets you do more interesting sublists:
As you can probably tell from the example, our third parameter lets us skip some elements. Generally, the rule is:
sublist = original_list[start_index : end_index : step]

sublist = [original_list[start_index], original_list[start_index + step], original_list[start_index + 2*step], original_list[start_index + 3*step]....]
# This will stop whenever we reach or exceed end_index
List comprehension
Splicing is very handy, and a lot of problems can be quickly resolved using it, but we wouldn't have been able to use it to solve problems where we want to base our logic on something more complex than just where the data is in the list. Sometimes we want to modify all the values in a copy of a list or filter the data. This is where List Comprehension comes into play.
The idea with List Comprehensionis that you can describe the values in the list, and let python process the list for you. Let's look at the most basic example: using list comprehension to copy a list
celsius_temperatures = [12.5, 18.7, 20.9, 28.3]
copy_list = [ temperature for temperature in celsius_temperatures ]
copy_list is defined using list comprehension: The square brackets [] tell python we are making a list. The elements of the list are defined by an internal for loop: for each element in celsius_temperatures, put that element in copy_list. I named that element temperature as that makes sense, but this would've worked the same if we said: copy_list = [ temp for temp in celsius_temperatures ] or copy_list = [ element for element in celsius_temperatures ] or any other name for the variable.
This syntactic sugar is not very sweet though, we could copy the list faster using the deepcopy() method we learned about in week 2. Things get more interesting when we get to manipulate the data. Instead of just copying the list, let's make a list of farenheit temperatures. The formula to convert is that farenheit = celsius * (9/5) + 32. We could build a loop to do this, but list comprehension is easier to read and implement. Take a look:
This brings us back to our initial challenge: Finding all the positive numbers that are multiples of 3, but not multiples of 4, and are less than 100. We can imagine a for loop that lets us create such a list. If we can put it in a for loop, we can probably put it in list comprehension format!
The general pattern for list comprehension therefore is:
list_comprehension = [ some expression with element for element in input_list if some conditions are true ]
The expression can be as simple as leaving the element as is, you can call functions with it as an input etc. The if statement can be skipped if you do not need filtering.
An important aside: Comparing lists and objects.
If you are really paying attention, then some of our last examples should leave you scratching your heads. In the last two examples we created two different lists, then compared them and found a result of True.
Now if you recall week 2, we said that comparing objects means comparing their references. Regardless of the value of the object, if the references are pointing to two different objects in memory then they are different. Lists are objects, so how come we could compare two different lists and still get True?
The answer lies deep. When we compare two objects, there is a specific method that gets called. The method is name __eq__. This is similar to how the __str__ method gets called when we print an object.
By default, __eq__ compares the references of two objects to see if they are the same. Thanks to inheritance and what we know of object oriented programming, this is something we can override. Look at these two examples with the simple Point class we had made way back in week 1:
In this first example, you can see that despite having similar instance variables, our two point objects are not seen as the same. Let's now override the __eq__ method and see:
We get to define for ourselves if the objects are the same!
You may be wondering: Well how can I tell what happens when I compare two objects if it's all based on whether or not __eq__ is implemented? The only true answer to this question is to read the documentation!
Tuple definition
Tuples are an odd cousin of lists, but with a crucial difference: tuple objects are immutable! This means that once you create a Tuple, you can not change it, expand it, shrink it, replace items within it, etc.
Why would we want a data structure like that? we will explore that later in the notes, but first let's get used to the basic Tuple syntax
Tuples Syntax:
You can instantiate a tuple the same way you'd instantiate a list, except we use parentheses () instead of the list's square brackets []:
my_tuple = (1, 2, 3)
At this point we can access our data as with a list using indexing. Note that we are back to using square brackets now!
print(my_tuple[0]) ### prints 1
Note however that we can't assign a new value to that index:
my_tuple[0] = 7
### Raises a TypeError: 'tuple' object does not support item assignment
### In other words, you can't assign to a tuple after it's been instantiated.
There is also no append for tuples. The size of a tuple can not be changed once we create it. Our example tuple has three elements, and will always have the same three elements.
We however can still use some other convenient functionality similar to lists:
We can loop over the elements of a tuple using for loops:
for element in my_tuple:
	print(element) # prints 1, then 2, then 3
We can check for the length of a tuple using len:
print(len(my_tuple))
And we can mix and match various types within the tuple:
scorecard = ('Mathematics', 80, True, "Solid Effort!")
Now on this last point, we can do the same with a list. Python does not stop us from appending elements of any type in a list. The community however tends to prefer to keep lists of the same type as much as possible. If you find yourself needing a few elements of various types stored together in a variable, then a tuple may come in handy.
This is a matter of style, of preference, so don't hold on to it too strongly. That being said, let's dig into why tuples matter.
Unpacking
One of the most common use cases for using tuples is scenarios where you want to return more than one value from a function. For example, let's say we build a program for a quizz. We could have a function that provides us both a question and its answer, that way the rest of our program would both know what question to show a learner, as well as how to validate their answer.
A tuple is a good structure to use to return both data at once - An object may be overkill, while trying to use two different functions that each return one of the values would make our code messy. Read through the following example to see how you can seamlessly use such functions in your code:
You can assign a tuple of size two to two variables at once. By default, the first variable will get the entry at index 0, and the next variable the entry at index 1.
Variable unpacking only works when the number of variables on the left side of the = sign is exactly equal to the length of the collection on the right, otherwise you will encounter an error.
Note that this works with many collections: Lists, Tuples, Sets, etc. We mention it here as it is a very common pattern to see with tuples in particular.
Why does immutability matter?
Our first motivation in covering tuples is making sure you can read as much python code as possible. Beyond that, let's think as to why we would ever want an immutable data structure? Why would we ever choose to lose the flexibility of a list? after all a list's value can keep changing! and the list can keep growing as long as we need it to!
These two observations are exactly why, in some specific cases, tuples end up being a better choice:
Sometimes we don't need data structures to grow:
Think about what we discovered on week 3: Every variable, every piece of data we use takes some space in memory.
With a tuple having a limited size, we know exactly how much space it will take in memory, and most importantly, we know that will never change. There is no work for us to do to manage this tuple after it's been created.
In contrast, a List can grow to any arbitrary size. This is useful, but bear this in mind in general: if it's useful, you are paying for it somehow: In practice, it means that it would take some work - we would have to execute some code - to grow our List: What's the element we are putting in? where in memory do we put it? do we even have space for that?
This means that in specific scenarios where your code would:
- Need to keep track of a large amount of collections.
- Not care about modifying them.
You would get a much better performance using tuples, meaning your code would be likely to run faster, and use less memory.
Now at our stage of learning, we will not run into situations like that yet, but it's important to build up the intuition for it. This is also likely one of the reasons you'll see tuples used in code.
Sometimes we don't want values to change:
If you want to communicate to a fellow engineer that some values are critical for your code to works and therefore should not be modified, then it is good to use an immutable value. If they try to directly modify the collection you provided them the code would error out.
There is something very powerful about immutable data as well that we will explore in the next section.
Set definition
You should be very familiar with the idea behind sets from the mathematical thinking course. We will take this section to focus on how to bring all those concepts together in Python code. But first, a refresher: A set is a collection of unique elements. Similarly to lists, a set can grow to arbitrary sizes.
set objects can be set up very similarly to lists, we just use curly braces {} instead of square brackets [].
vowels = {'a', 'e', 'i', 'o', 'u'}
We can also loop over sets using for loops:
for vowel in vowels:
	print(vowel)
but we can't access an element using a specific index. vowels[0] returns an error
As we've just learned this week, we can also use set comprehension in a very similar way to list comprehension - simply swap the square brackets for curly braces. For example, here is a quick way to find all the unique characters in a word or sentence:
unique_letters = {character for characters in 'anticonstitutionally' if character not in 'abc'}
We can add and remove individual elements as well, by using the add() and remove() methods:
vowels.add('y')
print(vowels) # shows {'a', 'e', 'i', 'o', 'u', 'y'}

vowels.remove('y')
print(vowels) # shows {'a', 'e', 'i', 'o', 'u'}
Note that adding the same element a second and third time does nothing really: A Set only contains unique elements:
vowels.add('y')
print(vowels) # shows {'a', 'e', 'i', 'o', 'u', 'y'}

vowels.add('y')
print(vowels) # still shows {'a', 'e', 'i', 'o', 'u', 'y'}
Removing an element that does not exist in the set will raise a KeyError - this is very similar to trying to use the wrong key in a dictionary!
vowels.remove('x')
# Raises KeyError!
Set operations
Let's get into set operations, as we have seen them in mathematical thinking! the provided set class would not be complete if it could not perform unions, substractions, and intersections! Let's look at an example that covers all three of these operations
We also very commonly use sets to check if some data belongs to the set or not. We use the in keyword for that test, as shown in this example:
Set to List and List to Set
Sometimes we have to work with functions and libraries that use data structures that are not ideal for what we are trying to build. For example you may receive lists as an output of a function, then realize that what you really want to do is find the intersection of all those lists. Let's look at a scenario where we are forced to have lists as an input and output
Life would be so much easier if we had sets instead of lists! Well life can be that easy: We can quickly convert between data structures using their constructors. Let's consider this example:
We get the exact same result, and we still stick to our constraint in terms of the input and output. Our code became more concise and clear: Turn the inputs into sets, take the intersection of the sets, turn that into a list!
This is possible thanks to the list() and set() methods, which take a different collection as an input, and convert it into a list and a set respectively.
As you can imagine, there is also a tuple() method if you ever need to turn a list or set into a tuple, but that's a rarer usecase.
What can we put in a Set?
Let's consider a simple example: Imagine we are writing software to help retail stores track their expenses. We build up a big list of data throughout the day, keeping track of items sold and how much they were sold for. We want to turn that list into a set.
Run the code above to see that everything runs as expected: We turned the list of tuples into a set of tuples, which means we no longer see two entries for ('T-shirt', 45)
Now let's look at a slightly different example. Read through this code carefully, and before running it think of what changed in comparison with the previous example. Then run it and see what the output is:
In the first example, we are building a set of tuples, and it works.
In the second example, we are building a set of lists, and it does not work. We get the error message TypeError: unhashable type: 'list'
Let's try to make sense of this situation. Here is what we know:
- Lists and Tuples are different. The main difference is that tuples are immutable
- We briefly spoke about hashing in the mathematical thinking course: It's a process to turn some data into a numerical value.
We will cover this in more depth in our data structure course, but for now the takeaway is that sets use hashes to be efficient at what they do. Hashing some data depends on its value, so we can't hash data that can always change! Imagine for a second that we could allow lists inside a set:
test_set = {[1,1], [1,2], [1,3]}

new_list = [1,4]
test_set.add(new_list)
So far so good right? we have 3 different lists within the set, then we add a new, fourth list that is different from them. Bear in mind though that in this scenario, we still have a reference to our new_list in the new_list variable. This means we can do the following:
new_list[1] = 2
# We have just made new_list equal to [1,2]
# This is one of the lists that are already in our set?
How should we handle this? does that mean that our set now has duplicate elements? if so then it's no longer a set!!
Should we raise an error instead, saying we can't change this list because it's in a set? That would be a lot of information to keep track off at all times!
This is a simplified explanation for why sets can only store data that is immutable. The same idea applies for the keys of a dictionary, which we will study in more depth in the next section.
Dictionary Refresher
We are familiar with dictionaries already, but let's refresh the basic syntax and learn some new tricks with them.
First of all, what is the purpose of a dictionary? whereas a list collects entries that are related to each other. A dictionary is really about relationships: This is a mapping from some data to some other data. A dictionary consists of a set of keys - the term set here matters: Keys can't be repeated - and a variable that relates to each key
Looping over dictionaries
Let's consider a simple example of a dictionary capital_cities where we keep track of countries and their capital cities. Our keys will be strings for the country name, and the value will be a string representing the capital city.
We can identify the keys of the dictionary by using the capital_cities.keys() method. Note that looping over the dictionary's keys and looping over the dictionary itself are equivalent:
We can also access the values stored in a dictionary by using capital_cities.values(), which we can also loop through:
It's important to be able to access the keys and the values when needed, but really dictionaries are about relationships, so how can we show both the key and the value easily?
We can always try to access the data in the dictionary since it's easy to find the keys, but there is also a handy shortcut:
the capital_cities.items() method returns a list of tuples. Each tuple contains a key and value pair, which we can unpack!
Dictionary comprehension:
Similarly to lists and sets, we can use dictionary comprehension to quickly create dictionaries. Let's use that to "reverse" our capital_cities dictionary: We want the capitals to be the key now, and the country to be the city. We could do this via a loop, building up an empty dictionary in the process, but it's a lot faster and easier to read to use comprehension:
Note that dictionary comprehension looks similar to set comprehension, in both cases we use curly braces {} to indicate the collection we are building. The main difference is that in dictionary comprehension we will always care about two values and how they connect. We'd need to see a : character to represent the mapping. In the example above, we set the capital as the key because it is to the left of the :, and country becomes the value since it is to the right.
We can process the data as well if need be. Say that in our application we want all names of countries and capitals to be lowercase:
capitals = {'Morocco': 'Rabat', 'Senegal': 'Dakar', 'Nigeria': 'Abuja'}
lowercase_dict = {coutry.lower():capital.lower() for country,capital in capitals.items()}
print(lowercase_dict) # {'morocco': 'rabat', 'senegal': 'dakar', 'nigeria': 'abuja'}
We also don't have to start from a dictionary as the source of our data. We can start from lists or sets or anything else we can loop through:
squares = {number:number*number for number in range(4, 12)}
print(squares) # {4: 16, 5: 25, 6: 36, 7: 49, 8: 64, 9: 81, 10: 100, 11: 121}
Finally, we can also include if statements if need be. Take a moment and read through this example as it is a bit more complex: We have a large dictionary mapping countries to their capitals. We also have sets to indicate what country belongs to what continent. We want to use this information to create a dictionary of only African countries and capitals:
Avoiding Key Errors:
Similarly to lists who break when the index is larger or equal to the length of the list, dictionaries will also raise a KeyError when you try to access a key that does not exist. Consider this example:
Take a few minutes and convince yourself that we can access the data in our dictionary. I also want you to intentionally break this code! how can you trigger an error?
If we want to shield ourselves from such errors, we have a few options:
Option 1: Check first, then index:
In this example, we check if the user provided input is a key first, and only if it's a valid key do we use it to index.
Option 2: Use the Get method:
the get method is very convenient! It takes two parameters:
- The first parameter is the key you want to use.
- The second parameter is a default value. If we don't find the key, we will just return this default value. Note that this is an optional parameter, if you don't provide it, the method will return
None
We will see a new, more generic way of handling errors, but for now let's keep going with our dictionary study.
DefaultDict:
A similar issue we often run into involves dictionaries that connect a key to a collection. Consider the following dictionary:
continent_to_countries = {'Africa': ['Ghana', 'South Africa', 'Ethiopia'], 'Asia': ['South Korea', 'Singapore', 'Mongolia']}
How would we add "Ivory Coast" to our dictionary? well we know we want to add it to the entry for 'Africa', so we'd need code that:
- Finds the list associated with the key 'Africa'
- Appends "Ivory Coast" to that list
continent_to_countries['Africa'].append("Ivory Coast")
What about adding "Brazil" to our dictionary? Brazil is a country in South America, but We don't have "South America" as a key yet, so there is no list for us to append to yet. Could we perhaps use the get method we saw earlier to do this? let's try:
We are not getting an error, but let's analyze this line:
continent_to_countries.get('South America', []).append("Brazil")
We use the get method to look up the String "South America" in the dictionary's keys without triggering an error.
As we don't find it, we return the default value, an empty list.
We then append "Brazil" to that list, but we never put the list in the dictionary!!
We have to be more cautious: Let's look at a new example
Now we check first! if we can't find our new continent, then we create a new entry for it, with a new list, containing our new country input.This pattern is very common whenever you are dealing with a mapping from a value to a collection. So common in fact that we have a subclass of dictionaries that specializes in handling these kind of scenarios. It is called defaultdict: A dictionary that has a default value for its keys.
Counting
One of the most common use cases for dictionaries is counting. The keys represent some repeating data, and the value becomes the count of it. Let's look at an example: Say we are voting for a class representative. We receive a list of everyone's votes, and we would like to create a dictionary that tells us how many votes each candidates got. Let's think about a moment how we can approach this:
- We will need a dictionary mapping a person to a number indicating how many votes that person received.
- We can go trough our list of votes. For each name we see we can do one of two things: ** If it's the first time we see the name, add it to the dictionary with a value of 1 ** If it's already in the dictionary, we can increase its value by 1.
Let's see it in action:
Now this is quite a bit of code. This is also such a common use case that we have a specialized type of dictionary just for this in our collections library: The Counter class. Let's see how easy it makes this whole process:
Practice: Collections
Required Practice
Complete the exercises using the link below.
https://codecheck.io/assignment/231107215241cnac2tbstesp5liavwcjunm
When you start the exercise, you will be given a CodeCheck ID. You must save this ID and the private URL so that you can return to your work later! If you don't save the private URL (which contains the CodeCheck ID), you will have to start the exercise from the beginning. We will re-use this site throughout the term, so I recommend creating a document on your computer where you will save the private URLs for the whole term.
After you have completed the exercise, submit your CodeCheck ID to GradeScope using the following link:
/assignments/practice__collections.pdf
For submission to Anchor, please take a screen capture of each of your solutions (5 in total for this assignment) and submit them below.
Additional Practice
If you'd like more practice with collections consider the following:
Assignment 5: Picky Eaters
Provided Code
Clone your repo using this link: https://github.com/kiboschool/programming2-w6-preference-analysis
For this week's assignment, we will manipulate collections to answer some questions about the food tastes of a group of people. We asked them what their preferred meals were, and stored all that information in a dictionary.
The preferences dictionary maps a string representing a person's name, to a set of strings, representing the three meals they like the most.
preferences = {
  "Mehdi": {"Lasagna", "Tagine", "Steak"},
  "Tolu": {"Pepper Soup", "Noodles", "Lasagna"},
  "Stephen": {"Butter Chicken", "Salad", "Noodles"}
}
We are curious to know who amongst all our users has the most "unique" taste. Let's think about how to define that:
- For each meal, we will compute how many times that meal shows up in our dictionary
- For each user, we will then attribute a "score" based on how often each of their meals showed up across
- We will then look for the user(s) with the lowest score, meaning their meals showed up the least often throughout our dataset
In order to achieve this we will build three functions using our knowledge of collections and data structures
Step 1: Meal Counting
There is already a nice hint in the title of this step! Let's think about using a Counter object.
Recall that a Counter object is a special kind of dictionary, which works very well for counting objects. Counters can take all kinds of inputs:
- Strings, so the counter will count the characters in the string.
- Lists, so the counter will count the elements in the list.
- Sets, so the counter will count the elements in the set.
For example:
from collections import Counter

letters = Counter('Africa')
print(letters)
# {'a': 2, 'f': 1, 'r': 1, 'i': 1, 'c': 1}

letters.update({'a', 's', 'i'})
print(letters)
# {'a': 3, 'f': 1, 'r': 1, 'i': 2, 'c': 1, 's': 1}
# Note how the counter changed: 's' became a new entry, while 'a' and 'i' were incremented.
Armed with this knowledge, and using the update method above, complete the create_meal_frequencies method. Looping through all the preferences in the provided dictionary, create and return a counter that counts how often each meal appears.
For example, given
preferences = {
	"Mehdi": {"Lasagna", "Tagine", "Steak"},
	"Tolu": {"Pepper Soup", "Noodles", "Lasagna"},
	"Stephen": {"Butter Chicken", "Salad", "Noodles"}
}
We want to see:
print(create_meal_frequencies(preferences))

>> {'Lasagna': 2, 'Noodles': 2, 'Tagine': 1, 'Steal': 1, 'Pepper Soup': 1, 'Butter Chicken': 1, 'Salad': 1}
Once completed, run test.py: test_meal_frequencies should pass.
Step 2: Creating User Scores
We want to be able to score each of our participants based on the frequencies. For example, Mehdi's score should be 4, because "Lasagna" has a frequency of 2, "Tagine" has a frequency of 1, and "Steak" has a frequency of 1. Their sum adds up to 4.
We can compute the score for Mehdi easily by looping through all the meals in his set of preferences, looking up each meal in our frequency dictionary
You need to repeat this process for all the users!
preferences = {
	"Mehdi": {"Lasagna", "Tagine", "Steak"},
	"Tolu": {"Pepper Soup", "Noodles", "Lasagna"},
	"Stephen": {"Butter Chicken", "Salad", "Noodles"}
}

frequencies = create_meal_frequencies(preferences)

user_scores = create_user_scores(preferences, frequencies)

print(user_scores)
>> {"Mehdi": 4, "Tolu": 5, "Stephen": 4}
Once completed, run test.py: test_score_users should now be passing.
Step 3: Finding the Most Unique Preferences
We are getting close to wrapping this up! We now have a dictionary with scores, so all we want is to extract the users that have the lowest scores. We can do this in two steps.
First, how do we find the lowest score? Well the min() method of the Math library gives us the smallest element of a collection. The collection we care about here is the list of all values from the users_score dictionary For example,
print(user_scores)
>> {"Mehdi": 4, "Tolu": 5, "Stephen": 4}

print(min(user_scores))
>> 4
Now that we know the smallest number, let's find all the users that have that number as their value! You should be able to do this with a loop and a condition, or with list comprehensions.
find_users_with_lowest_score(user_score)
>> ["Mehdi", "Stephen"]
Note that order doesn't matter here, but you need to make sure to return all the users that share the lowest score.
Once completed, run test.py: all tests should now be passing, translating into full marks!
Grading
| Criteria | Proficient | Competent | Developing |
|---|---|---|---|
| Coding Style (20%) | |||
| 1. Indentation and Formatting | Code is consistently well-indented and follows PEP 8 formatting guidelines. | Code is mostly well-indented and follows PEP 8 guidelines with minor deviations. | Code lacks consistent indentation and does not follow PEP 8 guidelines. |
| 2. Naming Conventions | Meaningful and consistent variable/function/class names following PEP 8 conventions. | Mostly meaningful names, with occasional inconsistencies. | Variable/function/class names are unclear or inconsistent. |
| 3. Comments and Documentation | Comprehensive comments and clear documentation for major functions and complex logic. | Adequate comments explaining major sections of code. | Lack of comments or insufficient documentation. |
| 4. Appropriate Use of Language Constructs | Demonstrates advanced understanding and appropriate use of Python language constructs (e.g., list comprehensions, generators). | Generally applies language constructs correctly, with occasional lapses. | Misuses or misunderstands key language constructs. |
| Persistence (50%) | |||
| 5. Completeness | Evidence that all components of the assignment were attempted. All functionality present. | Evidence that most elements of the assignment were attempted. Most functionality present. | Little evidence of completion of work. Incomplete or major functionality missing. |
| 6. Timeliness | Assignment started early (based on GitHub data). GitHub commits show steady progress. Submitted on time. | Assignment is submitted late but GitHub data demonstrates an early or reasonable start date, with significant iteration on arrival to solution (i.e., multiple commits showing progress) | Submitted late. GitHub repository data shows late start and minimal iteration. |
| 7. Use of Resources | Assignment is fully complete and provides all functionality. If assignment is not fully complete, student attended office hours (or additional help sessions) and/or asked high quality and timely questions on Discord. | Assignment is not fully complete and there is minor evidence of effort to get assistance on assignment (e.g., office hours attendance or Discord discussions). | Assignment is incomplete and no evidence of seeking assistance. |
| Correctness (30%) | |||
| 8. Test Cases | Percentage of automated test cases that pass. |
Evidence of Persistence:
In the event that you are unable to get your program fully functional, you will receive partial credit based on your evidence showing the amount of effort that went into learning the underlying concepts to complete the assignment or that you persistently sought appropriate assistance. Examples of persistence may include, but is not limited to, the following: Git commit history showing evolution of your program, attendance to office hours (Instructor or TA), asking thoughtful questions in the appropriate Discord forums, formation of study groups, completion of additional practice exercises, reading of third-party resources, etc.
To receive partial credit, you must create a file called
PERSISTENCE.mdin your GitHub repo alongside theREADME.mdfile, and include your evidence of persistence, for example, links to your Discord questions, narrative explaining dates and times of office hour sessions that you attended and what you learned, links to resources that you referenced, links to ChatGPT conversations that you initiated (focusing on concepts not just getting answers), etc. The better you can demonstrate your work on learning, the easier it will be to provide partial credit, so be thorough. Make sure that file is properly committed to your repo, and included in your Gradescope submission.
Submitting Your Work
Your work must be submitted Anchor for degree credit and to Gradescope for grading.
For coding tasks involving Github Classroom:
- Ensure that you
commitandpushyour local code changes to your remote repository. (Note: In general, you should commit and push frequently, so that you have a backup of your work, so that there is evidence that you did your own work, and so that you can return to a previous state easily.) - Upload your submission to Gradescope via the appropriate submission link by selecting the correct GitHub repository from the drop-down list.
- Export a zip archive of your GitHub repository by visiting your repo on GitHub, clicking on the green
Codebutton, and selecting "Download Zip". - Upload the zip file of your repository to Anchor using the form below.
For cases where you answer questions on Gradescope:
- Complete the work in Gradescope by navigating tot he appropriate link.
- Export it as a pdf using th Google Chrome plugin: https://gofullpage.com/. This plugin will do multiple screen captures while scrolling through your document, and then stitch them into a pdf that you can download.
- Upload the generated pdf to Anchor using the form below.
For any work completed outside of GitHub or Gradescope:
- Take either screen captures of your work or export a pdf showing your complete work.
- Submit the materials to Gradescope via the appropriate submission link for the course.
- Upload the screen captures or pdf files to Anchor using the form below.
Note: Anchor submissions can occur at any time during the term, but it is critical that you upload all of your work to Anchor before the last day of the term. Gradescope submissions must be submitted before the deadline (or the late deadline, if applicable).
ERROR! ERROR! ERROR!
We are nearing the end of the course, and we have read, analyzed, and written quite a bit of code so far. This week we will deal with errors and exceptions in our code in a couple new ways:
First of all, we will talk about the Exception class itself, and see how to
handle errors in code as well as create our own custom errors! Why would we want
to do that? we will explore it more in the content, but this ultimately has to
do with communication: The same way Python teaches you how to use its syntax
and tools safely (for example, don't divide by 0. Don't try to index into a
location where we have no data), you can convey that same information to users
of the code you create.
We will then get proactive with our code: In week 2 we spoke about debugging - a reactive way to deal with runtime errors or logical bugs - this week we will focus on automated testing. You've been using automated tests ever since programming 1! That is the code that you ran to check your assignments before submitting them. Turns out writing code that confirms that another piece of code works correctly is very, very valuable. So valuable in fact that for on average, for every hour of coding, a professional developer expects an extra half an hour testing that code. [1]. We will learn the mindsets and tools needed to be able to write our own test moving forward.
Preview
Here is what we will be exploring this week:
- How can we prevent exceptions from triggering in our code?
- How can we create custom exceptions to handle our specific logic?
- How do we define a unit test? What are other kinds of testing?
- How can we use the unittest framework to write unit tests?
Why does this matter?
Getting more familiar with exceptions: How they are made, handled, and raised, is important for a new developer as it is a way we communicate our ideas in code. If something raises an exception, then it is serious!
Similarly, testing is a key part of professional development and you will inevitably spend hours testing your code in the future. This is time to learn the fundamentals.
[1]: A. N. Meyer, E. T. Barr, C. Bird and T. Zimmermann, "Today Was a Good Day: The Daily Life of Software Developers," in IEEE Transactions on Software Engineering, vol. 47, no. 5, pp. 863-880, 1 May 2021, doi: 10.1109/TSE.2019.2904957.
Exceptions
Despite it's title, this section is not about writing bad code, quite the opposite! Throughout our experience as programmers, we will run into plenty of Runtime Errors. Time to understand a bit more about them: How do they work, how do we handle them, and how do we customize them?
Behind the scenes: Runtime Exceptions
When Python runs into a problem, it follows these steps:
- Python encounters a problem, like dividing by 0
- Python creates a new
Exceptionobject, which stores:- an attribute with the file name
- an attribute with the line that was being run
- a string with a message
- Python stops the program completely
- Python shows the error type, for example
DivideByZeroError. - Python shows the information from the Exception object
This type of object, which stores information about an error that occurred, is called an exception object.
This sequence of events is known as raising an exception.
So once again, we run into a practical example of Object Oriented Programming. The exception object already has data and methods to help us deal with a bad situation:
- The file name and line number help us pinpoint where the exception comes from.
- The name of the error and the message that comes with it hopefully help us understand why the error occurred.
As frustrating as seeing many lines of red text is, think of the alternative: What would we do if our program just crashed, without any kind of information? Being able to work with these exceptions is powerful. Let's get more acquainted with them:
Try it: Investigation
Write a program that uses a variable that does not exist. What error type is shown?
Write a program that causes another type of error of your choice: Just do something you expect to break. What's the type of the exception object you've encountered? What message is provided? Does it seem helpful?
Handling errors
You are writing a program that divides candy into pieces. Your program asks "how much candy?" and "how many people?" Test the program: If you provide 10 candies and 5 people the result should be 2
What happens however if the user inputs "seven" or "twenty two" instead of numbers?
Even if the users know to type in numbers, what if they provide a negative number? what if they provide 0 as the number of people?
- In the first scenario, we will get a
ValueErroras we are trying to convert arbitrary strings to integers. - In the second scenario, we will get an negative result, but no error.
- In the final scenario, we will get a
ZeroDivisionErrorError.
The second scenario may lead to logical errors, but it is not immediately halting our program. There may be other things we want to do within our programs: data to store, other questions to ask, APIs to call. None of those would happen in the first and third scenario as exceptions immediately halt the program
What if we don't want to do that? well we can handle an exception. The way
python approaches this is by using the keywords try and except. The video
below is a solid introduction to the new syntax you should watch:
So bringing the ideas from the video, here is how we can improve our code to handle the errors we saw before:
Behind the scenes: Exception handling
As you saw in the video above, if there is a try and an except, there will
still be a runtime error. The program will stop, but it will jump to the
except block instead of stopping entirely.
Here's what Python does behind the scenes:
- Python encounters a problem, like dividing by 0
- Python creates a new Exception object, which stores:
- an attribute with the file name
- an attribute with line that was being run
- a string with a message
- IF IT WAS INSIDE OF A
tryblock:- Jump to the
exceptblock and keep running the program.
- Jump to the
- OTHERWISE:
- Python stops your program completely
- Python shows the error type, for example
DivideByZeroError. - Python shows the information from the Exception object.
We call this handling the exception: We know it could happen, but we won't let our program stop because of it.
It is a matter of debate, and experience, whether or not an exception should be
handled though. You should not always default to using try except
whenever you run into an exception.
Handling these two exceptions, we have made our program more resilient: It will not randomly crash when a user gives a bad input, but it's up to us to make sure that the experience remains good and useful - perhaps we can put our function in a loop that keeps asking until we get good input?
Some programs really want to be resilient: If you are writing software for planes, or for banking systems, or medical applications, crashing the program could be terrible! if you can think of a scenario where an exception would occur, you better handle it!
There are other scenarios though where we may want to be strict: If an exception would occur, let the program crash, because that is better than the alternative: Imagine for example that our program is supposed to save our work in a file, and opens that file whenever we run the program. If we find the file is missing, we should freak out! Let's raise an exception! nothing can move forward if we don't have that key file.
Creating Exceptions
Now how about if we wanted to make our candy program more strict. How do we treat the scenario where someone puts a negative number with the same level of seriousness as the other two scenarios? Python is perfectly fine with it, we can convert '-2' to an integer, and divide negative and positive numbers.
Let's create a new exception that we want to trigger whenever someone inputs a negative number as an input. Our goal is to:
- Interrupt the program whenever we realize the user gave us a negative number as input.
- Point out where the issue occurs.
- Show a helpful message - let's say a
NegativeInputErrorwith instructions on how we do not want negative inputs.
Many of these behaviors are similar to other exceptions we have seen. We know these exceptions are objects that belong to a class...let's try to inherit from them!
The Exception class is straightforward. its __init__ method takes a single
parameter: A message to be displayed. Let's use that information to create a new
child of Exception:
Here we create a NegativeInputError class that inherits from Exception.
NegativeInputError takes a value in its __init__ method, uses it to create a
message that it provides to its parent's __init__ method, and done. Try
running the code and providing a negative input.
Nothing happened! this is part of the catch with creating your own exceptions:
You have to decide when they should be raised. We do that using the raise
keyword
Note that we add two if statements to check our input. If any of the inputs is
negative, we raise NegativeInputError(input_value), which triggers an
exception in the code: If we raised with the first input, we never ask for the
second, the program ends right then and there.
Recap:
Exceptionis a class that you can inherit from to create your own custom exceptions and error messages.- Built in classes for exceptions also inherit from
Exception, you can read more about them here - You can trigger your new exceptions by using the
raisekeyword - You can make your program more resilient to exceptions by using
try,except, andfinally:tryincludes the code that could trigger an exception.exceptif an exception happens within atryblock, the code inexceptwill run- if provided, the code in a
finallyblock will always run, whether or not an exception was handled.
exceptcan also be customized to handle only a specific kind of error by usingexcept ExceptionClass
Testing your code
We've written code and submitted many assignments over the last few months. Hopefully, this means you've spent quite a bit of time thinking through whether or not your code was correct, and testing it. In this section, we will try to formalize some thinking about how to effectively test our code.
What to look out for
First and foremost, testing really benefits from organizing your code in functions. If all the functions work correctly, it's likely that our program overall will work fine (but it's not guaranteed! testers are pessimistic by nature!)
Start by making sure your code is as organized as possible. Testing a function that has exactly one goal, returns one value, is much easier than testing functions that do multiple things. Once you have your code sorted into multiple functions, let's consider how we will test each one.
Start with functions that do not call any of your other functions, then once they are tested and you trust that they work fine, start testing functions that combine them together.
The same logic applies for methods if you are working on an OOP project. Let's focus on what to test:
Confirm the obvious results
Make sure that the function handles the ideal scenario. If you give it correct input, does it give you correct output? If we don't have this achieved then that should be our main focus: Making sure the function does its job.
For example consider:
def reverse(input_list):
    ### This function should return a new list that
    ### reverses the content of the input list.
    ### The first element of the output list is the last element of the input list, etc.
What's an example of a test to confirm that the obvious result is correct?
You'll probably want to set up a small list, say [1,2,3], then pass it to the
function. When you print the result, you want to see [3,2,1]
Does seeing that result make the function correct? well take a look at the following implementation:
def reverse(input_list):
    return [3, 2, 1]
Technically, this function passes the test above, but is it correctly
reversing? no! it always returns [3, 2, 1] no matter what.
The lesson here is that you often want to test more than one scenario, so let's look into how we to find other scenarios
Think about branches
If your code includes multiple branches, you should have tests that you know will go through all of them.
For example consider this function:
### Returns "beginner league" if the user's age is between 10 and 14, and if the user has an authorization from their parent
### Returns "junior league" if the user's age is between 15 and 18, regardless of authorization
### Returns "Not Allowed" in all other scenarios
def check_if_eligible_for_entry(age, has_authorization):
    if 10 <= age <= 14 and has_authorization:
        return "Beginner League"
    elif 15 <= age <= 18:
        return "Junior League"
    else:
        return "Not Allowed"
We want to make sure to set up tests that explore each branch of the if
statement above. Testing check_if_eligible_for_entry(11, True) should trigger
the first return.
Testing check_if_eligible_for_entry(16, True) and
check_if_eligible_for_entry(17, False) should trigger the second return.
Testing with an age under 10, an age over 18, and with age between 10 and 14 without authorization, should all trigger the else statement. This fairly simple function already lead us to think about 5 different test cases if we want to be thorough.
Think of it like playing hide and seek with potential bugs. If we are playing hide and seek in your house. You will want to check every room looking for me. If you just decide to never check the kitchen, you'd be making it a lot more likely to lose the game!
The same idea applies: We want to write tests that visit as much of our code as possible. As many methods and functions, and as many branches as possible.
Think about exceptions
Another way we just learned we can create a branch in the way our code runs is
with try and except statements. This means that we should check what happens
with input that does not trigger exceptions, as well as what happens with input
that triggers them, because that's what gets us to actually run the code we
defined in except
Similarly, if you build custom exceptions, you want to make sure that your program raises them in scenarios when they should be.
Think about types
Take a moment and think about the type of the inputs you provide to your function. What type do you want your input to be? What happens if it is not? You hopefully already caught a lot of that in the previous section thinking about exceptions.
More interestingly, think very hard about the type you want to see...are there any broad categories of it? any weird exceptions?
When thinking about numbers for example, we have negatives and positives. Does it matter for your function? if so it's worth testing both! We have whole numbers and fractions, do they matter? Zero is a very special case, and would break division, does that matter?
Similarly for lists: What if the input list to our function is empty? do things still work well?
What is unit testing?
If you look at all the previous sections we covered, clearly we have a lot to think about! If we wanted to manually test our code each time we've worked on it for a while we would have to:
- document all our test cases somewhere.
- set up a test by running our program, or starting the console and importing a specific function to run it.
- do it over and over again going through all these scenarios
- document whenever a test fails or gives us incorrect output.
- this means we need to already know with 100% confidence what the output to each test should be given our changed code.
I don't know about you but that seems like way too much work. We can get the benefits of thorough testing without all these headaches by setting up Automated Unit Tests for our project. We will explore the automation in the next section, but for now let's define Unit Tests:
A Unit Test is a function that checks if another function correctly performs a
specific task. Unit tests are what we would use to explore all the concerns
we've been reading about so far. Before we jump into it though, let's introduce
some new Python syntax that will be helpful here:
assert True

assert False
assert is a Python keyword that except a Boolean after it. If you assert a
True statement, nothing happens!
However if you try to assert a False statement, an exception will be raised!
Optionally, you can provide a second parameter that contains a message that can be displayed when the assertion fails:
Now, how can we put what we learned together. Let's build some unit tests for
the check_if_eligible_for_entry function
Take your time and read through each of the functions we created: Each one aims to test a specific scenario.
Now make a small change to the check_if_eligible_for_entry function: Imagine
as we were working, we didn't notice a typo, and instead of typing 18 as the age
limit we typed 189!
Make the change and run your code, you should see an error.
This is the beauty of unit testing: This is not about making sure your code is correct now. This is about making sure your code is correct forever. As you keep working on the project, making small changes to functions as new problem pop up, it's easy to sometimes take a step back, and introduce a bug or lose some functionality that worked well before.
Unit tests help your future self, and collaborators on your project, build confidence that you will not go backwards!, and this is very, very valuable in the business world.
Now you may be thinking that you are still far from that business world, and that is true. We still recommend you think carefully about unit tests, and put effort into writing tests for you code, as it is a great way to push yourself to really understand every function you work on.
That being said, our example tests were a bit tedious to write, and that approach doesn't fit well into a project, so let's look at a better way to write Unit Tests!
The Unittest Framework
As mentioned, testing is important, so you can imagine that the hundreds of thousands of python developers have been writing tests for years now. This means that we, as a community, have a sense for how tests should be run:
- We need to make assertions and know where they fail and where they succeed.
- We want to test a lot of logic at once, so even if something fails we shouldn't stop the test.
- We want to not have to write a ton of code.
- We want the tests to run fast
And many other notions. Usually, when the community starts getting strong opinions about how things should be done, members of the community will create a framework: A library or modules that implement their opinion. unittest is the most common testing framework for Python. There are others, that behave slightly differently, but let's just focus on this one for now.
Unittest in practice
Watch this video to see how to use the unittest framework in Python:
Frameworks
You have noticed that when we have a test file, we have used the unittest
module. Why didn't we just write some functions with asserts, and call them at
the bottom of the file?
A few reasons why it is helpful to use a testing framework like unittest:
- Shows a console UI when running the tests, with a count of passes and failures.
- Useful methods like
self.assertEqual. This is similar to theassertkeyword, but if the values are not equal, the values are shown to the console as part of the error message, saving you time.- For example, your test might say
self.assertEqual(result, '4') - The error message will say something like
expected '4' but got '5'.instead of justAssertionError. - This makes it quicker to debug/discover the problem.
- Sometimes the bug is a real bug in the program, and sometimes it is simply a bug in the test.
- For example, your test might say
- Because
unittestis a common framework, other programs connect to it. For example, there are VSCode extensions that make it convenient to work withunittesttests.
Test classes
It might seem confusing to need to create a class that inherits from
unittest.TestCase. Why did we have to write class TestMultiply(unittest.TestCase)?
We're mostly just using a class to organize all of the tests into one structure. We don't really have a need to create instances of the class or really use object-oriented features. One benefit of the class structure is that if your test needs helper methods, they can be part of the structure of the class instead of being floating as functions outside (which is less organized, especially if you have one test file with several test classes).
Also, if you add methods called setUp or tearDown to the class, setUp will
run before each test, and tearDown will run after each test. Behind the
scenes, these are overriding methods on the base unittest.TestCase class.
One good way to organize test classes is to create one test class for each corresponding class in your source code. And then for each method on your real class, create several test methods in the test class to cover the different scenarios for that method.
A hidden benefit to writing tests
If you write tests only a long time after developing your program, it might be
tricky to add tests. Your program might have classes and methods that perform
many actions, and so one method might need 5 or more tests to cover what it
does. You also might need to write extensive setUp and tearDown helpers,
because some classes expect complex state to be present.
As a program grows over time, it is natural for your program to begin to depend on the precise interaction between multiple classes. This is called coupling, and it can be fragile because adding future changes can cause the program to stop working in hard-to-debug ways.
But if you are writing tests around the same time as developing the program, writing the tests can influence the way you write the program code too. The tests might influence you to write shorter methods that do fewer actions. And the tests might influence you to have smaller classes that are more focused on one part of the program. These traits are beneficial to making a flexible program that can be changed and repurposed in the future, which is an important benefit for professional software.
Because unit tests focus on just one method of one class, it helps you avoid coupling because it encourages you to write classes that can work more independently.
You are still learning as a programmer, so don't worry if you don't yet feel how writing tests can help in this way. It's just something to keep in mind: in larger scale projects, a hidden benefit to writing tests is that they help organize your program structure.
Testing continued
Important concepts in unit testing
Test Driven Development
Some developers strongly believe in the value of unit testing to the extent that a new way of coding has emerged a few years ago: Test Driven Development. The idea behind TDD is to write the tests first, then the actual code.
You should set yourself up with a series of failed tests, then aim to make them all pass. While this technique is often debated and polarizing (Some devs swear by it, others really dislike it), it's a good approach to adopt early in your career as it pushes you to think about your logic very early on as you set up the tests.
Test Coverage
Many unit testing frameworks track a metric called test coverage: This is the percentage of lines of code in your program that were executed by your tests. You will likely encounter projects and individuals that boast of 90% or 95% test coverage, meaning they have very thorough testing.
While higher coverage values are better than lower ones, recall that the presence of tests does not imply the absence of bugs: Because our functions could receive such a wide range of possible inputs, having tested a line of code once with one sample input is not enough to guarantee that there is no bug there. As projects grow bigger and more complex it's impossible to fully trust your tests.
It is however still worth tracking code coverage, as projects with low coverage-- or god forbid none at all! -- should be treated very carefully, and with a deliberate focus on testing the parts of the code that are untested.
This is often seen as the bare minimum for your work to be included in a serious professional and/or open source project: If you do not show a high test coverage, other developers will not trust your contribution.
Mocking
As we've seen in the previous video, unit tests focus on isolating small portions of the code to focus on. All the examples we've seen so far have involved simple, self contained functions, but every now and then our code will interact with another system. This can be an api call or a connection to a database to name a few examples. How can we then test such a function?
Well one approach is to run it as it is, but this runs the risk of our unit tests failing because the system has a problem, not because our own code is incorrect.
Another approach is to use mocking. This is a technique to "swap out" an object or a class for a fake version we can use for testing. This is a fairly complex topic, and you will not be assessed on it in this course, but we will rely on it in future courses. You can check out the video below for a hands on demo on how to use mocking with the unit test framework.
Note that the video starts on the mocking focused part of the tutorial, but it is overall a good resource for using unittest
Other kinds of testing
While unit tests are extremely common, they are not the only types of tests we write. Two other tests are notable and you should be aware of them, though we won't write them until future classes.
Integration tests
While unit tests want to mock other systems to focus on simple, isolated logic, it's important for us to trust that the whole system works well together. It's great that our code works well if we mock a call to an external API, but what would happen if the API actually broke?
What would happen if the developers responsible for the API changed the format of it?
Integration tests aim to test the system altogether, with all its parts talking to each other. They tend to be more complex to write and think about, but are arguably even better than unit tests in telling you if your program does the right thing.
Performance tests
In some scenarios, we really care about the performance of our code, not only its correctness
Perhaps we are working on a very time sensitive scenario, and our code must execute faster than some target time.
Maybe we are dealing with extremely large amounts of data, and our code must run fine even if we throw Gigabytes at it.
In situations like this, it is important to have tests that assert that after making some changes, our code remains as fast, or even gets faster! Similarly, we care about our code handling memory well enough even after changes in scenarios where we are dealing with huge data.
Testing as a professional focus
While some amount of testing is expected of any professional developer, it is a focus area for many companies who hire dedicated developers focusing on testing and QA. If you enjoy the process of breaking down the logic of a function and testing it thoroughly, then this path could be one to explore. Check out this video for more context on this kind of work.
What's next
Next week will be our final week of new content! we will carry on where we left off with a focus on professional concepts and methods to apply in your coding moving forward.
Practice: Exceptions and Testing
Required Practice
Complete the exercises using the link below.
https://codecheck.io/assignment/23111422363sxun8e3pdh568v81zmmliey1
When you start the exercise, you will be given a CodeCheck ID. You must save this ID and the private URL so that you can return to your work later! If you don't save the private URL (which contains the CodeCheck ID), you will have to start the exercise from the beginning. We will re-use this site throughout the term, so I recommend creating a document on your computer where you will save the private URLs for the whole term.
After you have completed the exercise, submit your CodeCheck ID to GradeScope using the following link:
For submission to Anchor, please take a screen capture of each of your solutions (5 in total for this assignment) and submit them below.
Additional Practice
Pagination Testing
Imagine a "pagination" function that takes a list as a parameter. The goal is to take a long list and split it into pages of length 5 or less. The result is a list of lists that all need to be less than 5 items. For example, if the input is [1, 2, 3, 4, 5, 6, 7], the output would be [[1, 2, 3, 4, 5], [6, 7]].
This type of function would be used, for example, if a search engine gave you 90 results, and you needed to display them to the user one page at a time.
- What test cases would you write to test this function?
- Make a list of at least 3 test cases you would write if you were to write unit tests for this function.
Testing Show Weather From API
Recall our "show-weather-from-api" program that we worked on earlier in the course. You can see the source code at the link here.
Right now, the show_weather_to_user function is not as easily testable because it prints the result instead of returning it as a string.
Making the program more testable
- Modify
show_weather_to_userso that it returns a string instead of usingprint.- This can be done while still leaving the program looking the same. Just take any place that calls
show_weather_to_userand add aprintat that point instead, that will print the return value fromshow_weather_to_user.
- This can be done while still leaving the program looking the same. Just take any place that calls
Writing test cases
- Make a list of at least 3 test cases you would write if you were to write unit tests for this function.
Creating a test (optional challenge)
- Create a file named
program.pyon your computer, - Copy the
show_weather_to_userfunction into that file, - Create a file in the same folder named
test_show_weather_from_api.py, - Add test methods that call the
show_weather_to_userfunction. For example,
import unittest
import program

class TestShowWeatherFromApi(unittest.TestCase):
  def test_when_hour_number_is_24(self):
     fake_weather_data_list = ...
     result = program.show_weather_to_user(fake_weather_data_list)
     assert result == ...
Assignment 6: Testing
Clone your repo using this link: https://github.com/kiboschool/programming2-w7-store-order-processor
In this project, you will write tests that check if a program is working correctly.
There are two parts of the project. First, you will explore the code for the Order Processor. Then, you will write a set of tests that check that the implementation is working correctly.
Provided Code
Part One: Understanding the Order Processor
Part of managing an online store is handling inventory. The store receives orders, and some code has to update the inventory. For this online store, there is already an OrderProcessor class that can update the inventory based on the orders that come in.
This store has 3 types of merchandise: jacket, slacks, and pair_of_shoes.
There are 3 brands the store sells, fruche, onalaja and kente.
The store starts with a quantity of 20 of each of the different items for each brand. So, in the beginning, there will be
- 20 Fruche jackets
- 20 Onalaja jackets
- 20 Kente jackets
- 20 Fruche slacks
- 20 Onalaja slacks
- 20 Fruche pair_of_shoes
- 20 Onalaja pair_of_shoes
- 20 Kente pair_of_shoes
For simplicity, this project won't connect to a database or persist the results to a file - it will just print the results.
The other parts of the program send the OrderProcessor a json file with an order, and the order processor interprets it and deducts from the inventory.
An order is a JSON list of objects with a type, brand, and quantity.
An example order looks like this:
[
    {"type": "jacket", "brand": "fruche", "quantity": "2"},
    {"type": "slacks", "brand": "kente", "quantity": "1"}
]
In processing this order, the inventory would deduct 2 from the Fruche jackets, and deduct 1 from the Kente slacks.
The program should print this as a result:
Remaining inventory:
jacket fruche 18
jacket onalaja 20
jacket kente 20
slacks fruche 20
slacks onalaja 20
slacks kente 19
pair_of_shoes fruche 20
pair_of_shoes onalaja 20
pair_of_shoes kente 20
Explore the program
For Part 1, you don't need to write any code. Complete the following steps to understand what the program is doing:
- Run
main.pyand see the results. - The sample orders are stored in json files named
example1.json,example2.json, andexample3.json. Editmain.pyso that runsexample2.json, and runmain.pyto see the results. Also tryexample3.json. - Read through
implementations/store_order_processor.pyand trace through how it processes an order.- Find the part of code that raises an exception if the brand for an order is not one of the 3 supported brands.
- Understand what the
search_in_listmethod does.
In summary, here are the features that exist in implementations/store_order_processor.py:
- Ordering an item subtracts it from the inventory.
- An order that uses more than the available inventory is not valid.
- If input is not valid, raise an
StoreOrderProcessorException. - The inventory is displayed after each order.
Part Two: Writing Tests
The next part of the assignment is to write tests that check that the StoreOrderProcessor implementation works correctly.
Edit test_store_order_processor.py. See the TODO comments in the file. For each TODO comment, write a test. The existing tests in the file show examples of how to set up and test the order processor.
Run the tests with python test_store_order_processor.py. All the tests should pass.
The next step is fun. Notice all of the files like implementations/with_bugs_01.py. These are different Store Order Processors that have realistic bugs. If the tests are working correctly, they will detect the bugs. In other words - if you pass a buggy implementation to your tests, you would expect one or more of the tests to fail! You can try this. Read the buggy implementations - a comment at the top of the file describes the problem.
We have provided a file test_tests.py - a Python program that tests the tests. It loops through every with_bugs file, runs the tests on it, and confirms that the tests have a failure. If the tests did not have a failure, they are allowing a buggy program to pass, which isn't right.
Test the tests you've written by running test_tests.py. If it runs with no errors, your tests are catching the right bugs. The test_tests.py tests are how the project will be autograded.
Grading
| Criteria | Proficient | Competent | Developing |
|---|---|---|---|
| Coding Style (20%) | |||
| 1. Indentation and Formatting | Code is consistently well-indented and follows PEP 8 formatting guidelines. | Code is mostly well-indented and follows PEP 8 guidelines with minor deviations. | Code lacks consistent indentation and does not follow PEP 8 guidelines. |
| 2. Naming Conventions | Meaningful and consistent variable/function/class names following PEP 8 conventions. | Mostly meaningful names, with occasional inconsistencies. | Variable/function/class names are unclear or inconsistent. |
| 3. Comments and Documentation | Comprehensive comments and clear documentation for major functions and complex logic. | Adequate comments explaining major sections of code. | Lack of comments or insufficient documentation. |
| 4. Appropriate Use of Language Constructs | Demonstrates advanced understanding and appropriate use of Python language constructs (e.g., list comprehensions, generators). | Generally applies language constructs correctly, with occasional lapses. | Misuses or misunderstands key language constructs. |
| Persistence (50%) | |||
| 5. Completeness | Evidence that all components of the assignment were attempted. All functionality present. | Evidence that most elements of the assignment were attempted. Most functionality present. | Little evidence of completion of work. Incomplete or major functionality missing. |
| 6. Timeliness | Assignment started early (based on GitHub data). GitHub commits show steady progress. Submitted on time. | Assignment is submitted late but GitHub data demonstrates an early or reasonable start date, with significant iteration on arrival to solution (i.e., multiple commits showing progress) | Submitted late. GitHub repository data shows late start and minimal iteration. |
| 7. Use of Resources | Assignment is fully complete and provides all functionality. If assignment is not fully complete, student attended office hours (or additional help sessions) and/or asked high quality and timely questions on Discord. | Assignment is not fully complete and there is minor evidence of effort to get assistance on assignment (e.g., office hours attendance or Discord discussions). | Assignment is incomplete and no evidence of seeking assistance. |
| Correctness (30%) | |||
| 8. Test Cases | Percentage of automated test cases that pass. |
Evidence of Persistence:
In the event that you are unable to get your program fully functional, you will receive partial credit based on your evidence showing the amount of effort that went into learning the underlying concepts to complete the assignment or that you persistently sought appropriate assistance. Examples of persistence may include, but is not limited to, the following: Git commit history showing evolution of your program, attendance to office hours (Instructor or TA), asking thoughtful questions in the appropriate Discord forums, formation of study groups, completion of additional practice exercises, reading of third-party resources, etc.
To receive partial credit, you must create a file called
PERSISTENCE.mdin your GitHub repo alongside theREADME.mdfile, and include your evidence of persistence, for example, links to your Discord questions, narrative explaining dates and times of office hour sessions that you attended and what you learned, links to resources that you referenced, links to ChatGPT conversations that you initiated (focusing on concepts not just getting answers), etc. The better you can demonstrate your work on learning, the easier it will be to provide partial credit, so be thorough. Make sure that file is properly committed to your repo, and included in your Gradescope submission.
Submitting Your Work
Your work must be submitted Anchor for degree credit and to Gradescope for grading.
For coding tasks involving Github Classroom:
- Ensure that you
commitandpushyour local code changes to your remote repository. (Note: In general, you should commit and push frequently, so that you have a backup of your work, so that there is evidence that you did your own work, and so that you can return to a previous state easily.) - Upload your submission to Gradescope via the appropriate submission link by selecting the correct GitHub repository from the drop-down list.
- Export a zip archive of your GitHub repository by visiting your repo on GitHub, clicking on the green
Codebutton, and selecting "Download Zip". - Upload the zip file of your repository to Anchor using the form below.
For cases where you answer questions on Gradescope:
- Complete the work in Gradescope by navigating tot he appropriate link.
- Export it as a pdf using th Google Chrome plugin: https://gofullpage.com/. This plugin will do multiple screen captures while scrolling through your document, and then stitch them into a pdf that you can download.
- Upload the generated pdf to Anchor using the form below.
For any work completed outside of GitHub or Gradescope:
- Take either screen captures of your work or export a pdf showing your complete work.
- Submit the materials to Gradescope via the appropriate submission link for the course.
- Upload the screen captures or pdf files to Anchor using the form below.
Note: Anchor submissions can occur at any time during the term, but it is critical that you upload all of your work to Anchor before the last day of the term. Gradescope submissions must be submitted before the deadline (or the late deadline, if applicable).
What is Good Code?
We are heading towards the final portion of this course, and we will take a shift in our approach. So far, throughout programming 1 and programming 2, you have mostly worked on very small programs consisting of a few functions. As you spent time practicing exercises and working on assignments, you thought hard about these functions for many minutes, perhaps a few hours...Then you submitted your work and moved on to other concerns.
You have so far spent little time with the code you have written, and that is expected at this stage.
However, in the context of professional software development, the reality is quite different. Take a moment and watch this video - you can fast forward it.
This animation shows all the changes happening to a git repository. In particular, this is the git repository for VLC, a popular video player you may be familiar with. Each circle is a specific file. Files are grouped close to each other if they are in the same folder. The little images you see appear and disappear represent contributors, and you can see briefly a line between contributors and files whenever someone edits the project.
Let's add some numbers to the equation:
- The video showcases changes from 1999 to 2011. That's 12 years of working on the same codebase!
- 5 different programming languages.
- 96000+ commits over the history of the project.
- 580+ different contributors.
How can anyone keep track of so much complexity? well there are a few things to note:
- You don't really have to keep track of ALL of it. By the time projects grow this big, many individuals specialize in a specific part of it.
- We write, and push each other to write, very good code.
What do we mean by good code here? Well good code should be correct, it should do the right thing we agreed upon. We've been practicing that, and with our new knowledge of testing, we can make sure it stays correct.
Good code is also performant: It works quickly, does not use more memory than necessary, and won't occasionally crash the machine running it. We will learn a lot more about how to assess the performance of our code in our Algorithms course.
The aspect of "good code" we want to focus on this week, and for the rest of our time as growing developers, is that good code should be easy to work with. We should strive to make it as easy to read and understand as possible, and as easy to adapt to future challenges as possible. This is how we get to build projects that hundreds can collaborate on. Put yourself in the position of a new team member at VLC. Where would you even start? well written code gives you a good logical start, and guides you step by step.
Many concepts come together to make code easy to work with, and we will spend this week introducing a few, as we head towards your final project for the course where you will spend weeks 9 and 10 working on the same codebase!
Preview:
Here is what we will be exploring this week:
- What makes code good? how can we make our code better?
- How can we make our code resilient and flexible?
- How can we think about good abstractions reliably?
Why does this matter?
We should build up our intuition for what makes good code. This will serve you well in future courses and in the professional world where you will be working on the same codebase for months at a time. As we head towards our first long term assignment, you will soon have the opportunity to apply these design principles for yourself
Bad Code
As we are having a conversation about code quality, let's take a moment to study some absolutely terrible code. I want you to take a moment to read through the code and think about what it will do. Don't take more than 5 minutes on this, as this code may hurt your head.
Now I want you to state what the code does. What do you predict will happen when you run it? Run it and see if your prediction was correct.
Now let's take a moment and read through this other example of code in the same way. Read for 5 minutes, think about what it will do, then run it.
You may have seen this coming. The two programs produce the exact same output!
They both display a time, in this case 13:59:47, then display the following 29
possible timestamps, adding one second each time.
Reflect for a moment: What made the first example hard to understand? and how does the second address it?
Imagine if you were given a task to modify this code to add new functionality Where would you like to start from? example 1 or example 2?
Let's dig into what makes example 2 better code
Make your code easy to read
Let's start with the most obvious challenge of example 1: The developer did not do us any favors explaining what's going on:
- We have meaningless names: What do
x,y, andzactually mean? - We have magic numbers: Why are we looping 30 times?
- We use functions without explanations: what is
zfill?do I really have to open google every time I read code? - We have nested logic: The deeper you nest your logic - in other words the more if statements you have inside other if statements inside loops inside try/except etc. The harder it is to make sense of all the ways your code could execute.
We have been able to address this in example 2 by applying ourselves and communicating clearly:
- There is a
Clockclass. This probably has to do with time! - it's init method takes on 3 parameters called hours, minutes, and seconds. Now we know at a glance that the code has to do with time.
- The
Counterclass has some tricky elements, but at least it has comments to explain thezfillmethod and how thetickis designed. - We have very few numbers directly used in code. When we do, they can be understood from context (The upper limit for the value of minutes is 60). The duration we want to simulate a clock is stored in a variable so it's clear what would happen if we modify it.
- While we still have a little bit of nested logic, it's made more understandable: Tick the seconds, if they reset (returning True) then tick the minutes. If they reset then tick the hours!
Make your code easy to reuse
Beyond immediate readability, let's think about future reuse: In example 1, nothing can be readily reused! there is no function, no method, no class. Where do we begin if we wanted to make changes?
Example two puts the code together in a more organized way: We now have a
Clock class which we can use in many scenarios. We can initialize to the
current time and use it to simulate time passing. We can initialize it as
00:00:00 and use it as a stopwatch. It's versatile.
With the basic building block of the Counter class, we could make easy
modifications by using our knowledge of OOP: What would a counter that counts
"down" instead of counting "up" look like? that way we could have a timer
instead of a clock! We could inherit some aspects of the Counter class, and
just change the tick method to advance the clock.
Beyond using methods and classes, one of the big benefits of our approach is
that we have built useful abstractions. If we needed to build a Stopwatch
class for example, we can think of ways to use a Clock that don't even require
us to know how the Clock class works in depth, how it's methods are
implemented. We know we can set a clock, print it, and make it advance
correctly. We can use that!
Make your code focused
As much as possible, focus on having each function, each method, perform one job only. Moreover, if a function performs a particular task, we shouldn't have other parts of the code doing the exact same thing! let's just reuse the same function.
This unlocks a lot of benefits for us:
- It's easier to think about a function when it's goal is small and focused.
- It's easier to know where to make a change, then trust that it will be applied across our program.
- It's also easier to test the function if it only does one thing.
The demo_function performs the main task. The tick method moves the clock forward, etc. This also makes it easier to reuse a function in other parts of the project when it does exactly one thing. You don't have to worry about unwanted side effects.
The same thinking can apply at a higher level: We can think of a program as having has different layers. Code in the higher layers imports and uses classes that are written in lower layers. The highest layers are generally the user-interface code, and the lowest layers are the simple helper functions that do not need to call into any other modules.
Think of it this way, the user-interface has a lot of specific problems it needs to solve: What does the UI look like? what do we write? what do we do? This means a lot of code focusing on this. For our command line programs, this is equivalent to all the code we write to print instructions and gather user input from our users, testing if the input is correct, etc.
So what then? once we have the right user interface, what should we do with the information we get from the users? that's where the deeper layer can come in, and all the code for it. All the code that has to do with our business logic (Deciding if a transaction should go through. Creating a new account. Checking our inventory to see if we can sell an item. Saving some data to a file etc..) does not need to know about our presentation logic (What do we display? where? how do we get input?). They each have their own challenges.
A way to think about abstraction is that it involves splitting code into higher and lower layers, and moving details from the higher layer into the lower layer. These layers can get very deep!
Abstraction & Flexibility
Examples of Abstraction in practice
🚗 Driving a car
Here is a depiction of abstraction in our life:
Different car engines work in different ways. An electric engine is significantly different than a combustion engine, and an all-wheel-drive car is internally different than a two-wheel-drive car.
But when you drive, the car designers have hidden the unimportant details. You only need to focus on what to do, not the type of engine or how the engine works. And there is a very similar interface -- no matter what type of engine the car has, you just need to know how to use the steering wheel and the pedals.
If there weren't abstraction, we'd have to think about this when we drove:


But because of abstraction, we only need to think about this:

Square roots
When we use the math module, we don't need to know how the computer calculates
the square root of a number. We just need to know to use the sqrt() function.
import math

x = 25
y = math.sqrt(x)
print(y)
There are several different algorithms and ways to compute the square root of a number. Some are faster for certain types of computer processors. Some algorithms are slower, but return a more accurate answer. In the vast majority of cases though, those differences are irrelevant. It doesn't really matter what method is used to compute the square root, because the differences are so small that they do not meaningfully affect what the program does.
We could imagine a world where to compute a square root we would have to choose
between different algorithms, like math.sqrt_linear_estimate_algorithm,
math.sqrt_heron_algorithm, and math.sqrt_babylonian_algorithm.
But this would be confusing to read! It would be distracting to think about the choice of algorithm when the differences have no real impact on what the program does.
When we write code with abstraction in mind, we hide the unimportant details.
What matters most for a high level language like Python is to have code that is
easy to read and understand. And so, Python gives us just one choice,
math.sqrt. Behind the scenes, Python will use one of the square root
algorithms. Because we don't need to know about that detail when we write our
program, we can say that detail is hidden.
In this case, the author of Python's math library thought about abstraction
and realized that people computing the square root of a number don't need to
know the details. So they hid the details, like the choice of which algorithm to
use, by only providing one simple sqrt function.
🏷️ Example: getting the price
This is a way to use abstraction in your code: find a piece of complicated code, create a new Python module, and move the complicated code there.
For example, you are working on a store program where items being sold have
prices. The way to get the price of an item was complicated and had dozens of
lines of code. The solution is to create a file called get_price_helpers.py
and move all of that complicated code into a get_price function in that file.
The existing code that needed to get the price of an item is now simple and easy
to read. For example, there is a function that calculates the total price when
there are many of one type of item. calculate_total_price is now very simple
because it does need to see any of the complexity of the get_price function.
import get_price_helpers

def calculate_total_price(item, quantity):
    price = get_price_helpers.get_price(item)
    total_price = price * quantity
    return total_price
In this case, the detail being hidden is the detail of how the price is being
retrieved from the item. get_price might be using a database to get the price
of the item, or it might be using a dictionary, or even reading from the
internet. From the point of view of the calculate_total_price function, it
doesn't matter.
The details of the get_price function are hidden from us, and we don't need to
know how it works. This is abstraction.
💾 Abstraction in practice
Now with all these new concepts in mind, let's try to improve some code ourselves! When a program has good abstraction, it is more flexible.
This means that when, in the future bug fixes or new features are needed, the code is easier to change.
Imagine that you are creating a game, and you need a feature where the player can save their progress.
There are several places in the code that need to save the game - when the player clicks save, after completing a level, every 5 minutes just in case, and so on.
You know you want saving to be a separate method, since you definitely don't want to have duplicated code in all of those places.
Imagine that calling the method looks like this:
import json
class Game:
    ...
    def on_complete_level(self):
        ...
        self.save_to_json(self.data, 'saved_game.json')
        ...
    def on_every_five_minutes(self):
        ...
        self.save_to_json(self.data, 'saved_game.json')
        ...
    def on_user_click_save(self):
        ...
        self.save_to_json(self.data, 'saved_game.json')
        ...
    def save_to_json(data, filename):
        with open(filename, 'w') as save_file:
            json.dump(data, save_file)
This strategy will work in the short term.
But in the future, it will probably need to change. You might need a feature to store more than one game file. Or you need to store the game in a database. Or you need a feature to save to an online server. Each time a change like this is made, you would need to update each of the several calls - which takes time.
The problem is that the details are not hidden. To improve the code, the high level code should not have details about how the save is occurring!
Let's create a new class with a single job, a single responsibility: Saving a game.
import json
class GameSaver:
    def __init__(self, filename):
        self.filename = filename

    def save(self, data):
        with open(self.filename, 'w') as save_file:
            json.dump(data, save_file)
        ...
# Every game that wants to save some data should use an object of the GameSaver class
class Game:
    ...
    def __init__(self):
        self.game_saver = GameSaver('saved_game.json')

    def on_complete_level(self):
        ...
        self.game_saver.save(self.data)
        ...
    def on_every_five_minutes(self):
        ...
        self.game_saver.save(self.data)
        ...
    def on_user_click_save(self):
        ...
        self.game_saver.save(self.data)
        ...
    ...
The save method is now well abstracted, because the details are hidden.
And the program is more flexible because it is easier to adapt to future changes. If any changes need to be made,
they only need to be made once in the creation of the game_saver object instead of several times. (In this small
example, it's not a big deal. But in a large professional software project, having to search for each place that calls a
method and making the correct updates can end up being days of work, especially once testing and code review are taken
into account).
Also, the program is clearer, because we just see the action save and we are not distracted by seeing the filename
and format.
💡 For a program that uses abstraction well, the higher layers only describe what the program does. It is the lower layers that have the details on how the program works.
Sharing an Interface
We will continue with the GameSaver class: We are asked to make the program
run in two modes - in one mode the game is saved to a file on disk, and in
another mode the game needs to save the data online to a server. The goal is to
keep the program's flexibility, where if anything about saving needs to change,
the changes only need to be in one place and not all of the locations that
call the save method.
One approach would be to modify the GameSaver class:
class GameSaver:
    def __init__(self, filename, is_online_mode):
        self.filename = filename
        self.is_online_mode = is_online_mode

    def save(self, data):
        if self.is_online_mode:
            # saves to the server
        else:
            # saves to self.filename
        ...

    def load(self):
        if self.is_online_mode:
            # loads from the server
        else:
            # loads from self.filename
        ...

class Game:
    def __init__(self):
        self.game_saver = GameSaver()
        ...
    def on_complete_level(self):
        ...
        self.game_saver.save(self.data)
        ...
    def on_every_five_minutes(self):
        ...
        self.game_saver.save(self.data)
        ...
    def on_user_click_save(self):
        ...
        self.game_saver.save(self.data)
    ...
This would work, and it keeps our Game class clean and tidy.
Think about all the future work we might have to do on the GameSaver class:
Every method would start with an if else statement, depending on the mode.
If we introduce a third way to save, then we have to update every single
method to add a new scenario. That sounds annoying before we even got to it!
So while the code is clear, and fairly well abstracted, there are some complications if we think about how we would keep improving it.
Object-oriented-programming provides a perfect solution to this:
Thinking about interfaces
A solution is to have two classes with the same interface. They have the
same save and load methods.
This will mean making some small changes to the Game class, but that's ok. The
Game should tell us what mode it's operating under, and we will set up one of
the two classes to save the game correctly.
From the calling code's perspective, it just needs to say save, and the
calling code does not need to know which class is actually being used!
class GameSaverToFile:
    def __init__(self, filename):
        self.filename = filename

    def save(self, data):
        # saves to self.filename
        ...

    def load(self):
        # loads from self.filename
        ...

class GameSaverOnline:
    def __init__(self):
        ...

    def save(self, data):
        # saves to the server
        ...

    def load(self):
        # loads from the server
        ...

class Game:
    def __init__(self):
        # This is the slight change we need to make: The game should know what mode it's running with
        # But let's just make one decision with that information
        if is_online_mode:
            self.game_saver = GameSaverOnline()
        else:
            self.game_saver = GameSaverToFile('saved_game.json')

    # All the methods just ask the game_saver object to save()
    def on_complete_level(self):
        ...
        self.game_saver.save(self.data)
        ...
    def on_every_five_minutes(self):
        ...
        self.game_saver.save(self.data)
        ...
    def on_user_click_save(self):
        ...
        self.game_saver.save(self.data)
        ...
    ...
When we speak of interfaces in this context, we mean "the things you interact with". It's nice when interfaces are consistent: Pretty much every phone you've held in the last 5 years has 2 buttons, next to each other, to indicate the volume going up or down. It would be pretty confusing if a phone manufacturer changed that.
The interface of a class is the set of method names that are intended to be called from outside the class. When different classes share the same interface, that means they should be interchangeable.
In this example, we say that the classes have the same interface because they both have methods (save and load) with the same names and which take the same parameters.
When the game is started, it determines which class to make an instance of. From
then on, everything in Game just works - it just calls save() and it doesn't
need to worry about which class is actually there!
Making our interface more sturdy
If someone makes changes to the methods in GameSaverToFile, it might not be
clear to them that they need to also update GameSaverOnline.
Our previous changes work because the two classes both implement the exact same
method signatures. How can we make sure a fellow developer wouldn't change
the save method of one of the classes to take on new parameters and break this
nice setup we have?
This concept is very important to structuring OOP code - so important in fact that many languages give you built in ways to prevent classes from breaking their interface.
Python is not as strict, but we can achieve the same goal all the same - Remember: This is not about syntax, this is about concepts that will serve you throughout your studies and career.
Wouldn't it be nice that if another developer broke our interface by modifying
the classes we just made, the program itself would tell them? Well we can achieve
that! First, we will create a class to define what our interface should be:
class GameSaver:
    def save(self, data):
        raise Exception("Children of GameSaver MUST implement this method")

    def load(self):
        raise Exception("Children of GameSaver MUST implement this method")
The point of this class is not to ever be instanced. We will never create a
GameSaver object directly. Instead, this is here almost as a safeguard: If for
some reason we call the save or load method of this class, we will raise an
error! This is our alarm bell!
# NOTE: This now inherits from GameSaver
class GameSaverToFile(GameSaver):
    def __init__(self, filename):
        self.filename = filename

    def save(self, data):
        # saves to self.filename
        ...

    def load(self):
        # loads from self.filename
        ...

# NOTE: This now inherits from GameSaver
class GameSaverOnline(GameSaver):
    def __init__(self):
        ...

    def save(self, data):
        # saves to the server
        ...

    def load(self):
        # loads from the server
Remember what we learned in inheritance. If GameSaverOnline implements the
save(self, data) method, that is the code that will run. If we modify that
method to make it have a different signature, say save(self, data, server),
but the rest of our code still has calls to save with only one parameter, it
will call the method from the parent class - GameSaver and will raise an
error!
This helps us maintain that GameSaverToFile and GameSaverOnline, and any other class that inherits from GameSaver, need to have the same save() and load() methods.
The child classes GameSaverToFile and GameSaverOnline we refer to as an implementation. Each child class is an implementation class that has methods that override the interface methods.
This new version of the program doesn't really change the functionality. But it
does convey to anyone working on the program that GameSaverToFile and
GameSaverOnline need to share the same interface. And, if the child class has
forgotten to add a method, or modifies its signature over time, the exception in
GameSaver will remind us to fix it.
This was a lot to digest, let's look at some other tactics to improve code quality.
Refactoring
The video here will explain what refactoring is, and why it can be helpful:
To follow along with the video, you can download the source code by using the links below. You can pause the video every few minutes and look through the code.
Part 3: After changing the data structure
Details on refactoring
In large projects, software developers read through the code often. This means that it is valuable to have code that is easier to understand and work with.
Improving code in any of these ways is considered a type of refactoring:
- Naming
- Improving the variable names, method names, and file names
- Readability, intention
- Making the purpose of the classes and methods more clear to people reading the code
- Readability, implementation
- Making the implementation - how the program works - more clear to people reading the code
- Testability
- Restructuring the program so that automated tests can be written
- Flexibility
- Making the pieces of the program not be tangled to the details of other pieces of the program
Why should we spend time organizing code in a way that allows us to make changes in the future?
Because in the world of professional software development, code is always changing. Some reasons why a program will need to change:
- New requirements
- Realizing that the program needs to have different capabilities
- Feature requests
- Needing to add or modify a feature
- Reuse
- Taking code from one project and repurposing it to use in another project
- Bug fixes
- Needing to fix bugs and errors
- Platform changes
- Maintaining compatibility with the newest versions of Python, and newest versions of the Python modules being used
Wrap up
This brings us to the end of new content for the course. Next week we will focus on revision of content: Make sure to come prepared to discuss topics you still feel unsure about.
We will also release your final project early next week! You will have two weeks to work on it, and it will be your biggest coding exercise yet. Organize your time to start as early as possible, and use office hours wisely!
Practice: Code Quality
Required Practice
This week, you won't be doing a CodeCheck exercise for your practice; however, you will be submitting some practice to Gradescope.
Your task is as follows:
- Read through this website on Code Smells. Some of the examples used here are other than Python, but the concepts still apply.
- Visit the Gradescope assignment (/assignments/practice__code_quality.pdf), and answer some questions about what you've learned.
Additional Practice
This practice section will focus on the concept of code reviews: Reading through code in order to make it better, refactoring it as you see opportunities to do so.
Let's start by watching the following video where you can see a small code review in practice - you don't have to keep watching past 13:00
Your practice is to apply the same spirit on your own!
- Reach out to a classmate and share a code snippet of yours with them for them to review, give them feedback on some of their code in exchange.
- Go through your midterm project code and review it. What improvements can you find?
- Go through your programming 1 final project and review it. What improvements can you find?
While we cover some big ideas in this week's content, here are a few other small things to look for - these are often called "code smells":
- Are there poorly named variables?
- Is there repeated code?
- Are there random numbers used across the program?
- Is there inconsistent style and naming?
- Are there obvious ways to break the program?
Assignment 7: Code Reviews
This week, you won't be doing a GitHub programming exercise for your assignment. Instead, you will perform code review exercises on GradeScope.
Visit the Gradescope assignment (/assignments/assignment_7__code_reviews.pdf), and answer some questions about what you've learned.
Submitting Your Work
Your work must be submitted Anchor for degree credit and to Gradescope for grading.
For coding tasks involving Github Classroom:
- Ensure that you
commitandpushyour local code changes to your remote repository. (Note: In general, you should commit and push frequently, so that you have a backup of your work, so that there is evidence that you did your own work, and so that you can return to a previous state easily.) - Upload your submission to Gradescope via the appropriate submission link by selecting the correct GitHub repository from the drop-down list.
- Export a zip archive of your GitHub repository by visiting your repo on GitHub, clicking on the green
Codebutton, and selecting "Download Zip". - Upload the zip file of your repository to Anchor using the form below.
For cases where you answer questions on Gradescope:
- Complete the work in Gradescope by navigating tot he appropriate link.
- Export it as a pdf using th Google Chrome plugin: https://gofullpage.com/. This plugin will do multiple screen captures while scrolling through your document, and then stitch them into a pdf that you can download.
- Upload the generated pdf to Anchor using the form below.
For any work completed outside of GitHub or Gradescope:
- Take either screen captures of your work or export a pdf showing your complete work.
- Submit the materials to Gradescope via the appropriate submission link for the course.
- Upload the screen captures or pdf files to Anchor using the form below.
Note: Anchor submissions can occur at any time during the term, but it is critical that you upload all of your work to Anchor before the last day of the term. Gradescope submissions must be submitted before the deadline (or the late deadline, if applicable).
Revision week
We have two key objectives this week:
- Making sure that key concepts from this course are well understood.
- Get started on the final assessment.
There will not be new content, nor a weekly assignment. If you want to revisit old assignments, or spend more time on difficult concepts, this is the time to do it.
Note that you also have access to the final assessment now, and will have until the end of next week to submit it. You should plan to start the assignment this week, as it is significantly larger than what you have worked on so far. It is not significantly more complex, but it has many requirements. Budget your time wisely. You should make sure that you have read through the assignment before office hours, so you can use them if any requirement is unclear.
Make the best out of this recap week, and enjoy your new project!
Final Project: Competition CLI
Obtain the Starter Code

Project Overview
Note: The test cases do not fully encompass the functionality of everything described in all the milestones. You should NOT assume that if the auto-grader gives you full correctness score, that you have completed all the assignment requirements. You should manually test your work to ensure you are meeting all the requirements, and/or create additional test cases to testing anything that isn't already tested.
We will build a Command-Line tool that lets you organize a tournament! Say you want to organize a dance-off, a chess competition, or any other kind of competition you can think of. Our tool will help you do that.
Your tournament's information will be saved in a file, so we can modify it later.
We will also use the Eventbrite API to schedule all the games in our tournament!
We will provide you with a lot of code already, but it's up to you to make the following key features happen over the following milestones
Milestone 1: Understanding the code you are provided
main.py
This is where we define our Command Line Interface (CLI for short). This is where we start our tool, and you should run this now and get familiar with how it works.
In particular, right now it will break, a lot. We will improve on it throughout the milestones
In particular, make sure you are comfortable with the experience:
- We first ask the user if they want to create a new tournament or edit an existing one.
game.py and tournament.py
These are our main abstractions, so make sure to read through them carefully.
The Game class keeps track of basic information about a Game: When the event
starts, when the event ends, and the two players competing.
The Tournament class keeps track of higher-level information about the
tournament such as its name, and all the scheduled games.
eventbrite_client.py
This is the class that knows how to use the Eventbrite API. No need to read through it yet, we will have a whole milestone dedicated to it.
untested_helpers.py
As you will have noticed looking at the other files, many of them import functions from the untested_helpers.py file
Your first task is to write unit tests for every function defined in untested_helpers.py.
As a rule of thumb, you should not blindly trust any untested code provided to you, and this applies to this project as well. Read through the comments on each function, and write corresponding unit tests before moving on to Milestone 2
Create a new file called milestone1_tests1.py and set up your tests there. Do
not overwrite or modify the provided test.py
Milestone 2: Saving and Loading tournaments
Part 1: gathering the right data
Let's look at the tournament_setup method in main.py.
- We first ask for a tournament name.
- We then ask for the participant count - this may be useful, as for our style of tournament to work, we need the number of participants to be a power of two.
- We then create an empty list.
- Then we ask our tournament object to create the games using that empty list.
That will not work. Let's fix these two issues:
Valid participant count
Complete the request_participant_count function in main.py. This function
should request user input; but only accept numbers that are power of two.
You can draw inspiration from the request_integer_input method, and use any
helpers already available in the code.
Valid participants
Complete the request_participants function in main.py. This function should
return a list of participants. That list should have as many items as the
participant count, and all those items must be unique.
You will prompt the user for participants but should repeat that prompt if the participant was already provided.
You should be able to generate a similar experience as the two examples below:
> How many participants? 2
> Please provide a participant: Magnus
> Please provide a participant: Fabiano
> Done
> How many participants? 2
> Please provide a participant: Magnus
> Please provide a participant: Magnus
> Please provide a participant: Fabiano
> Done
Note how when we entered Magnus a second time, we received another prompt. That's what your code should be able to do.
Part 2: Saving the game
The abstraction
We're finally getting into the heart of the tournament, so let's think about our abstractions in more detail.
A Game can refer to any sport or activity that engages two players or two
teams. Our Game objects will need to keep track of a few important
information:
- Player 1 and Player 2. These are simple strings that tell us who will be participating in a game.
- A start time and an end time. Each game should know when it begins, and when it should end.
- A name: This is a short description of the game that we can display. In particular, this should tell us how the game fits into the competition. a game's name could be "Round of 32 Game 5" or "Final Game 1"
A Tournament is a collection of games. First of all, though, we want to give
our tournament a name: This tells us what the event is: Are we doing a race? a
freestyle dance competition? are we playing Scrabble?
The Tournament object will be responsible for creating all the necessary
Game objects. To do that though, it will need some extra information:
- A start date: This lets us know when the first games should be scheduled. (In the provided code, this is hard-coded to start the day after you create the tournament in the CLI)
- An interval: This lets us know how many days to wait between rounds (This is hard-coded to be two days in the provided code).
- A game duration: This lets us know how long each game should run, so we can compute the end time for games. (This is also currently hard-coded)
The kind of tournament we will create is called a single-elimination
tournament. We
trust this Tournament class to know how to create all the right games, given
the info above and a list of participants.
Let's make sure that information is saved so we can reload it. Our format for this will be as follows.
- When saving, create a file with the name:
tournament_name.games. - In the file, write each of the games stored in the tournament.
Read through the Game class, and look at the to_json_string method, you can
use it to complete the Tournament class' save method
You should be able to create a tournament now, let's call it test_tournament, then see that a test_tournament.games file was created, which contains all the games needed
By this stage, the test_save_tournament should be passing when you run unit
tests
Part 3: Loading the game
What good is saving if we can't load? Our CLI is already set up to ask the user
to provide a tournament name. we need to complete the load_tournament method:
This method should look for the right file. If we want to load the
summer_event tournament, then we will look for summer_event.games
Once found, we should read and recreate all the games stored in the file. You
can use the from_json_string method of the Game class to support that.
You can then return a new tournament object that contains all those games!
You should select option #2 in the CLI, and see that after closing the program, you can load a tournament and see all its games!
By this stage, the test_load_tournament should be passing when you run unit
tests
Milestone 3: Updating the tournament
As the tournament progresses, and we play games, we will want to update games with no known players.
Look at the tournament_changes() method in main.py and read through it
carefully. We will continue where we left off from the previous milestone:
- Complete the
update_gamemethod in theTournamentclass. - This method should rely on the
updatemethod in theGameclass. - Don't forget that we need all of this saved on file! make sure that the file for your tournament is updated accordingly
By this stage, the test_tournament_update and test_game_update should be
passing when you run unit tests
Milestone 4: To the internet
Let's step away from thinking about games and tournaments and files and all of that. One of our goals is to schedule events for our games on the internet, and this milestone will focus on just that. If this was a team project, a team member could've started here!
Part 1: Getting set up with the Eventbrite API
- Go to eventbrite.com and create an account, then Sign In
- Under Account settings, click on Developer Links and go to the API Keys page
- Click the "Create API Key" button in the top right
- Fill out the form to request an API key, and submit it
- For the application URL, enter https://kibo.school
- For the application name, enter Kibo Programming 2 Project
- For the description, enter Project for Programming 2
- Wait a few seconds,
- Click "Show API Key, client secret, and tokens"
- Copy the "private token".
- Create a file inside the files directory of the project (right next to the files like cli.py) called apikey.txt.
- Paste the "private token" into the apikey.txt file and save it.
- Note that apikey.txt will be ignored by git. You can't git add it and it won't be uploaded as part of your project.
(There will be some Python code that reads the contents of apikey.txt. Please reach out for assistance if you are having trouble with this part, it's just a matter of navigating the Eventbrite website.)
Once you have apikey.txt set up, go ahead and run event_brite_client.py. If
everything goes well, you should see:
- Some string showing up in the console - that is the ID of the event we just created
- If you visit your Eventbrite page here, you should see that a Test event was scheduled for May 2024!
Part 2: Updating events
We provided a function to create events - You are welcome!
It is also here to serve as a reference, so you can create the function to update events on your own!
For this milestone, you have to complete the update_event method of the
EventBriteAPIHelper class:
- Make sure to carefully read how the
create_eventmethod works first. - Then build up the
update_eventmethod. Note that the URL you need to send the request to is documented here - Your method does not need to return anything.
Before moving forward, test this by running your method with the ID of the event you've already created as an input!
By this stage, test_update_event should be passing when you run unit tests.
Milestone 5: Putting it all together
At this stage, we have games and tournaments that we can save locally and it all works ok. We have a class that knows how to create an event and how to update it. Let's bring this all together so we have a fully working program!
Part 1: The Scheduler class & Scheduling the tournament
To set up events for the tournament, we have created a file called
scheduler.py. Functions within this file will receive games as input, and call
the right methods from EventBriteAPIHelper to create the corresponding event.
Let's start with the schedule_tournament function. This should take a
tournament as an input, then extract information from all its games, passing
them to the create_event method of EventBriteAPIHelper.
The big question is: When should we call the schedule_tournament method? That is up to
you to figure out. At the end of this step though you should be able to create a
brand new tournament, then go to your Eventbrite
page and see all the
corresponding events!
Part 2: Updating Events
The next step is to finish the update_game_event method.... but wait
wait wait wait
We may have a problem here. To update a game, we need to know its event ID! We
could get the IDs from the calls to create_event, but we don't right now! We
have some work to do:
- Modify the
Game__init__method so it can take an optional parameter for event_id - Modify the
to_json_stringandfrom_json_stringmethods to also store the event_id - Make sure that as you call
schedule_tournament, each game is updated with its event_id.
You should be able to see the event ID stored within your local save file.
Once you've accomplished this, then finishing update_game_event should be very
similar to the work you did in the previous step. With this, you should be
able to create tournaments, load them, modify their games, and have all your
changes reflected on Eventbrite. Well done!
By this point, the test_schedule_tournament and test_update_game_event tests
should be passing. Congratulations on being done!
Grading
Correctness and Completeness (85 points)
Milestone 1:
- unit tests for power_of_two - 5 Points
- unit_tests for compute_round_name 5 Points
Milestone 2:
- correct implementation of
request_participant_count5 Points - correct implementation of
request_participants5 Points - correct implementation of
save10 Points - correct implementation of
load10 Points
Milestone 3:
- correct implementation of
game.update5 Points - correct implementation of
tournament.update_game5 Points
Milestone 4:
- correct implementation of
update15 Points
Milestone 5:
- correct revision of
Game5 Points - correct implementation of
scheduler.schedule_tournament10 Points - correct implementation of
scheduler.update_game_event5 Points
Coding Style (15 points)
| Criteria | Proficient | Competent | Developing |
|---|---|---|---|
| Coding Style | |||
| 1. Indentation and Formatting | Code is consistently well-indented and follows PEP 8 formatting guidelines. | Code is mostly well-indented and follows PEP 8 guidelines with minor deviations. | Code lacks consistent indentation and does not follow PEP 8 guidelines. |
| 2. Naming Conventions | Meaningful and consistent variable/function/class names following PEP 8 conventions. | Mostly meaningful names, with occasional inconsistencies. | Variable/function/class names are unclear or inconsistent. |
| 3. Comments and Documentation | Comprehensive comments and clear documentation for major functions and complex logic. | Adequate comments explaining major sections of code. | Lack of comments or insufficient documentation. |
| 4. Appropriate Use of Language Constructs | Demonstrates advanced understanding and appropriate use of Python language constructs (e.g., list comprehensions, generators). | Generally applies language constructs correctly, with occasional lapses. | Misuses or misunderstands key language constructs. |
Submitting Your Work
Your work must be submitted Anchor for degree credit and to Gradescope for grading.
For coding tasks involving Github Classroom:
- Ensure that you
commitandpushyour local code changes to your remote repository. (Note: In general, you should commit and push frequently, so that you have a backup of your work, so that there is evidence that you did your own work, and so that you can return to a previous state easily.) - Upload your submission to Gradescope via the appropriate submission link by selecting the correct GitHub repository from the drop-down list.
- Export a zip archive of your GitHub repository by visiting your repo on GitHub, clicking on the green
Codebutton, and selecting "Download Zip". - Upload the zip file of your repository to Anchor using the form below.
For cases where you answer questions on Gradescope:
- Complete the work in Gradescope by navigating tot he appropriate link.
- Export it as a pdf using th Google Chrome plugin: https://gofullpage.com/. This plugin will do multiple screen captures while scrolling through your document, and then stitch them into a pdf that you can download.
- Upload the generated pdf to Anchor using the form below.
For any work completed outside of GitHub or Gradescope:
- Take either screen captures of your work or export a pdf showing your complete work.
- Submit the materials to Gradescope via the appropriate submission link for the course.
- Upload the screen captures or pdf files to Anchor using the form below.
Note: Anchor submissions can occur at any time during the term, but it is critical that you upload all of your work to Anchor before the last day of the term. Gradescope submissions must be submitted before the deadline (or the late deadline, if applicable).