Program Overview
Welcome to the Automation Assistant Trainee Program
Welcome, and congratulations on your new job! Automation Assistants is a new “earn while you learn” initiative at Kibo, in partnership with the GitLab Foundation. The program will equip you to build low-code, no-code, and data tools for businesses.
As an Automations Assistant Trainee, you are embarking on a training program designed to equip you with the knowledge and expertise needed to master no-code/low-code tools. You will build the skills needed to excel as a no-code/low-code expert, a role that is in high demand across various industries.
📺 Watch a welcome from Kibo's CEO (5:19)
A few things to remember about the AATP program:
- This is a job! This is a paid training program, and you are expected to treat it as a job. This means you must adhere to professionalism standards including conscientiousness, integrity, and commitment to increasing your knowledge.
- After 6-months of training, assuming you meet the expectations of the training, we will support you to find a part-time paid role.
- By beginning this training, you commit to 18-months of work as an Automation Assistant (6 months training, minimum 12 months on the job)
Program Requirements
- 6-month paid training program, followed by minimum 12 months of work.
- 24 hours per week, over 3 days devoted to work.
- Maintain a minimum 2.5/4.0 or 3.0/5.0 GPA per term/semester.
Trainers
- Bidemi Dairo, bidemi@kibo.school
- Oluwafunminiyi Oladapo, funminiyi@kibo.school
- Olubukunola Akinsola, bukola@kibo.school
If you have any questions or concerns, the first step is to post in the dedicated Slack channel. Please do this before sending emails.
Skills you will build
This training will prepare you for paid work with various companies. You will build technical skills, become familiar with specific tools, and learn critical non-technical skills.
Technical Skills
- Create, manage, and manipulate databases, tables, and records in Airtable.
- Use advanced features such as automation, formula fields, roll-up fields and linked records in Airtable to build sophisticated databases and workflows.
- Design complex, multi-step Zaps that integrate other tools and business apps to create a robust workflow.
- Understand Make(formerly Integromat) as an alternative to Zapier and build complex scenarios with conditional logic.
- Create custom integrations using webhook triggers and actions for specialized automation needs.
- Design analytics dashboards and reports with Google Sheets.
Non-Technical Skills
- Problem-solving: Analyze complex tasks, identify automation opportunities, and apply critical thinking to troubleshoot issues within workflows.
- Communication: Communicate clearly and concisely, in written and verbal form, to both technical and non-technical stakeholders.
- Collaboration: Collaborate with team members, clients, or end-users to gather, refine, and update requirements.
- Project management: Plan and execute automation projects within specified timelines and resources.
- Knowledge sharing: Create comprehensive documentation for workflows, and share knowledge effectively within a team.
Tools
- Google Sheets: An online spreadsheet tool by Google. Helps you create, edit, and collaborate on spreadsheets in real-time. It is a useful tool for data analysis and visualization.
- Airtable: A flexible and user-friendly online database. Allows you to organize information in a visually appealing way, combining the simplicity of a spreadsheet with the complexity of a database.
- Zapier: A tool for automating tasks between different apps. Lets you set up automated workflows (Zaps) to connect and move data between various apps without manual intervention.
- Make (formerly Integromat): A tool for automating workflows and connecting apps. Allows you to create complex and customized automations, connecting different apps and services to streamline processes.
- Typeform: An online form and survey builder. Enables you to create interactive and engaging forms and surveys with a user-friendly interface.
Assessments
You will be learning by doing, and be assessed on your ability to complete individual and team projects.
Weekly individual projects
Each week, you will complete a project demonstrating your understanding of concepts and tools covered during that week.
Bi-weekly team projects
Every other week, you will collaborate with your colleagues to complete a project. These projects are larger in scale and will give you the opportunity to solve real-world problems from conception to completion.
Capstone project
At the end of the training period, you will complete an individual capstone project. This will bring together everything you have been learning, and give you a robust project to add to your portfolio.
Getting and Giving Help
We are #BetterTogether, and encourage you to seek and offer help where you can. Below is some guidance on asking for and giving help.
Getting Help
If you are stuck on a problem or have questions about a topic or tool, drop a message in the dedicated Slack channel. Be sure to:
- Clearly explain the problem and your objectives
- Share the steps you've taken so far
Additional learning materials can be found in the Additional Resources section. We are here to assist you, and reaching out ensures a seamless learning journey.
Giving Help
-
Encourage Independent Learning:
- Rather than giving direct answers, guide your peers to resources, references, or methodologies that can help them solve the problem on their own. Encourage them to understand the concepts rather than just finding the correct solution. Work through examples that are different from the assignments or practice problems provided in the course to demonstrate the concepts.
-
Collaborate, Don't Complete:
- Collaborate on ideas and concepts, but avoid completing assignments or projects for others. Provide suggestions, share insights, and discuss approaches without doing the work for them or showing your work to them.
-
Be Mindful of Collaboration Tools:
- If using collaboration tools like version control systems or shared documents, make sure that contributions are clear and well-documented. Clearly delineate individual contributions to avoid confusion.
-
Refer to Resources:
- Direct your peers to relevant textbooks, online resources, or documentation. Learning to find and use resources is an essential skill, and guiding them toward these materials can be immensely helpful both in the moment and your career.
-
Ask Probing Questions:
- Instead of providing direct answers, ask questions that guide your peers to think critically about the problem. This helps them develop problem-solving skills.
-
Promote Honesty:
- Encourage your peers to take pride in their work and to be honest about the level of help they received. Acknowledging assistance is a key aspect of academic integrity.
Remember, the goal is to create an environment where you can learn from each other (after all, we are better together) while we develop our individual skills and understanding of the subject matter.
Expectations
This page lists the expectations of you as an Automation Assistant Trainee. It includes action items for you to take on your first day, and each day and week after.
Day 1
Introduce yourself
Join the program's dedicated Slack workspace (an invite has been sent to you), and send a message to the 01-introduction channel to introduce yourself. The introduction should include:
- Your name and year at the university
- City you are located
- 2 truths and a lie (everyone else will try to guess which one is a lie)
- A Gif or image that represents how you're feeling about being an AAT
Read program overview
During your first day, you should read through the entire program overview, and start working on Week 1 project.
Every Day
Daily Standup
We will begin each day with an async Daily Standup Meeting. Daily Standups are a common part of technical teams. During standup meetings, teams meet briefly (usually less than 15 minutes) to discuss progress and identify blockers. The meeting is called a "stand-up" because it's short (usually less than 15 mins) and everyone stands during it. You can read more about daily standups here.
We will hold the daily stand up asynchronously. Async daily stand-ups are common among distributed teams where team members work from different time zones. Each team member shares their update when they report to work. They also read their colleagues' updates, and identify ways to help. You are required to share a stand-up in the 04-standups channel each day within the first half hour of starting work. Your standup should answer the following questions:
- What did I work on yesterday?
- What am I working on today?
- What issues are blocking me?
- How am I feeling today (this can be a word, emoji, gif, or something else representing your 'mood')?
📌 You are required to share a standup in Slack each day that you are working.
Daily Check-in and Check-out
At the start of your workday, you are required to check in on the dedicated Slack channel and check out at the end of your workday. You are allowed to check in and check out as many times as necessary throughout the day. It is important to check out at the end of your workday, otherwise the system will assume that you worked for 2 hours that day.
Every Week
Weekly team meeting
You will be required to attend a weekly meeting with your trainers and some of your colleagues. Check your calendar for an invitation to your weekly meeting. This is similar to a weekly meeting you might have on a project team in the workplace.
Weekly office hours
We will also have weekly office hours with the trainers. The office hours are an opportunity for you to get feedback, help to unblock you or have your questions or concerns addressed. You will receive calendar invites for the possible office hours you can join.
Introduction
📺 Watch the video below to get an overview of the coming week. (2:11)
Objectives
By the end of this module, you will:
- Understand the concept of no-code/low-code and its importance in business automation.
- Build and format spreadsheets.
- Use formulas, functions and pivot tables for data analysis.
Due this week
Motivation: Why no-code and low-code?
Imagine being able to bring your creative ideas to life without the constraints of traditional coding. No-code tools empower individuals and businesses from diverse backgrounds and industries to design applications, automate workflows, and solve complex business challenges, without a deep technical background.
📺 Watch the video below to learn how a personal coach uses Zapier to integrate multiple applications for running her online business (1:49)
📺 Watch the video to learn how the Head of Marketing at a sports company using Zapier to save significant time and transition from manual processes (1:36)
📺 Watch the video to learn how Vimeo consolidated tools and built custom apps using Airtable (1:43)
No-code/Low-code Development
Introduction
If I were asked to build a house from scratch without any prior experience in construction, I would be lost. However, if given a prefabricated kit with pre-cut pieces and instructions, the task would be much more manageable, similar to building with Legos. Instead of manually crafting each component, I could easily assemble pre-designed blocks that fit together seamlessly, allowing me to create complex structures without requiring extensive construction knowledge.
In the same way, low-code and no-code tools are like prefabricated kits for building software applications. With these tools, you can assemble pre-built components and features to create complex software solutions without needing to have extensive programming knowledge or experience. These tools provide a foundation for you to build upon and customize, making it easier for anyone to create software applications without starting from scratch.
📺 Watch this video to learn more about low-code and no-code development (3:59)
Businesses find no-code development appealing because it's versatile and simple to build, and anyone can use it.
Here's an example: Zapier and Make are no-code automation platforms that allow you to create workflows that send information across thousands of apps without using any code. You don't need to know how to use APIs or code up a solution —- anyone can use the visual builders to make the magic happen.
For instance, imagine you run a small eCommerce business and want to streamline your order processing and customer communication. With a no-code tool like Zapier or Make, you can create custom integrations between your eCommerce platform, email marketing tool, and customer support system—all without needing to write a single line of code.
Some examples of no-code platforms
- Zapier: a no-code automation tool that connects thousands of apps and services. It lets users create automated workflows, or Zaps, without any coding knowledge.
- Make: A no-code tool for automating workflows and connecting apps. Allows you to create complex and customized automation, connecting different apps and services to streamline processes.
- Bubble: a no-code app builder designed for building web and mobile apps visually. It offers a range of customizable elements and data workflows that enable users to create complex apps without coding.
- Weweb: a no-code website builder that empowers users to create responsive and interactive websites. It provides advanced design and hosting options.
- Airtable: a no-code database where users can create custom, collaborative apps. It's a flexible solution for workplaces that want to improve their workflows.
According to a Gartner report, by 2024, 80% of tech products and services will be built by people who are not IT professionals. Having low-code/no-code skills can put you in high demand and offer job security.
In a market survey, Zapier found that 90% of no-code users think their company has been able to grow faster due to its no-code usage.
Motivation: Why Google Sheets?
As discussed previously, you are going to be using low-code and no-code tools to build powerful applications. But before we jump into them, there is one important tool that you must first master: ✨✨ spreadsheets! ✨✨
📺 Watch the video below to explore the awesomeness of spreadsheets! (2:24)
Spreadsheets are powerful
Spreadsheets are an incredibly powerful tool that can be used to organize, analyze, and share data. Whether you're managing a budget, tracking inventory, or analyzing data, spreadsheets are an essential part of any business or organization.
The heart of any application, whether it's low-code or not, is storing and retrieving data. Modern applications use relational databases (e.g., Oracle, MySQL, PostgreSQL) to store data. Spreadsheets are not databases, but they organize data in a tabular structure of rows and columns. This means spreadsheets can be used to create simple databases, and/or manage data stored in external databases. They are ubiquitous in business, and having strong spreadsheet skills is a required foundation for effectively using other database tools like Airtable.
Learning spreadsheets will prove useful when we move to Airtable - a tool you will spend more of you time in this job working with. Airtable is a powerful database that is built on top of a spreadsheet interface. It allows you to organize and manage your data in a way that is more flexible and powerful than traditional spreadsheets.
The most popular spreadsheet program is Microsoft Excel. For this class, we will use Google Sheets which is another widely used and popular spreadsheet. Excel and Sheets share many, though not all, of the same formulas and features.
Sheets is free to use and offers a wide range of features that make it easy to create and customize spreadsheets. With Google Sheets, you can collaborate with others in real-time, share your spreadsheets with anyone, and access your data from anywhere with an internet connection.
Project: Streaming Video Subscriptions
Background
You have been hired as a Data Analyst for MavenFlix, a video streaming platform. Your first project is to help to analyze subscription records, and help the team understand customer patterns. You receive the email below from your supervisor.
The Email
Hello Ope,
Welcome to the team! I'm happy to have you here.
For this week, I want you to spend some time digging into the subscription data. Our CEO is very worried that we are not doing enough to retain customers. With Netflix, Amazon Prime, and others competing for the same users, we need to understand how to remain competetive. I have been meaning to spend time analyzing the data, but there's too much on my plate. So I'm glad you can take this on.
Here are some of the questions I believe we need to answer.
- What are the trends in subscription sign-ups over time?
- What is the average duration of subscriptions before cancellation?
- What percentage of customers have subscribed for 5 months or more consecutively?
- What month had the highest subscriber retention, and the lowest?
If there are other questions you have after looking at the data, feel free to explore them as well.
As you do this, don't lose focus on our business goals which are:
- Increase customer subscriptions
- Increase customer retention rates
Please aim to wrap the initial version of this by the end of the week.
Regards, Bidemi
Data
Download the data required to complete this task from here and the data dictionary from here
Deliverables
Submit the following documents:
- Data analysis sheet
- A written report that explains the findings and insights derived from the analysis.
Complete this form to submit your project.
Ensure the documents are set to enable to comment. See below for a demo of how to change sharing settings.

Learn to use Google Sheets
📺 Watch this introduction to Google Sheets to learn how to get started. Feel free to skip ahead if you are already comfortable with the basics of Google Sheets. (49:11)
📺 Watch the video below and learn about some of the most essential formulas and functions in Google Sheets. (23:25)
Watch the following video on Data Analysis using Google Sheets. (34:05)
Watch and follow along with these tutorials on how to work with Pivot Tables and Slicers in Google Sheets. (8:45) & (21:29)
Follow along with these videos to learn how to use Lookup Vlookup and Index-Match functions in Google Sheets
Watch this video to learn how to report your data analysis (2:05)
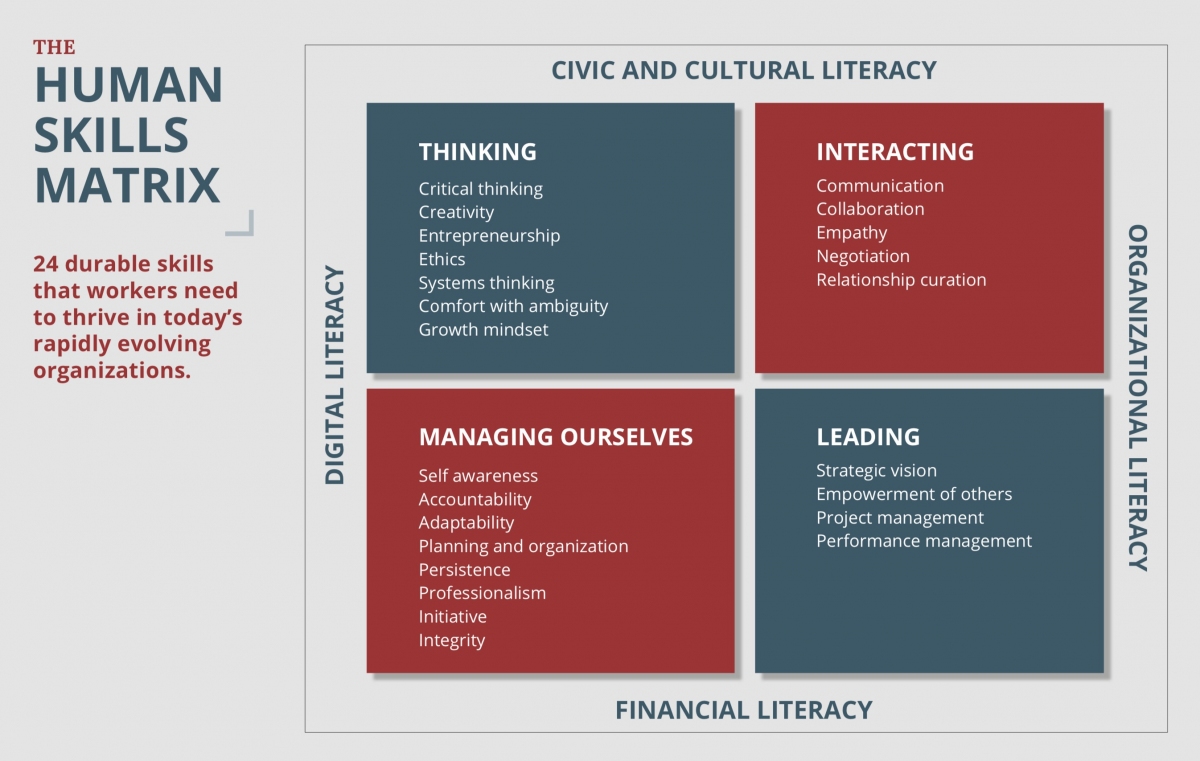
Focus on Human Skills
❓ ❓ What does it take to thrive in a world of fast-changing technology?
According to MIT's Jameel World Education Lab:
🗣 Focusing on STEM skills is not enough. Every employee, whether technical or not, needs a set of essential non-technical skills to thrive in today's digitally-powered organizations.
The aim of the Automation Assistant Training program is to prepare you to get a paid, remote role in technology. Strong technical skills are necessary, but not sufficient, to get entry-level roles in technology.
More often than not, it is non-technical skills that make the biggest difference. In addition to technical topics, your training will include modules in essential non-technical to help you land and keep a job!
You will practice human skills in the areas of:
- Self-management, including self-awareness, and goal setting
- Interacting with others, including communication, collaboration, and building powerful networks
- Leadership, including project management, and performance management
In this module, we begin with a focus on ownership mindset, which is essential to managing ourselves.
Learning Outcomes
After completing this module, you will:
- Understand why your career development requires personal responsibility, and how to take ownership of your career
- Identify your strengths and weaknesses
- Articulate your short and medium-term goals
Case Study: Bukola gets a job!

💡 Meet Bukola. She's a 400-level student studying computer science at the University of Lagos. Bukola just received the following from Newcastle Partners, a regional planning consulting firm based in Bristol, United Kingdom.
As you might imagine, Bukola is overjoyed! After a rigorous interview process, including a two-month unpaid trial, she has accomplished her goal of landing a remote job before graduation.
Meet the "Also-Rans"
While Bukola celebrates this accomplishment, numerous others are dissapointed. They include:
- Victor, a student at UNILAG, who never even heard back on his initial application
- Emeka, a 500-level Engineering student at UNN is still bemoaning that he was asked to leave the trial program
- Aliko, a recent graduate of Mathematics from Nairoibi was also part of trial but failed to receive an offer
Over the coming months, as we learn and practice essential non-technical, you'll meet Aliko, Emeka, Victor, and many others who did not get the offer. You'll understand the flaws in their approach, and the particular skills and mindsets that set apart the Bukolas of the world.
Let's go!
Career Coach: Meet Victor
💡 Victor is a final year student studying computer science at the University of Lagos. It’s three months to graduation, and Victor is focused on landing an entry-level tech role. His search is not going as well as he hoped, so he makes an appointment with Fatima, a career counselor, to talk through his experience.
Read the conversation below between Victor and Fatima.
Fatima: Hello Victor, it's great to see you. What brings you to the career office today?
Victor: Hello Fatima, thanks for meeting with me. To be honest with you, I’m very very frustrated right now. I've been applying to so many jobs, over 200 actually, and I haven't gotten any interviews. I'm graduating in three months, and I'm starting to panic. My family has spent so much money on this degree. I don’t want to graduate and be back home sitting around doing nothing.
Fatima: It sounds like you’ve put a lot of effort into your job search. I can imagine how frustrating it must be not to get the results you want and how it might be causing you some stress. I’d like to better understand your job search process. Can you share more about how you approach your applications?
Victor: Well, I made a resume and cover letter last month. I had someone review it, and they said it was good. So a few days a week, I search on LinkedIn, Jobberman, and Tech Cabal, and I drop my resume and cover letter to all the software development roles. I don’t really understand why I’m not getting interviews. I even just got a rejection less than 10 minutes ago from one remote job, with Newcastle Partners. It was a remote role for a Data Automation Analyst, and I really really wanted that job. I followed the resume template your office provided. Are you sure it was a good template? Because I don’t see how it could be if students like me aren’t getting jobs.
Fatima: I understand that you may have concerns about the resume template. Before we discuss that, can you walk me through your decision-making process when it comes to applying for jobs? How do you decide which positions to target?
Victor: I basically apply to any data analyst or software development job I come across, whether it's in healthcare, finance, or tech. I’m really trying to increase my chances of finding something. I can’t be too picky.
Fatima: I see. That's a broad approach. How do you decide which locations to apply to?
Victor: I've been applying everywhere. I figure I can move for the right opportunity.
Fatima: Being open to relocation is good, but you may want to focus on remote roles or locations where you can realistically move. Some employers may not be able to support relocation.
Victor: Well, if there aren’t jobs here and I want a job, what other option do I have? You guys told us to spend time applying, and so that’s what I’m doing. I’m just following instructions here. If the companies won’t give me a chance, maybe there’s something wrong with what the career service is advising or the companies process themselves. I’m really doing everything I can here.
Fatima: I understand you are trying. How do you go about matching your skills and experiences with a given job? Are you making your application align with what the employer is looking for?
Victor: Honestly, I haven't been doing that. There's too many jobs to apply for and too little time. I just figure they'll see my experience and know I'm a good fit. My skills will speak for themself.
Fatima: I see. Tell me, for most of the applications, how have you felt about your qualifications? Do you believe you’ve been a good fit?
Victor: If I’m being honest, almost all the jobs want you to have 2 years or more of experience, even the junior ones. So I’ve just applied to everything that’s junior or mid-level. I haven’t had the experience, but I built some cool projects for my portfolio. So I’m shooting my shot. I can do great in an interview and show someone it’s worth taking a chance on me.
Coach Victor
❓ Why do you think Victor is not getting responses from companies? Is there anything in his approach that may be contributing to this? Add your thoughts in Slack here.
Ownership Mindset
Getting Your First Job is Hard

Image source: Gagan Khatri
Getting an entry-level job can be tough. Many entry-level jobs require experience and so early job seekers feel like they are caught in a bind: without being given an opportunity to start, how does one gain experience? Situations like this can leave job seekers feeling frustrated and at the mercy of an impossible system.
🤔 So, what’s an entry-level job seeker to do?
One approach to navigating modern career development is to think like an engineer. Whether they are designing new buildings, electrical circuits, or software systems, engineers focus on solving problems. They use their technical knowledge, collaboration skills, and creativity to find solutions to complex problems. Navigating a career is a complex problem. One that calls for “career engineering.”
Getting Your First Job is Up to You
Becoming an effective career engineer requires taking an analytical and proactive approach to career development. While academic institutions, mentors, or others may provide support, you and you alone are responsible for your success.
📢📢 Let’s say it again louder for the people in the back: You and you alone are responsible for your success!
Reflect: What is extreme ownership?
Share your answers in Slack here.
Owning Your Career Development
Making Your Career Count
As children, many of us are asked: "What do you want to be when you grow up?"
This suggests that, even at a young age, we should be ready to commit to a career path. For most people, their first companies or jobs are not what they will pursue for most of their career. In fact, according to the US Bureau of Labor Statistics, most people hold an average of 12 jobs in a lifetime.
So, it’s important to remember that the aim is not to find the perfect internship or job you will have forever. Instead, the aim is to build skills, experiences, and a network that will help you thrive in the long term.
💡 The purpose of the professional development modules are to give you the skills to craft a meaningful career.
You’re More Ready Than You Think
📺 How does one craft a meaningful career? Read or listen to the tome below for a perspective from Reid Hoffman, serial entrepreneur/investor and founder of LinkedIn
Click this link to access the tome
Reflect: You’re More Ready Than You Think
Share your thoughts in Slack.
What is Career Development?
Hoffman describes a common experience that many people have after university. He thought he wanted to study philosophy, began a graduate program, then realized it was not the right path. This experience — of one’s first job not being the right fit — is quite common. When it happens, the first instinct is fear or worry about having made the wrong career choice. But, as we’ll learn throughout this course, choosing one’s career is not a one-time decision. Having many jobs roles or functions is a normal part of career development.
Before defining what career development is, let’s start with what it is not. There are a lot of misconceptions about what it takes to craft a rewarding career. For starters, career development is not:
- Deciding what you want to do for the rest of your life
- Applying for or getting a job
- Creating a rigid timeline and/or defined job progression for your career
💡 Career development is a lifelong, intentional process of managing one’s work and learning experiences. It involves continuously exploring, experiencing, and evaluating professional opportunities.

The illustration above breaks the career development cycle into four parts. Before we delve into each part, note that the image is cyclical. As the definition states, career development is a lifelong process that involves continuous action. The career development cycle includes:
- Know yourself: developing self-awareness and honestly assessing your interests, skills and values
- Explore options: understanding the workforce, market realities, and your opportunities to contribute
- Get focused: selecting specific goals to drive your action
- Take action: gaining experience and reflecting on that experience so that you can deepen your self-awareness
Four Ideas to Guide Career Development
By the end of this training course, we hope you will agree with four key claims.
1️⃣ Career success is a journey, not a single destination
Getting a job is a step towards building a career, not the ultimate goal. A successful career is an ongoing process marked by continuous adaptation.
2️⃣ Knowing yourself is the beginning of career wisdom
To achieve career wisdom, you must first know yourself. A fulfilling career is informed by a deep understanding of your values, interests, strengths, and weaknesses.
3️⃣ Your professional network will power future opportunities
Building and nurturing a strong professional network is crucial. Your network will be a source of opportunities, collaboration, and knowledge sharing. The connections you cultivate, starting with your peers, will significantly influence your professional growth and success.
3️⃣ Experience is the best teacher
In the early stages of your career, prioritize gaining diverse and relevant experiences. Actively seek opportunities that allow you to develop skills, explore different roles, and build a strong foundation for future career growth. As Hoffman notes, “In the world of work, you don’t know what the best plan is until you try.”
In the next lesson, we'll begin to explore how to deepen your self-awareness for career success.
Finding Your I: Strengths and Weaknesses
Taking responsibility for your career development starts with knowing yourself and having a realistic view of your abilities and potential. Self-awareness forms the foundation for informed decision-making and intentional career development. But what exactly is self-awareness?
💡 "Self-awareness" is the conscious understanding of oneself, including one's personality, emotions, values, strengths, weaknesses, and motivations.
Self-awareness is the foundation of personal and emotional intelligence. A self-aware individual can look at their own behavior, recognize patterns, understand how they impact others, and identify areas for personal goals. Being self-aware means engaging in continuous introspection in order to:
- Understand your thoughts, feelings, and behaviors
- Have a realistic and accurate perception of yourself
- Remain in tune with your emotions and reactions
Case Study: Kwame and Ama
Kwame and Ama, two ambitious computer science students at Kibo School, are interns at a tech tech startup. Both have excelled in their studies, possessing impressive technical skills and outstanding grades. However, the difference between them lies in their levels of self-awareness.
During the first week, they are each assigned a coding task to complete.
After reading the issue, Kwame realizes he doesn't fully understand the task. He seeks clarification from one of his colleagues, who then offers to walk him through the codebase on a Zoom call. With a strong understanding of what's needed, Kwame is able to fix the issue, and submit a pull request by the end of the week. He receives feedback from his supervisor with suggestions on improving his code. Kwame quickly implements these suggestions, and his pull request is merged into the codebase.
Ama takes a different approach. Though she also struggles to understand the task, she's determined to show that she can work independently. She spends a few days reading documentation and googling. She eventually starts writing code, though she still has gaps in her understanding. After submitting pull request, Ama receives a calendar invitation to speak with her team lead. She points out that Amas completely misinterpreted the task, and will have to redo the code. Ama is visibly upset, and doesn't understand why her supervisor is not praising her tenacity and time she spent figuring this out.
Throughout the internship, Kwame recognizes areas for improvement and invests time in continuous learning. Each week, he meets with a different colleague to share his questions, and learn from them. Kwame's internship experience is marked by steady progression, and he is quickly recognized for his contributions.
Ama, however, is determined to show her technical prowess. She works on all her tasks on her own, without "bothering" others with her questions. Though she is sometimes successful, she often submits work that misses the mark, which leads to frustrations from both colleagues and supervisors. Ama struggles to ask for and adapt to feedback, often dismissing it as unnecessary. As a result, she faces setbacks in her early projects, and her colleagues find it difficult to work with her.
Why Self-Awareness Matters in Career Development
As a university student navigating the job search, self-awareness is critical. Understanding yourself will give you clarity in the job search process and enable you to:
- Target your job search: with a solid understanding of yourself, you can tailor your job search and hone in on opportunities that resonate with your skills and aspirations. Instead of submitting a generic application, you can make a strong case for why a particular job or company fits into your future vision. You can also look for companies whose culture aligns with your personality and work style
- Tailor your application: with a deep understanding of yourself, you can tailor your application materials (e.g., resumes, cover letter, and interview responses) to showcase how you can uniquely and meaningfully contribute to potential employers
We’ll focus the rest of the lesson on building self-awareness by finding your strengths and weaknesses.
Your “I”: Understanding Your Strengths
📺 Watch the video below for an introduction to Strengths Finders (6:39)
Do: Take the Strengths Finders Test
📝 Register on the VIA website and take the strengths finder test here
Share your top 5 signature strengths in the Slack thread.
Understand Your Weaknesses
Understanding your strengths, what you offer, and what energizes you is critical to career development. In a similar manner, having a realistic view of your weaknesses will help you grow as a professional.
To identify your top 3-5 weaknesses, you can:
- Learn: Review this list** of common weaknesses. As you skim the list, take note if any resonate with you.
- Reflect: Take dedicated time for introspection. Reflect on your experiences, challenges, and areas where you feel less confident. Consider your performance in various situations and identify patterns of difficulty. Questions to ask yourself
- What tasks do you leave until last on your to-do list?
- What drains your energy?
- When do you have to ask for help?
- Get Feedback from Others: Ask someone you trust, e.g., a friend, family member or classmate, for constructive feedback. Others may provide valuable insights into areas where you can improve or where they've observed challenges in your performance. If you ask someone for their opinion, be open to constructive criticism.
- Analyze past goals: Review personal, professional, and educational goals you’ve set in the past. Identify if there are particular areas (e.g., skills, habits, mindsets) where you consistently face challenges or fall short
Keep a list of your top strengths and weaknesses. You’ll revisit them later.
Project: Personal SWOT
In this project, you will conduct a personal SWOT analysis and set goals to guide your career.
A Personal SWOT Analysis
📺 Watch the video to learn how to conduct a personal SWOT analysis (2:20)
Step 1: Create your personal SWOT analysis
You’ve already considered your strengths, weaknesses, and purpose. To finish your SWOT analysis, you will need to consider opportunities and threats, as described in the resources above.
To complete this project, make a copy of this template and add your SWOT analysis on page 1
Step 2: Goals
The final step of this project is to set short and long-term goals.
- Your short-term learning goals should describe your goals for the training period. Set concrete goals for what you want to accomplish by the end of the training
- Your short-term career goal should be related to the job or internship you aim to have after completing this training
- Your 5-year career goal should relate to your professional aims within 5 years of completing the training
📺 Watch the video to learn how to set SMART goals (4:08)
As you set goals, ensure that your goals are SMART i.e.
- Specific: What do I want to learn?
- Measurable: How will I know you have achieved my goal?
- Attainable: How will I do it?
- Realistic: How will I do it given my current responsibilities, needs, etc.?
- Time-Bound: When is the deadline to achieve my goal?
Here are some typical goals that a computer science student might set. For each goal, you will see a non-SMART version and a SMART version.
| Version 1: Non-SMART Goal | Version 2: SMART Goal |
|---|---|
| Improve programming skills. | Develop proficiency in Python programming language by completing an online course and taking HackerRank Python 1 certificate within 6 months |
| Do well in the AATP program | Achieve a "Meet Expectations" or higher in 95% of all AATP projects |
| Learn more about artificial intelligence. | Enroll in a course on artificial intelligence by the end of the year and complete at least one AI-related project. |
| Find an internship. | Secure an internship at a local company by submitting applications to at least five companies, attending at least 3 professional networking events, and building a portfolio of automation projects. |
Submission
Submit a link to your SWOT document here
Ensure the document is set to enable to comment. See below for a demo of how to change sharing settings.

Introduction
📺 Watch the video below to get an overview of the coming week. (1:27)
Objectives
By the end of this module, you will:
- Use Google Sheets to create charts and graphs that effectively communicate data insights.
- Choose the right visual formats for different data categories.
- Understand design principles for effective data visualization.
- Connect data to a front-end (Glide) and build an app with Glide.
Due this week
Motivation: Why data visualization?
Data visualization is a vital part of the business intelligence process that offers several benefits to businesses and stakeholders. It presents complex data in a visual format, making it easier to understand and identify trends and patterns. This helps businesses to make informed decisions, save time and resources, and communicate insights to stakeholders in a more engaging way. In summary, data visualization is an essential tool for businesses to optimize their operations and make data-driven decisions.
At Kibo, we have a few dashboards targeted to different stakeholders that give a snapshot into the academic performance and engagement of students. For example, course instructors have following dashboards:
- Attendance dashboard: to understand the rate at which students attend the weekly meetings.
- Assignments dashboard: to see students who are missing assignments and the overall grade distribution for the class.
- Class feedback: to understand what the most important things students learned in the week and how they feel about the course.
These dashboards serve as important tools in ensuring students' success and monitor the overall health of the courses.
📺 Watch this video by Bukola, a Data Analyst at Kibo, explaining the assignment dashboard and its importance. (2:26)
Importance of Dashboards
- Dashboards provide a visual representation of complex data sets in a simple and easy-to-understand format.
- They allow businesses and individuals to monitor key performance indicators (KPIs) and track progress towards their goals in real-time.
- Dashboards make it easy to identify trends, patterns, and insights that might otherwise go unnoticed.
- They enable quick decision-making by providing a snapshot of important metrics at a glance.
- Dashboards can be customized and filtered to meet the specific needs of different users.
- Dashboards are a powerful tool for improving productivity, increasing efficiency, and driving business success.
Project: Dashboarding with Google Sheets
Background
You have analyzed MavenFlix's subscription records and discovered customer patterns and trends. The team gained insights on subscription sign-ups, duration, and retention rates. Your supervisor wants to use this information for strategic decision-making and share findings with the CEO. You receive the email below from your supervisor.
The Email
Hello Ope,
Thanks for your analysis and report, that was super useful!
Building on the foundation you have laid, I believe it would be beneficial to translate your findings into a dynamic and accessible format for the team.
For this week, spend some time building a dashboard showing our key performance indicators from your analysis. Feel free to add additional data points that may be useful. The dashboard should give a user the ability to filter between time periods, so that we can track KPIs over time as we get more data.
Finally, record a video showing how members of the team can use the dashboard.
Please wrap this up by the end of the week.
Regards,
Bidemi
Deliverables
You are required to submit the following:
- A link to your dashboard in Google sheets
- A link to your video, hosted preferrably on YouTube or Loom.
Complete this form to submit your project.
Ensure the documents are set to enable to comment. See below for a demo of how to change sharing settings.

Learn to Build dashboards using Google Sheets
📺 Watch this video on how to create charts in Google Sheets and how to customize them. (21:05)
📺 Watch and follow along with this video on how to create a dashboard in Google Sheets. (41:58)
📺 Watch this video for practical tips and techniques for better data visualization. (9:51)
Additional Reading
Introduction to Glide
Glide is a platform that allows users to create mobile apps without any coding or programming knowledge. It is a no-code app builder that uses Google Sheets as one of its backend database services, making it easy to create apps that are connected to data sources.
Glide simplifies the app-building process by providing customizable templates and drag-and-drop components, making it easy to add features such as forms, user authentication, and more. With Glide, you can create apps that are optimized for mobile devices and can be shared with others via a link or QR code. Glide is a powerful tool that can help you bring your ideas to life in minutes.
📺 Watch this video about what Glide is. (1:30)
As an Automation Assistant, one of your primary responsibilities is to build systems and processes that help businesses streamline their operations. While database, survey, and automation tools are essential for this task, connecting data to front-end platforms such as Glide, WeWeb, or Bubble etc. is equally important.
Project: Build an App with Glide
Background
The CEO of MavenFlix wants to be able to see and monitor KPIs on the move with his mobile phone. You have been assigned a task by your supervisor, Bidemi, with the following details.
Task Details
In addition to the dashboard your are currently building, we want to be able to monitor the company's KPIs on-the-go. The team should be able to visit a link and see all the important information they need on a mobile device.
This platform will enable team members to have near realtime visibility of our KPIs even while away from their computers or out of the office.
I suggest that you investigate Glideapps for this task and implement accordingly. Ensure to record a video explaining how to use your app.
Please aim to wrap this up by the end of the week.
Deliverables
You are required to submit the following:
- A link to your Glide App
- A link to your video, hosted preferrably on YouTube or Loom.
Complete this form to submit your project.
Ensure the documents are set to enable to comment. See below for a demo of how to change sharing settings.
Learn Glide
A note on official documentations
Official documentations are a great way to learn new tools and software. They provide a comprehensive overview, step-by-step tutorials, troubleshooting guides, and are regularly updated. By using official documentations, you can quickly and efficiently learn new tools and software and start using them to achieve your goals.
📺 Watch this video introducing Glide and how to get started (6:39)
Introduction
🗣 "At the end of the day, why do we write, why do we speak? It is because there are ideas and things that we feel are important that we want to convey to someone else."
- Mehran Sahami
Writing Matters!
📺 Watch this video to learn why writing is essential for computer scientists and how writing can help improve the way you think.
There is a common misconception that writing is not an important skill for professionals in Science, Technology, Engineering, and Mathematics (STEM) fields. However, as mentioned in the video, technical professionals with poor writing skills often reduce the impact and effectiveness of their work. If no one can understand what you have done, the quality of your work can become irrelevant.
The technology industry is increasingly characterised by a global, distributed workforce. For example, suppose you are based in Nairobi and work with colleagues in California. The 10-hour time difference means that you will rarely have meetings and will instead rely on written communications to share information, give instructions, and build relationships.
Therefore, writing skills consistently top the list of skills employers look for in job candidates. Vivek Ravisankar, CEO of HackerRank, the market leader for technical interviews, notes that the shift to hybrid and remote work means that "writing is the most important new skill for tech workers, regardless of role." Technical professionals write every day, from sending emails to their colleagues to creating product manuals for customers to drafting technical reports that summarise the outcomes of their work. As such, writing well is a prerequisite for success in the Future of Work.
Learning Outcomes
This module aims to introduce you to practices of effective writing. After completing the module, you will:
- Assess the efficacy of your writing and identify areas for improvement
- Learn a framework for evaluating the quality of communication, and apply it to written communication
- Understand writing as an iterative process with clearly defined, sequential steps
- Draft a technical blog post to practice effective technical writing
Career Coach: Aisha
💡 Meet Aisha. Aisha is a final year student at Ko University with a passion for data. In addition to her university coursework, she's taken numerous online data courses. When Aisha hears about a Data Analyst internship at Newcastle Partners, she reviews the technical requirements and her qualifications are a great fit. The application requires submitting a resume and cover letter. Aisha hates writing, and she quickly cobbles together a cover letter to submit. Below is a copy of her cover letter.
Coach Aisha
❓ How would you rate Aisha's cover letter? What does she do well, and how could it be improved? Add your thoughts in Slack here.
Hiring Manager Feedback
Emily, the hiring manager at Newcastle Partners, is tasked with evaluating candidates for the internship. Her applicant tracking system shortlists 25 candidates based on their resume, including Aisha. Emily then reads and evaluates the cover letters for the shortlisted candidates. After reading Aisha's cover letter, she rejects her application. See below for Emily's notes on Aisha.
Feedback
Impersonal: generic, flowery language, maybe AI generated? Grammar: numerous grammatical errors, spells company name wrong and awkward sentence structure Research: does not seem to have done any research into Newcastle and what we do. This could be for any company.Writing Self Assessment
📺 Watch this video to learn how to reflect on your writing experiences and grow as a writer (11:06)
📝 Complete the following writing self-assessment and identify three writing development areas that you can focus on during this part of the course.
Evaluating Written Communication
Numerous frameworks have been developed to improve the effectiveness of written communication. One of these, the 7 Cs of Communication, was created with the professional context in mind.
📺 Watch this video to learn more about the 7Cs of communication.
Summary of the 7Cs of Communication
-
Clarity: Keep it simple
-
Conciseness: Get to the point
-
Concreteness: Be specific
-
Correctness: Be accurate and error-free
-
Coherence: Make it logical
-
Completeness: Include all necessary information
-
Courtesy: See things from the audience's point of view
Check Your Understanding
❓ Take this quiz to see how well you understand the 7Cs of Communication. There are 7 questions, so each of the 7 Cs will only be used once. If you think two of the Cs apply to a given description, select the one that you think is a more accurate fit.
Using the 7Cs
One of the best ways to improve your writing skills is to objectively evaluate your writing and the writing of others. In this section, you are going to use a checklist to assess some written communications.
Written Communication Evaluation Checklist
Below is a checklist for using the 7Cs of Communication to evaluate the quality of written professional communication.
Clarity
- Uses simple language, and avoids terminology that is not likely to be known to the reader
- Says exactly what it means without any room for ambiguity
- Individual sentences contain at most 1 or 2 thoughts
Conciseness
- Free from unnecessary words or paragraphs that do not add to the intended purpose of the message
- Conclusions and most important parts of the message are easy to identify
Concreteness
- Avoids the use of vague or ambiguous words (e.g. "several", "very", "quickly", "usually")?
Correctness
- Free from typographical and spelling mistakes
- Contains factually accurate information
Coherence
- Uses an appropriate organizing structure
- Leads with the most important points
- Follows a logical order, and uses transitions effectively
Completeness
- All arguments or claims are supported with appropriate evidence
- Includes all relevant information that the receiver would need to perform the intended action
Courtesy
- Acknowledges the reader by considering what the reader knows, what matters to them, and if they will understand the content and context of the message
Check Your Understanding
Written Communication Examples
Example 1
To know how to deliver messages clearly so as to stop the room for misunderstanding or alteration of messages, to learn how to solve the situation in a respectful manner, to know how to bridge the gap between individuals and groups through the flow of information and understanding between them and to learn how to provide good recommendations and suggestions especially when making decisions.
And hope to gain communications skills such as writing, listening, speaking and sign languages skills, create better relationships between individuals and groups and how to deliver messages clearly, also I hope to gain how to chair meetings in communication for success
Example 2
I am an accounting graduate and throughout my studies l never focused on communication skills assuming that all my communication will be through balance sheets etc. However to be a great accountant you need to be able to write reports that clearly explain what your financial reports mean to non accountants so opportunities are always offered to those with some communication skill as they are better able to produce quality reports. With this course l hope to first revamp my CV and present myself in the best light, improve my overal communication skills and be more marketable on the job market.
Example 3
Communication is essential in our living and daily activities, and must be prioritized.
Am applying because communication is part of human race and needs to be done well and in a right way, what I stand to gain is the required knowledge and skills in communication and impact generations, and promote businesses since it is fundamental in business world.
Example 4
As rightly said by James Humes, "The art of communication is the language of leadership", I strongly believe that, for me to make a difference in today's world as an upcoming Data Scientist, I need to learn how to communicate my findings, insights and thought appropriately. I believe, Communication For Success has all the required tools and resources to train to become a good communicator.
Again, Communication For Success presents a structured environment where I can consistently improve on my communication skills.
I hope to build my knowledge and skills in communicating appropriately as I improve to lead people in the Tech space.
Post your evaluation in this Slack thread. Include the example you are evaluating, e.g., "Example 3",the criterion you are using, e.g., "Coherence," and a brief evaluation of the example against that criterion.
Check Your Understanding
Now that you have evaluated some paragraphs, let’s practice evaluating writing at the sentence level.
❓Complete the quiz below. Each question of the quiz will ask you to select which version of a sentence you think is better. This will test how well you are able to evaluate some of the 7Cs, especially Clarity, Conciseness, Concreteness, and Correctness.
Improving Your Writing With the 7Cs
When you produce a piece of professional writing, use the criteria above to evaluate your own writing, and improve its effectiveness.
References
Romih, Tea. (2016). The 7Cs of Effective Communication Applied to Science
The Writing Process
Now that we have explored how to evaluate the quality of writing writing, let's explore how to write well. In particular, we focus on developing a writing process to produce effective writing.
Combating Writer's Block
Many of us experience paralysis at the beginning of the writing process, often termed "writer's block." What's going on in our heads when we struggle to write?
📺 Watch the following video to learn about the voices in your head that cause Writer's Block (3:14)
To best utilise each of these writing voices, it is helpful to use a standard process with deliberate steps that help get the most out of the madman, architect, carpenter, and judge at the appropriate time. This is called the writing process, and we will explore its steps in the next section.
The Writing Process
📺 Watch the following video on the writing process.
Exploring the Steps of the Writing Process
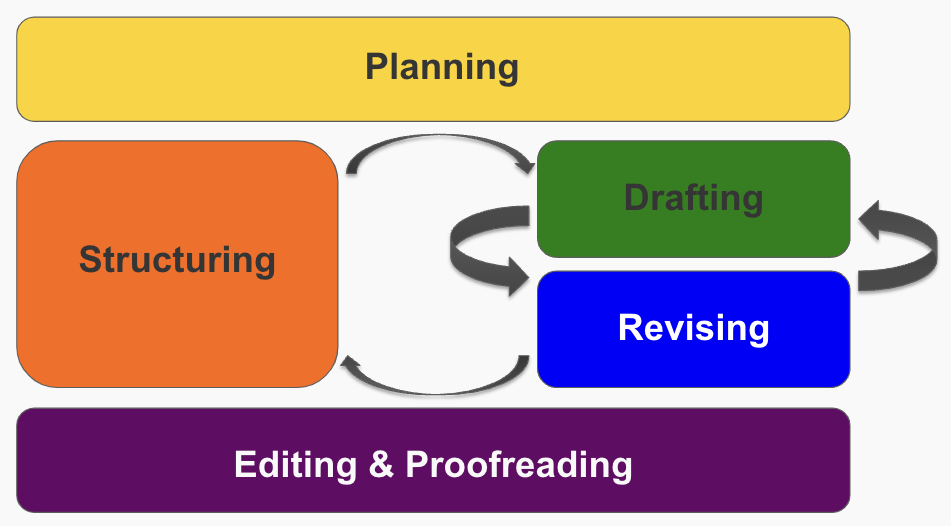
Similar to how communication can be broken down into steps, writing can also be decomposed into a sequence of actions. These actions allow a writer to efficiently navigate the journey from formulating an idea in their head to transmitting it effectively to an audience in written form. This writing process is made up of five main steps: 1) Planning, 2) Structuring, 3) Drafting, 4) Revising, and 5) Editing & Proofreading, shown in the image below.
-
Planning
The goals of the planning step are to 1) clarify the purpose of your writing, 2) think about who your audience is and how you can tailor your writing to them, 3) gather the information that you will need to support your purpose, and 4) identify the best channel to transmit your writing. Planning occurs before creating the content of your message.
-
Structuring
The goal of the structuring step is to determine how to organise your information to achieve your chosen purpose for your specific audience.
-
Drafting
The goal of the drafting step is to create the first draft of your communication.
-
Revising
The goal of the revising step is to evaluate your draft to see if it achieves your purpose. If not, you can revise the content until it does.
-
Editing & Proofreading
The goal of the editing and proofreading steps is to correct any remaining errors and finalise your text.
Why Use a Process?
It is helpful to separate writing into distinct steps. The alternative is an overwhelming writing method in which you are trying to remedy all writing issues simultaneously. For example, trying to draft text while thinking about the most coherent logical flow and paying attention to grammar and spelling errors. Unfortunately, this often leads to doing all the writing tasks poorly, or at the very least, inefficiently. Instead, when using this process, you can focus on the task at hand in each step.
The writing process pushes you to be intentional and focused in the way in which you write. For example, how often do you ask yourself what you want to achieve with a particular piece of writing before you start? The simple act of asking this question can significantly impact the effectiveness of your writing. Or, when you want to communicate something, how often do you stop to consider the best channel for your communication? Do you take time to think about who will be receiving the message and the impact that has on the message content? Starting with a planning step can help you consider these things first and avoid the communication barriers that result in miscommunications.
While planning before you start writing is excellent for setting your intention, sometimes even the best intentions do not go to plan. Therefore, having a distinct revision step allows you to review what you have written and compare it to your intention. You can ask yourself the question: Does what I have written achieve my purpose?
Finally, saving the proofreading step to the end is a great way to be more efficient. There is often no point in proofreading your text for perfect spelling and punctuation while writing because you might end up deleting whole sections of text that you have meticulously proofed. Therefore, view proofreading as the final polishing step that you use to remove any last distractions from your text. Modern technology also means that there are a variety of tools that you can use to help with this proofreading step, further freeing you to focus on the other more critical parts of the writing process.
You may have noticed that the Flowers Paradigm aligns well with this model of the writing process.
- During the planning step, you will wear your Madman hat for some actions.
- During the structuring step, you will wear your Architect hat.
- During the drafting step, you will wear your Madman and Carpenter hat.
- During the revising, editing, and proofreading steps, you will wear your Judge hat.
It is also helpful to think about the amount of time you should be spending in each of these phases. For example, if you have 1 hour to create and finalise a written text, you should ideally spend around 40% of the time in the Planning and Structuring stages, 20% of the time in the Drafting stage, and 40% of the time in the Revising, Editing, and Proofreading stage. However, as you personalise the writing process to suit your needs, you should adjust these distributions so that they make the most sense for you.
The writing is not linear. There will be a lot of back and forth between steps, especially between the organising, drafting, and revising as you try to ensure that what you have written achieves your purpose. This is also apparent with the arrows in the original diagram of the 5-step writing process.
🗣 "Too often, we make major communications decisions without thinking them through at all. Or we just say or write whatever first comes to mind...There are always choices to be made. The most effective [communicators] will make them quickly, but also wisely."
- Francis J. Kelly and Heather Mayfield Kelly
Perils of using AI in Writing
We’ve all been there. You are scrolling through the careers page of your dream company, and you see a role that is a perfect fit for your current skills and interests. You quickly click apply, and then you see a field that says: Upload Cover Letter (required).
😡 Your excitement vanishes. You feel betrayed. You think to yourself, “Why are they making me submit a cover letter? I don’t have time for this. This is too tedious. I’m just not going to apply.” Or you think to yourself, “Why are they making me submit a cover letter? I don’t have time for this. Let me just use ChatGPT, and it will write the letter for me. This will be good enough, and I will still be able to apply without going through the pain of having to write this stupid cover letter that no one is going to read anyway.”
Before you act on either of these thoughts, I want to caution you. If an employer is requiring that you upload a cover letter or they have included screening questions that require you to submit written responses to specific prompts, there is a reason these have been included in the application. The employer wants to get some valuable data from your responses to evaluate if you are a potential good fit for the role.
- If you see this as a deterrent, then the role and company probably aren’t a good fit for you because the actual job will require way more effort than answering a few questions or writing a cover letter. There is almost no job in the tech industry that doesn’t include a large amount of written communication. So if you are unwilling to demonstrate this minimal effort in the application stage, you are likely not going to keep up with the writing demands of the job.
- If you see this as an opportunity to use a Generative AI tool to do this writing task for you, be very careful. These writing tasks are a chance to showcase your unique experience and skills. Used poorly, the output of tools like ChatGPT is generic and easily recognizable, especially to someone who is reviewing tens, hundreds, or thousands of applications for a single role.
Let’s explore what can happen when a job applicant uses ChatGPT to answer screening questions.
Case Study: Using ChatGPT When Applying for an Operations Data Analyst Role at Kibo School
In mid-2023, Kibo School began recruiting for a new member to join the Data & Operations team. The initial application asked for basic demographic information, links to the candidate's LinkedIn and resume, and answers to a number of screening questions. The following two screening questions were specifically designed to assess 1) if the candidate might be a good culture fit, 2) if they have the relevant prior experience, and 3) if their written communication skills met our expectations:
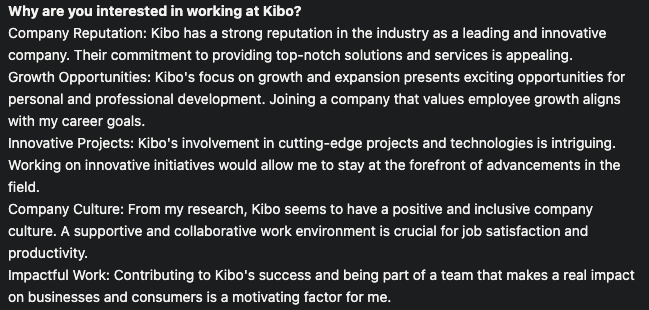
- Why are you interested in working at Kibo?
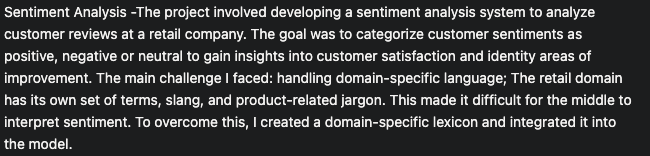
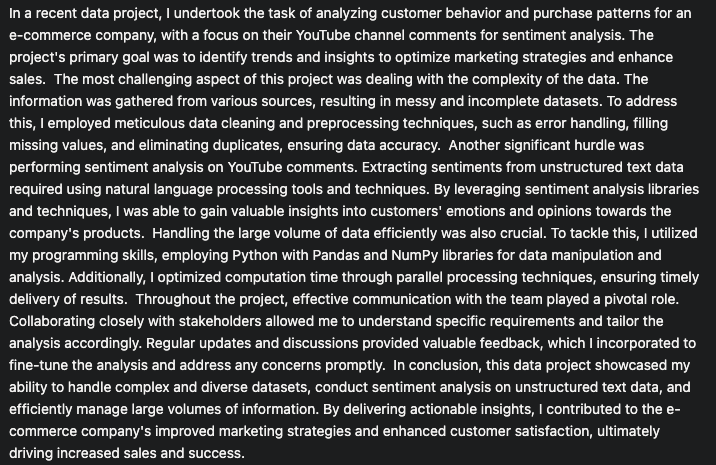
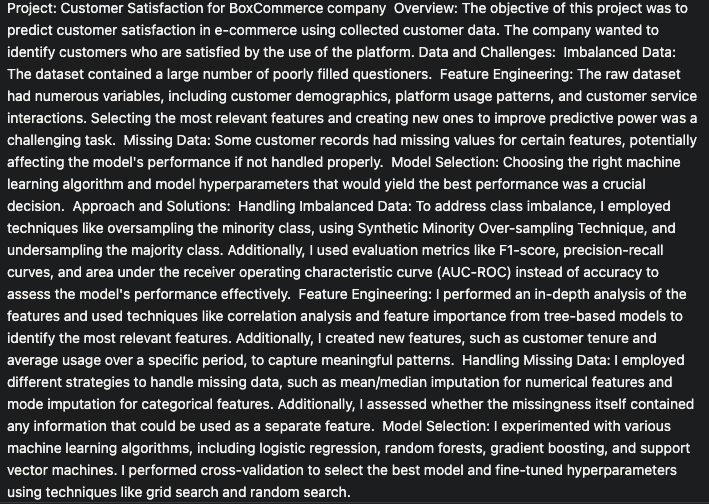
- Please share details about a recent data project you've worked on. What were the most difficult challenges, and how did you handle them?
Hundreds of applications were submitted each day, and a single hiring manager was tasked with reviewing them and identifying a shortlist of <10 candidates to move on to the interview stage.
Below, you will see some submissions that attempted to use ChatGPT (or another AI tool) to answer the questions for them. As you read through these examples, reflect on the mistakes that these candidates made and how their submissions were received by the hiring manager. Also, reflect on if you are able to tell that an AI tool was used to generate these responses.
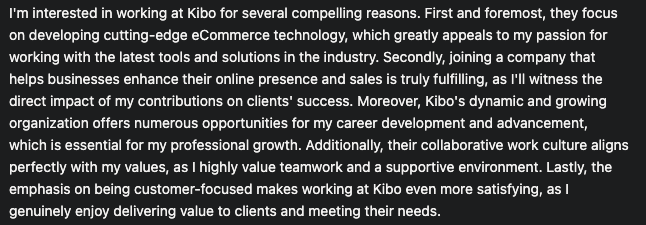
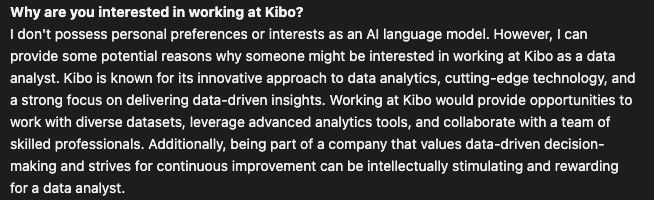
Here are some real submissions to the first question: Why are you interested in working at Kibo?

Here are some real submissions to the second question: Please share details about a recent data project you've worked on. What were the most difficult challenges, and how did you handle them?

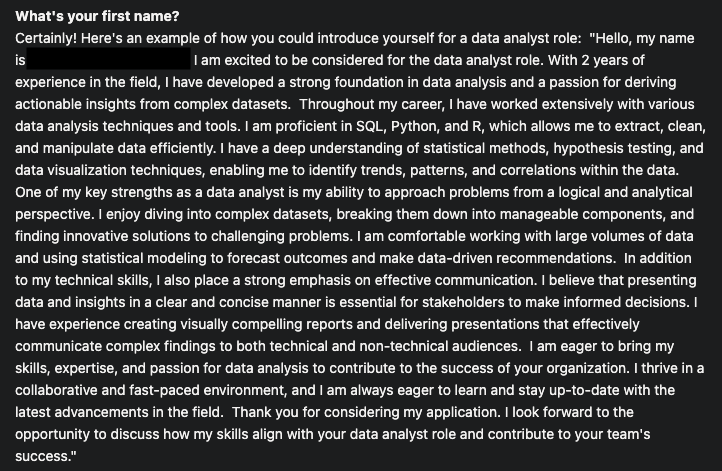
Lastly, here is a real submission to the question: What is your first name?
Discuss
❓ Reflect on the submissions given above and answer the following questions in Slack.
- What mistakes did these candidates make in their submissions?
- Just by reading the submissions, could you confidently determine that each of these submissions was made using an AI tool?
- How do you think the submissions were received by the hiring manager?
Dear ChatGPT-Wiz, Proceed With Caution!
After reading through the above examples, it’s tempting to think that these candidates are just not very skilled and they used AI poorly. You might think that you can get away with using AI because you are more skilled. However, unless you have the correct mindset around AI use (see below for more on this), it will be very easy to know that you have used it, and you will be severely disadvantaged. In fact, AI isn’t actually the issue. It has just worsened a job application issue that has been around for a long time: the need to stand out in an ocean of applications.
Top companies receive thousands of applications for each job posting that they put up. Back in 2019, Google received over 125,000 applications for its internship program (source). Back in 2019, there was no generative AI to help applicants write resumes, cover letters, or other application materials. Yet, the need to stand out from the crowd, be seen, and (most importantly) be remembered was critical.
Today, the number of people applying for each job or internship role is probably much higher than it was back in 2019. And worse still, a large majority are using the same AI-powered arsenal to spray and pray their applications across multitudes of roles and big and small companies. The result is that all candidates look the same. If you also employ AI tools, you will just blend into the vast applicant ocean with the rest of the candidates.
Worse still, if you use AI tools poorly, it sends a strong negative signal to employers that either your written communication skills are weak and you have to rely on AI written material, or you don’t have enough initiative or care enough about the role to write your own application materials yourself. This will make you stand out for the wrong reason and will result in instant disqualification from the hiring process.
Recognizing when AI has been used to write job application materials is surprisingly obvious. Especially to hiring managers who have been exposed to large numbers of these materials over their careers. Here are some tell-tale signs of AI use (in this case, we are focusing on cover letters). Full disclosure: this list was generated by ChatGPT 😉.
- Generic or Overused Phrases: If the cover letter contains generic phrases or clichés commonly found in template-based writing, it could suggest the use of automated assistance.
- Inconsistent Tone or Style: If there are abrupt shifts in tone or writing style throughout the cover letter, it might indicate the integration of different suggestions or paragraphs generated by an AI.
- Unusual or Excessive Jargon: The use of complex or industry-specific jargon that doesn't align with the candidate's background or the job description may be a red flag.
- Lack of Personalization: If the cover letter lacks personalization and doesn't address specific details about the company or job position, it might indicate a template-based approach, including AI-generated content.
- Unrealistic or Hyperbolic Claims: The presence of overly ambitious or exaggerated claims that seem out of place for the candidate's experience may suggest the influence of AI-generated content.
- Incoherent or Irrelevant Content: If the cover letter includes sections that are irrelevant to the job or industry, or if there's a lack of logical flow, it could indicate the incorporation of AI-generated text.
Even if you adapt the output of an AI tool so that your final document doesn’t suffer from the above tell-tale signs, remember that while you only see your submission, remember that a hiring manager or recruiter is viewing hundreds or thousands of submissions. Therefore, they can see patterns that emerge, indicating the wide use of AI tools by job applicants. Standing out is one of your key goals when applying for a job, and telling your story in a unique and authentic way is the greatest weapon you have to stand out. Don’t waste this opportunity to stand out and showcase yourself by relying on generic AI-written content. It will not help you land the job (or even an interview), and it will waste everyone’s time.
How to use AI in writing
AI can be useful in the writing process, but think of it as an assistant or editor, not the primary writer. There are a few ways to use AI effectively in writing process, including:
- Structuring advice: AI can be helpful to get ideas for various options to structure writing. For example, this prompt asks for inspiration on different ways to organize a cover letter
- Revising: AI can be helpful to give feedback on the quality of your writing, and/or suggest options for improving it. For example, you might give AI a copy of the 7Cs and ask it to point out specific areas your writing is weak or strong
- Proofreading: AI writing assistants like Grammarly can help proofread your writing, and ensure it is free of grammatical errors.
Again, think of AI as an assistant in your writing process, not the primary writer. A good rule of thumb is to never ask AI to write your first draft. Embrace your inner Madman and put your thoughts on paper first!
Project: Technical Blog Post
In this project, you will write a technical blog post. Your post should be a "how to" on any technical topic (e.g., how to build an app using Google Sheets and Glide.) Assume the audience of the blog post has basic technical proficiency.
Your blog post should:
- Be 1000 - 1500 words
- Persuade, i.e., convey information and convince the reader to use your tool
- Inform, i.e., provide the reader with helpful knowledge and insight
- Instruct, i.e., teach the reader how to do something or provide them with the information they need to complete a task
Tips
- Read this article to get some guidance on writing a great technical blog post. You don't need to worry about publishing or promoting your blog post for this assignment, so you can skip over those sections of the article.
- Refer to the steps of the writing process in creating your blog post
- After finishing your blog post, use an AI tool of your choice (e.g., ChatGPT, Gemini, Claude) to evaluate your writing against the 7Cs.
- Based on the AI feedback, revise your blog post.
Submission
You will submit the first draft, the link to the AI prompt and feedback, and your blog revision
Complete this form to submit your projects.
Ensure the documents are set to enable to comment. See below for a demo of how to change sharing settings.

Introduction
"The only person you are destined to become is the person you decide to be."
- Ralph Waldo Emerson
You've set an ambitious goal: to become "well-read." Luckily, you are on the campus of a world-class university, with access to a renowned library. Fired up with excitement, you walk in on the first day, elated by the floor-to-ceiling treasure trove – history, philosophy, fiction from every corner of the globe. Eager to devour it all, you grab books at random, from biographies to travelogues. Back at your table, you go from book to book, captivated by interesting snippets. At the end of a 5-hour marathon "reading session," you are exhausted. You've exerted a lot of effort, but remember very little. As you walk by to your residence hall, you are tired and frustrated. Your mind starts to doubt the entire effort: who cares about being well-read anyway? Aren't there more important goals -- like being able to build things or having close connections? How would you even decide which books are good or bad to read. Abeg, let's rest and watch a bit of Tik Tok.
You can probably identify the flaws in the above approach. Who walks into a library without a plan? Who reads for 5 hours straight without pausing to reflect and take notes, etc.
Still, many of us approach our learning and career in a similar, haphazard manner. In short, we lack self-management.
Self-management is the ability to control your thoughts, feelings, and behaviors to achieve your goals.
📺 Watch this video to learn for an overview of self management (1:32)
Learning Outcomes
This module will equip you with self-management skills and practical tools to navigate academic and professional challenges. After completing the module, you will:
- Understand why self management matters for academic and professional success
- Understand three key components of self-management: self-awareness, time management, and goal setting
- Understand the basics of project management
- Demonstrate the ability to break down large projects into smaller, manageable tasks
Case Study
Meet Idris. Idris is a final-year student at the University of Jos, Nigeria, majoring in Business Administration. Known for his academic diligence, he has applied for a remote internship at Newcastle Partners, a consulting firm based in the UK. Idris diligently crafted his application: he adapted his resume to highlight data analysis projects, and spent a few iterations writing and revising his cover letter. He is excited to receive an email with an invitation to interview.
The Day Before the Interview
As the interview approached, Idris found himself increasingly anxious. He struggled to concentrate on his studies, and despite his attempts to prepare, his mind kept wandering to worst-case scenarios. Though he'd done some interview practice, he still felt unprepared the night before. He couldn't fall asleep, and instead spent the night wide awake, going over each potential question again and again, and doubting his abilities.
The Day of the Interview
On the morning of the interview, Idris woke up feeling tired and nervous. He rushed through his morning routine, and skipped breakfast.
Idris had noted the interview time in his planner, but in his frazzled state, he misread it. The interview was scheduled for 2:00 PM BST (British Summer Time), which translates to 2:00 PM WAT (West Africa Time) due to the same time zone in effect during summer. However, Idris mistakenly thought there was a time difference and believed the interview was at 3:00 PM WAT.
Unaware of his mistake, Idris decided to do some last-minute preparation. He lost track of time and failed to set any reminders, which resulted in his starting his setup only a few minutes before 2:00 PM WAT. When Newcastle Partners called a few minutes after 2pm to confirm he could still join the call, he was caught off guard.
Flustered and unprepared, Idris rushed to login to the Zoom call. He appeared frantic to the interviewers, and apologized profusely for being late. They were understanding, and asked if he needed a few minutes to get ready. Not wanting to waste any more time, Idris said he was ready to begin.
They begin by asking Idris to introduce himself and, still a bit flustered, he rambled for a few minutes. The interview continued in a similar manner, with Idris often going off on tangents or providing incomplete answers. Sensing that he was not doing well, Idris fidgeted, avoided eye contact, and his voice quivered. When asked about his strengths and weaknesses, he focused more on his weaknesses, reflecting his current lack of confidence. He failed to highlight his skills and achievements effectively, leaving a negative impression on the interviewers.
Coach Idris
❓ Where did Idris go wrong in preparing for the interview? What mistakes did he make that contributed to his interview performance? Add your thoughts in Slack.
Self Awareness
🗣 Self-awareness is the ability to take an honest look at your life without any attachment to it being right or wrong, good or bad.”
- Debbie Ford
In the introduction to this module, we shared the following definition:
Components of Self-Management
Let’s delve deeper into this definition by exploring three components of self-management: self-awareness, time management, and goal setting.
Self-Awareness
To effectively control your thoughts and feelings, you must first recognize them. Thus, self-management starts with understanding your thoughts and feelings. This foundational step is known as self-awareness.
Time Management
To control your behavior, you must regulate how you spend your time. Thus, self-management requires thoughtful time-management. By mastering time management, you can ensure that your actions align with your priorities and goals.
Goal Setting
The ultimate purpose of self-management is to achieve your goals. This means having clear, articulated goals that guide your efforts and focus. Without well-defined goals, it’s difficult to channel your energy productively.
By understanding and applying these three components — self-awareness, time management, and goal setting — you can enhance your ability to manage yourself and achieve your personal and professional objectives. In the lesson on ownerships, you completed a project to identify your strengths and weaknesses, and set SMART goals. The lessons in this module will focus on self-awareness and time management, but be sure to review your project if you want a refresher on goal setting.
First, we begin with a detailed look at self-awareness.
Self awareness in Action
Self-awareness is the foundation of self-management. Without it, you won't understand your emotions, inclinations, and preferences. Cultivating self-awareness helps you grasp your motivations and the emotions that affect your performance.
Being self-aware means having a clear picture of your thoughts, feelings, values, and motivations. It’s understanding how these elements influence your behavior and decisions.
📺 Watch this video on what self-awareness is and why it is important (5:24)
Discuss: Benefits of self-awareness at work
❓ The video shares several benefits of self-awareness at work (e.g., fosters empathy). Which of the benefits of self-awareness particulary resonate with your experience, and why? Post your answer in Slack
How to Improve Your Self-Awareness
📺 Watch this video on improving your self-awareness (6:23)
One of the suggestions in the video for improving self-awareness is to use mindfulness meditation. Let's try it out.
📺 Watch this video below for a brief meditation practice
Discuss
❓ What did you think of the meditation practice? Did it change or impact your feelings in the moment (it's ok if the answer is 'no' - be honest!). Post your answer in Slack.
Self Awareness: Time Management
In the previous lesson, we learnred that self-management requires controlling your behavior. There is a direct link between your behavior and how you spend your time.
Many people struggle with time management, and it can have a significant impact on your ability to perform well. In this lesson, we'll explore some common time management challenges, as well as tools that can help you improve your ability to manage your time.
Introduction to Time Management
📺 Watch the following video for an introduction to time management
Common Time Management Challenges
📺 Watch the following video to learn about some common time management mistakes.
Reflection: Time Management
- Take the time management quiz by Mindtools here.
- Reflect: was your score what you expected? How would you rate your time management? What tools or techniques have helped you improve this skill?
Beating Procrastination
Procrastination is one the habits that gets in the way of effective time management. Most of us procrastinate from time to time. But, it's dangerous when this becomes a regular habit.
📺 Watch the following video on the effects of chronic procrastination (3:21)
Improving Your Time Management
Now that we've learned more about some some time management challenges, let's explore some tools and techniques that you can implement to improve how you use your time. We will look at:
- The Eisenhower Matrix
- Calendaring and Planning Your Time
- Time Blocking
- The Not To Do List
Eisenhower Matrix for Prioritization
📺 Watch the following video on how to use the Eisenhower matrix to prioritize.
The Art of Calendaring
📺 Watch the following video on the art of calendaring
Time Blocking
📺 Watch the following video on time blocking.
The Not To Do List
📺 Watch the following video on how to use a Not To Do List to help manage your time
Practice
Learning about time management is not enough! You must actually put the tips into practice. For the next week, pick one of the four practices above (e.g., The Not To Do List) and incorporate them into your routine.
Using Calendars at Work
Modern workplaces are fast-paced, and increasingly remote. Professionalism requires not just making efficient use of your own time, but also respecting the time of your colleagues. One of the most effective ways of doing this is to optimize your use of calendars at work.
Using a calendar effectively helps you organize your time, avoid conflicts, and demonstrate professionalism. When you regularly update and consult your calendar, you can plan and prioritize efficiently. This ensures that you allocate appropriate time for important meetings, deadlines, and other commitments, reducing the risk of double-booking and last-minute rushes. Additionally, a well-maintained calendar reflects your reliability and commitment, enhancing your professional image.
Below are some tips for using calendars effectively at work.
Respond to Calendar Invitations
Responding to calendar invitations in a timely manner is a fundamental aspect of professional etiquette. When you receive an invitation, check your availability and respond as soon as possible. This helps the organizer confirm attendance and make necessary arrangements. Use your calendar's options to accept, decline, or mark as tentative based on your availability and priorities. If you need to decline, it’s courteous to provide a brief explanation or suggest alternative times.
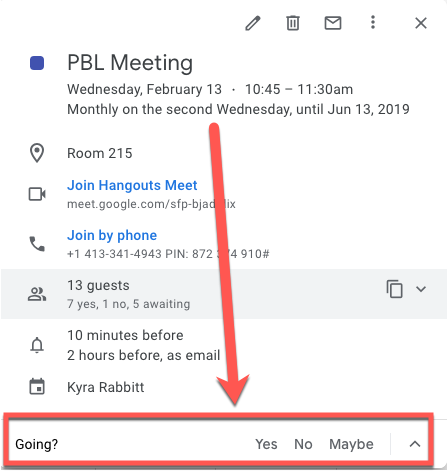
Check availability when scheduling meetings
Before scheduling a meeting, use your calendar to check the availability of all invitees. This minimizes scheduling conflicts and shows respect for others' time
Include clear meeting titles and an agenda
📺 Watch the following video on writing clear meeting invites (2:06)
Respect time
Punctuality is crucial. Start and end meetings as scheduled to respect everyone's time. Also, try to avoid rescheduling meetings at the last minute unless absolutely necessary. Sudden changes can disrupt participants’ schedules and reduce productivity.
Use recurring meetings when appropriate
If the same group needs to meet regularly, set up recurring meetings. This helps in long-term planning and ensures consistency in discussions and follow-ups.
Introduction to Project Management
As you have explored throughout this module, self-management is an essential skill that encompasses self-awareness, time management, and goal setting. These foundational elements enhance your personal and professional effectiveness by allowing you to regulate your emotions, manage your time efficiently, and stay focused on your objectives. However, achieving significant goals often requires more than just managing yourself—it requires the ability to execute on your goals in a coordinated and systematic way. This is where project management comes in.
Project management involves organizing, planning, and overseeing tasks and resources to achieve specific objectives within a given timeframe. It goes beyond personal goal setting to include team coordination, resource allocation, risk management, and effective communication. By mastering project management, you can apply your self-management skills on a larger scale, ensuring not only your own productivity but also the successful execution of complex projects. In these final lessons, we will build on the principles of self-management to equip you with the tools and techniques needed for effective project management. You will gain skills to execute projects successfully and turn your goals into tangible outcomes.
What is Project Management?
📺 Watch this video for an introduction to project management (7:08)
Project management is the process of planning, organizing, and managing resources to achieve specific goals and objectives within a specified timeline. This process involves breaking large projects into subtasks or sub-projects and time planning.
Large projects can be overwhelming and difficult to manage, but breaking them down into smaller, manageable tasks or sub-projects can make them more manageable. This process involves identifying the dependencies between the different parts of the project and creating a timeline for each part.
Time planning helps ensure that the project is completed on time and within budget, and it also helps identify potential delays or issues that may arise during the project.
Project management methodologies
These are frameworks that provide a set of guiding principles and processes to manage projects effectively. Some of the most popular project management methodologies include Agile, Waterfall, and Scrum.
-
Agile methodology is an iterative approach that involves breaking down a project into small, manageable pieces, and delivering them in short cycles. A popular subset of Agile methodoly is Kanban, which uses Kanban boards to visually represent stages of work.
-
The Waterfall methodology is a sequential approach that involves completing each phase of the project before moving on to the next.
-
Scrum methodology is a framework that focuses on delivering value to the customer by breaking down work into small, actionable tasks.
These methodologies provide a set of guiding principles and processes that help teams manage projects effectively.
Kanban boards
Many teams use project management tools to implement their methodology. Popular project management tools include Trello, Asana, JIRA, Monday, etc. These tools provide a platform for teams to collaborate, communicate, and manage tasks and projects effectively. Most of these tools support the use of Kanban boards.
Kanban is a methodology that focuses on the flow of work and visualizing the work process. A Kanban board is a visual representation of the work process that includes columns for each stage of the process. Each task or item is represented by a card that is moved from one column to the next as it progresses through the work process. Kanban boards can be used to manage tasks and projects effectively by providing a clear visual representation of the work process and the status of each task.
Learn More
- Read more about the differences between project management methodologies on Asana
- Learn more about project management by enrolling in Google's Project Management certificate on Coursera
Project Management with Trello
Trello is an example of a Kanban board that can be used for project management. Trello is a popular project management tool that uses a visual approach to project management. Trello's boards, lists, and cards provide a visual representation of the project's progress and status. Each card represents a task or an item that needs to be completed, and the cards can be moved from one list to another as they progress through different stages of completion.
📺 Watch this video by Bidemi, explaining what Trello is and how to use it. (10:49)
📺 Watch this video for more information on how to use Trello (12:13)
Read the official documentation of Trello
Task: Setting Up Your Trello Board
You have all been added to various Google groups, each representing a distinct team; more information about the teams can be found here. An invitation email to your team's Trello workspace has been sent to your email inbox. In the email, click on "Go to Workspace", this will take you to the Trello workspace for this program. Click on Google to login with your Google account - ensure to use email account you applied with.
Once logged in, you will be brought to your team's Trello workspace interface (Watch this video to understand how to navigate the interface). Here, you should do the following:
- Create a new board
- Name it after yourself e.g, Bidemi Dairo's Board. If it is a team project, Team Name: Project Title.
- Set the visibility to Workspace
- On creation, you will be brought to your board with lists; "To Do", "Doing", and "Done" created. Feel free to rename the lists
- Start tracking your projects with Trello
Introduction
📺 Watch the video below to get an overview of the coming week. (1:11)
Instructions
- Find and get in touch with your teammates from the table below
- Choose a team lead
- Create your project's Trello board
- Assign tasks to members of the team
Teams
| Team Name | Team Members |
|---|---|
| Team A | Ashara Chidubem, Ibukunoluwa Ariwodola, Chijama Uchechi, Meshack Korir, Wawira Mercy |
| Team B | Alabi Ayomide, Nafisah Adams, Diana Muiruri, Richard Coker, Nurdin Idris |
| Team C | Adeniyi Oreoluwa, Lucy Kendi, Eze Victory, Mbuthia Esther, Tolulope Abolade |
| Team D | Davy Juniour, Nwafor Samuel, Babubakri Bello, Omowunmi Oluwole-Denton, Joram Nyamawi Mwanyika |
| Team E | Feyishara Bamigboye, Moses Bankole, Sarah Solarin, Chukwudi Nwuju, Uzoamaka Anyaegbuna |
| Team F | Busolo Wendy, Marnin Audu, Adejoke Olaosebikan, Chinedum Okpechi, Ian Munai |
| Team G | Regina Wakari, Laurette Ibekwe, Princewill Onyekah, Samuel Gicheha |
| Team H | Akindele Juwon, Emmanuel Adepoju, Caleb Kegera, Rita Okonkwo |
Presentation
- Tuesday, May 28, 2024, 11 am - 12:30 pm GMT: Teams B and D. Link
- Wednesday, May 29, 2024, 11 am - 12:30 pm GMT: Teams C, E, and G. Link
- Wednesday, May 29, 2024, 1 pm - 2:30 pm GMT: Teams A, F, and H. Link
Note: Presenters will be chosen at random and their performance will determine your performance evaluation for the week, so ensure to carry everyone along and immerse yourself in the team project.
Objectives
By the end of this week, you will:
- Collaboratively work in a team to achieve a goal.
- Complete a data analysis project.
- Use Trello to track projects and assign tasks to team members.
Due this week
Project: United Superstore Performance Analysis Report
United Superstore, a prominent online retail company, has reached out to your team as a contractor to carry out a performance analysis of all their stores across the United States of America. You’ve been provided with the following project document:
Project Overview
Client: United Superstore
Project Name: Comprehensive Sales and Profit Analysis for Business Expansion
Project Introduction:
United Superstore, a prominent online retail entity established in 2014, has been on a trajectory of substantial year-to-year growth in sales. Recognizing the potential for further expansion, key stakeholders have decided to venture into the physical retail space by establishing large store chains in strategically selected cities across the United States.
Project Background:
The decision to expand was made during the end-of-year strategy session in 2014. The focus is on opening physical stores in cities with the highest sales within their most successful states. To ensure the success of this expansion, a comprehensive analysis of sales and profit data is crucial. This analysis will provide valuable insights into the overall performance of different states, guiding strategic decisions for successful business growth.
Project Objectives:
The primary objective is to conduct an in-depth analysis of sales and profit data, addressing key performance indicators (KPIs) to assess the overall performance of various states. The insights gained will inform decision-making for the expansion strategy.
Analysis Focus Areas:
- Year-on-Year Growth in Sales
- Sales Performance Across All States
- Product Performance in States
- Average Order Value
- Profit Margin
- Average Delivery Timeline
- Total Quantity Sold
- Total Profit
Business Questions:
The analysis will answer critical business questions to guide strategic decisions:
- What are the top three selling states, and how do these states perform in terms of profit, quantity sold, and the number of customers?
- Within the top-selling states, which are the top two cities in terms of sales performance?
- What is the average timeline for delivering products to customers, ensuring efficient logistics?
- Identify the top-performing product categories and subcategories in the top three states and cities, providing insights for targeted marketing and inventory management.
Expected Deliverables:
- Comprehensive report detailing the analysis of key performance indicators.
- Recommendations based on the analysis to guide strategic decision-making for the business expansion.
- Visual representations of data through charts and graphs for easier interpretation (a dashboard).
- An app showing key performance indicators and trends for use on the go.
Timeline:
The project is expected to be completed on May 24, 2024, to ensure timely and actionable insights for the business expansion strategy.
Data:
Make a copy of the provided data
Deliverables
- Data Analysis Sheet
- Analysis Report
- Dashboard
- Glide App
Submission:
Complete this form to submit your project.
Ensure the documents are set to enable to comment. See below for a demo of how to change sharing settings.
Additional resources
📺 Watch this video on an end-to-end data analysis project. Note that this is done in Microsoft Excel but it follows the same principle. (40:49)
Introduction
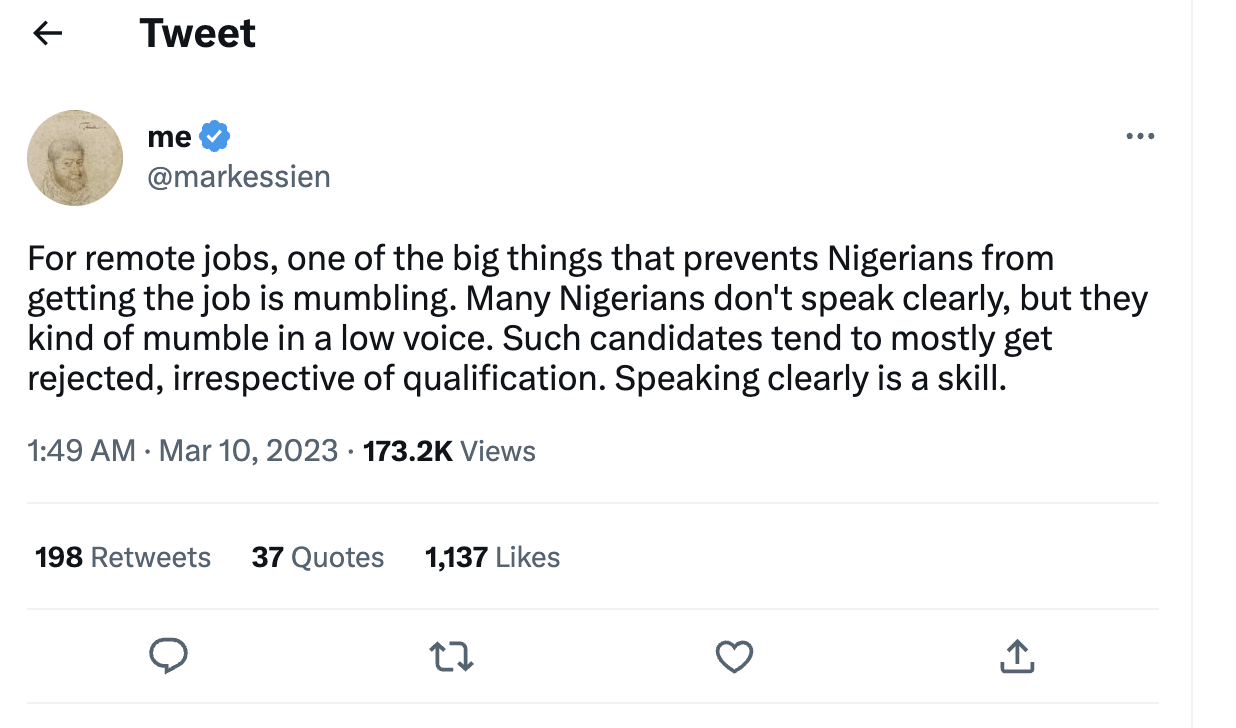
The tweet above was shared by Mark Essien, the founder of Hotels.ng and the HNG internship program, which has engaged tens of thousands of Africans in learning tech. While the tweet represents one person's opinion and may not be true of all Nigerians or all Africans, it underscores an important message: speaking well matters, especially in the context of remote work and collaboration. And speaking well is not only about choosing the right words. Ensuring your spoken communication has the intended impact requires delivering those words in the appropriate virtual environment, using appropriate tone, and order.
Learning Outcomes
This module will help you practice speaking clearly and with confidence. After completing the module, you will:
- Recognize the three components of clear and effective speech
- Develop skills to create engaging and memorable self-introductions
- Identify key elements of strong visual presence, and apply techniques to improve your virtual presence
- Develop and deliver concise and compelling elevator pitch
Case Study
Meet Cristiana. She is a 500-level student in Engineering at Imo State University who has been selected for a 2-month remote work trial with Newcastle Partners, a prestigious consulting firm in Bristol. Alongside three other candidates, Cristiana is vieing for a permanent position.
The interns are supporting Newcastle Partner's work on a proposal to lead the design of a new city park. During the first week, Cristiana and her peers are asked to read a report on potential locations for the park. Cristiana reads the report carefully, taking detailed notes of its recommendations and her questions and opinions.
During a discussion of their reading, the manager Michael asks each person for their impression. When it's Cristiana's turn to speak, she shares her opinion in a low and mumbled voice. Throughout the conversation, when asked for her insights, she speaks so softly that Michael and peers frequently ask her to repeat herself. Her points are sometimes lost in the confusion, and the team struggles to gauge her understanding and contributions. She only speaks when asked, so she is an infrequent participant in the conversation.
Michael assigns Cristiana and another intern Emeka to collaborate on a deep-dive into one of the potential locations, and report their findings the following week. When Cristiana and Emeka get on a Zoom call to collaborate, he finds it difficult to work with her effectively. Though her video is on, she avoids eye contact and looks away from the camera. When it comes time to present to Michael, Cristiana relies heavily on her notes, and reads through her portion of the presentation.
After a couple of weeks, Michael decides that Cristiana's communication skills are too significant a barrier to her effective performance. Though her technical analysis has been strong, she is holding back team discussions and synthesis. Plus, he has concerns about how she would perform in client-facing meetings. At the end of the third week, Michael explains these issues to Cristiana and asks her to leave the program.
Cristiana is shocked at this outcome, and cannot understand why it happened. She has worked diligently, and her analytical skills match or surpass those of other interns who remain.
Coach Cristiana
❓ Imagine you are Cristiana's friend and she explains the situation and her shock at the outcome. What would you tell her? Add your thoughts in Slack
How to Speak Well
Speaking is the process of communicating through spoken language. It involves using one's voice to convey a message to an audience, typically in the form of words and sentences. But, speaking is more than just saying words. Speaking well requires considering the needs of the audience, choosing the right words and tone of voice, and organizing the message in a clear and logical way. There are three important components of speaking well:
- The words that you use. (The verbal message)
- How you say those words. (Vocalics = The vocal nonverbal message)
- Your body language and other nonvocal nonverbal cues.
📺 Watch the video below to learn more about verbal and nonverbal communication, and how they interact (11:39)
Let us explore each of the three aspects of speaking introduced above so that you can feel more confident in achieving your speaking goal of ensuring your message is accurately heard, understood, and acted upon.
Your Words (The verbal message)
When you are speaking with other people, you should know what you want to accomplish (i.e., your purpose) and to whom you are speaking to (i.e., your audience). Ensure the words you select will be understood by your audience and serve your purpose. As with writing, selecting the correct level of formality is important. Ensure you use the appropriate level of formality based on the purpose, audience, and context of your spoken interaction.
Speaking with Clarity
📺 Watch this video for tips for improving the clarity of your speech, especially in professional settings.
Speaking Concisely
📺 Watch this video to learn how to be clear and concise in your speaking
Step 1 - What - What's your main point?
Step 2 - So What - Why is it important?
Step 3 - Now What - Based on the above, what are the next steps?
How you speak (Vocalics = The vocal nonverbal message)
While words are an important part of speaking, they account for less than 10% of the meaning that people attribute to our message. Vocalics (the vocal but nonverbal message) account for around 40% of the meaning, and body language and other nonvocal nonverbal cues account for over 50% of the meaning that is made.
📺 Watch this video to learn more about nonverbal communication.
Here is a summary of the types of nonverbal communication:
| Name | Type | Description |
|---|---|---|
| Vocalics | Voice | Vocalized nonverbal components of speech |
| Kinesics | Body | Body movements and posture |
| Haptics | Body | Touch behaviors that convey meaning |
| Proxemics | Body | The use of space and distance within communication |
| Chronemics | Other | Influence of time on our communication |
Your Voice
📺 Watch this video on how to speak so others will listen (9:59)
📺 Watch this video to learn how to eliminate verbal fillers (10:02)
Here is a summary of some of the tips mentioned in the video:
- Get comfortable with silence
- Record yourself speaking
- Replace filler words with "period" or "pause"
- Stop and take a breath
- Name them and shame them
- Filler word bell
- Chunk your information
- Make eye contact
- Calm your nerves
- Use gestures
- Keep your sentences short
- Preparation and practice are key
- Realize you are your own worst critic
Your body language and other nonvocal nonverbal cues
Finally, to finish this lesson, let's explore body language and nonvocal nonverbal cues. Remember that these cues account for the majority of meaning that people take away from your spoken communication.
Body Movement (Kinesics)
📺 Watch this video to learn more about body language in video calls (2:52)
Pratice
💡 Record yourself spontaneously speaking in front of your camera about a topic of your choice. After you are done recording, re-watch the video and pay close attention to your voice, speech clarity, language fillers, and body language (hands, eye movement, and how you move in your physical space).
❓What patterns did you notice when you were speaking? What would you keep, and what will you improve? and why? Add your thoughts in Slack
Powerful Introductions
Meet John
John, a 1st-year computer science undergrad from Nairobi, nervously settled into his study space for his first Zoom interview. His heart pounded as he checked the lighting, tested the audio, and adjusted the angle of his webcam. He wanted to make sure he looked and sounded his best for the interview. He joined the call and came face to face with his interviewer, Peter.
Peter greeted him with a friendly smile and gave him context about the structure of the interview before diving into the inevitable opener: "Tell me about yourself."
John felt a mixture of anxiety and excitement. It was the kind of question he'd rehearsed countless times in front of the mirror, but now, facing a real interview, the words seemed to slip away. Taking a deep breath, he leaned forward and began to speak.
"Well, I'm a first-year computer science student at Kibo School of Technology. I've always been fascinated by how technology can solve real-world problems. Growing up, I spent hours tinkering with computers, trying to understand how they worked. That curiosity led me to pursue computer science as my major."
As he spoke, John could feel the tension easing. He continued, "During high school, I participated in coding competitions and even developed a simple app that helped local businesses keep track of their inventory. It wasn't anything groundbreaking, but it taught me the value of practical solutions." The interviewer nodded, encouraging him to go on.
"On campus, I've been involved in a few coding projects with my peers, and I've also taken on a role in a student tech club. It's been a great learning experience, collaborating with others who share my passion for technology. I believe that this combination of hands-on projects and teamwork has honed my problem-solving skills."
John paused, briefly reflecting on his journey so far. He then concluded, "In essence, I'm a driven and curious individual, eager to contribute my skills and learn from the industry. I'm here to absorb as much as I can and make a meaningful impact."
The interviewer appreciated John's candid response. "That's great to hear," they said, genuinely impressed. "Tell me about a specific project or challenge you've faced and how you tackled it."
As the conversation flowed into more technical details, John felt a sense of confidence building. The nerves of the initial question had faded, replaced by the enthusiasm to share his experiences and knowledge. The interview became a genuine exchange, and by the end, John couldn't help but feel a sense of accomplishment. The simple, honest approach to "tell me about yourself" had set the tone for a successful interview, showcasing both his passion for computer science and his ability to articulate it under pressure.
When searching for a job, there are numerous situations that will require you to introduce yourself to people. These range from very formal situations like Job Interviews to more informal contexts such as Career Fairs, Networking Events, or Informational Interviews with industry professionals. This question can come in a variety of formats, such as:
- "Can you tell me a bit about yourself?"
- This is the most straightforward and commonly used variation of the question. It invites you to provide a brief overview of your background.
- "Walk me through your resume."
- This request prompts you to discuss your professional journey chronologically, starting from your education to your current position.
- "Share a little about your background and what brought you here."
- This phrasing invites a more narrative and personal touch, encouraging you to discuss not only your professional journey but also the factors that led you to the present situation.
Or there might be no question at all, and instead, you are trying to capture the attention and interest of a potential professional contact unprompted. These unprompted introductions often take the form of elevator pitches, which we'll discuss further in the next lesson.
However the situation arises, it is important for you to use your introduction to spark interest in who you are. While John was able to do this successfully, most students struggle with this. Here is an example of the experience of one of John’s classmates, Sarah.
Meet Sarah
As Sarah sat down for her Zoom interview with Peter, she fidgeted with her hair, a clear sign of her nervousness. Peter began with the same question: "Tell me about yourself."
Sarah's mind raced, and for a moment, she drew a blank. The weight of the question pressed on her, and her initial attempt at an answer felt disjointed. "Uh, well, I'm Sarah. I'm a computer science student, and, um, I've always liked computers and stuff." Peter raised an eyebrow, awaiting a more substantial response.
Sarah's discomfort grew, and she stumbled through a brief overview of her academic background. "I graduated from high school last year and joined the computer science program at Kibo School because, you know, I thought it would be interesting."
The interviewer, sensing Sarah's struggle, tried to guide her with a follow-up question, "Can you share a bit about any projects or experiences that have shaped your interest in computer science?" Caught off guard, Sarah hesitated. "Um, well, not really. I mean, I've done some coding assignments for class, but nothing major. I guess I'm still figuring things out." The uncomfortable silence hung in the air as the interviewer waited for more substance. Sarah's anxiety intensified, and her attempt to articulate her journey in computer science felt forced and unconvincing.
Reflect
❓ Think back to your interview for the Automation Assistant program. One question that we ask all candidates is: Tell me about yourself and your interests. Reflect on your experience answering that question:
- Was your experience positive like John’s or negative like Sarah's?
- How well do you think you answered the question? What did you do well? What could you have improved?
- Did you specifically prepare to answer that question?
Share your response here.
If your experience was not positive, that’s ok. Most people struggle to introduce themselves, especially in high-stakes situations like interviews. While a lot of things can go wrong when trying to introduce yourself, here are the top 10 errors that people make:
- Lack of Focus: It's easy to veer off-topic and provide irrelevant details, especially when individuals are unsure about what aspects of their background to emphasize.
- Overwhelming Nervousness: The pressure of the interview setting can make individuals nervous, leading to stumbling over words, forgetting key details, or providing vague responses.
- Balancing Personal and Professional Information: Striking the right balance between sharing personal anecdotes and professional achievements can be challenging. Some people may struggle to decide how much personal information is appropriate in a professional setting.
- Difficulty Prioritizing Information: Deciding which aspects of one's background, skills, or experiences to highlight can be a struggle. This is especially true when individuals have varied experiences and are unsure about what the interviewer is looking for.
- Underestimating the Question: Some may underestimate the importance of the question and provide overly brief or generic answers, missing the opportunity to create a positive first impression.
- Lack of Preparation: Not having a well-thought-out response can result in a rambling, disorganized answer. Adequate preparation is crucial to ensuring a concise and impactful reply.
- Fear of Oversharing or Undersharing: Striking the right level of detail is crucial. People might fear sharing too much personal information or, conversely, not providing enough context to make their response compelling.
- Difficulty Connecting Past Experiences to the Role: Linking past experiences to the requirements of the job can be challenging, especially if the person hasn't thoroughly researched the position beforehand.
- Cultural Differences: In some cultures, there may be different expectations regarding how much personal information is appropriate to share in a professional context, leading to potential discomfort.
- Not Tailoring the Response: Failing to tailor the response to the specific job or industry can make the answer seem generic and less compelling. Customizing the information to match the requirements of the position is crucial.
Structuring Your Introduction
📺 Watch this video on structuring a self-introduction for an interview, specifically for fresh graduates (13:20)
Here is a structure that you can use when crafting and practicing your introduction for an interview
- Start with a Concise Introduction: Begin with a brief introduction that includes your name and current professional status or role.
- Express Your Interest and Motivation: Convey your genuine interest in the position or field. Share what motivates you and why you are excited about the opportunity.
- Provide a Snapshot of Your Professional Background: Offer a concise overview of your professional background. Mention your education, relevant work experience, and any key milestones or achievements.
- Highlight Key Skills and Strengths: Transition to highlighting your key skills and strengths. Focus on qualities that are directly relevant to the role you are applying for or the context of the introduction.
- Connect Your Experiences to the Role: Articulate how your past experiences have prepared you for the current opportunity. Emphasize specific achievements or projects that demonstrate your capabilities.
- Wrap Up with a Future-oriented Statement: Conclude by expressing your enthusiasm for the future and how you see your skills and experiences contributing to the success of the team or organization.
📺 Watch this video on how to confidently introduce yourself on video calls (9:26)
✅ So what...? Practice!
A key point emphasized in both videos is the need to practice your introduction. Social confidence is not automatic. Taking time to practice different types of introductions will help you be better prepared to speak confidently and clearly about yourself.
Mastering Your Virtual Presence
Remote work offers access to a broader job market and the ability to work from anywhere. However, it also presents unique challenges when it comes to speaking well. While face-to-face interactions allow for non-verbal cues and a more natural flow of communication, virtual settings require a more intentional approach. By mastering your virtual presence, you can overcome these challenges, stand out to potential employers, and thrive in remote work.
Crafting your virtual work environment
A professional virtual environment is crucial. It will shape how employers, colleagues and clients perceive you. Imagine a cluttered desk or inappropriate attire in a physical meeting – a messy virtual background or unclear audio has the same negative impact. A well-organized, distraction-free space signals professionalism, respect, and readiness.
Tips for creating a professional virtual work environment
- Lighting: Ensure your face is well-lit using natural light or a dedicated light source like a ring light.
- Background: Keep your background clean and uncluttered, or use a virtual background.
- Camera Positioning: Position your camera at eye level to maintain eye contact and enhance engagement.
- Audio Quality: Use a high-quality microphone and minimize background noise to ensure clear communication.
- Dress Code: Dress as you would for an in-person meeting to convey professionalism and confidence.
Creating a professional environment fosters trust and maximizes the chances that your verbal messages will have their intended effect.
📺 Watch this video on how to speak confidently on Zoom (9:17)
Practice
- Choose a topic you've learned so far in the AAT program (e.g., data visualization). Prepare a short (3-minute or less) overview of it, as if you were describing your knowledge to a potential employer
- Record Yourself: Use your phone's camera or a video conferencing platform to record your presentation.
- Self-Evaluation: Review your recording. Identify areas for improvement based on the tips discussed in this lesson.
- Re-record & Reflect: Re-record your presentation, applying the feedback you identified. Reflect on how your virtual presence has improved.
Optional: upload your re-recorded presentation to YouTube (make the video unlisted) and share a link in Slack here.
Project: Elevator Pitch
In this project, you'll prepare and deliver a 60-second elevator pitch. This elevator pitch should be the answer to the question "Tell me about yourself" when asked by a potential employer for an Automation Assistant position. You will record the pitch, and deliver it live to your peers.
What is an Elevator Pitch?
An elevator pitch (also known as an elevator speech) is a short, persuasive speech you use to introduce yourself, your product, or your company. It aims to explain the concept quickly and clearly to spark interest in who you are and what you do.
Elevator pitches can be used in a variety of situations, including:
- General networking
- Introducing yourself at a career fair
- Introducing yourself at the start of an interview
- Pitching your project or ideas to different stakeholders
The information that you include in your elevator pitch will differ depending on your goal. So one of the first steps when creating an elevator pitch is to determine what you want to accomplish with your pitch.
Introducing Yourself
📺 Watch this video for an introduction to elevator pitches.
📺 Watch this video to learn more about crafting your elevator pitch.
As mentioned in the video, your elevator pitch should include:
- Who you are, and a bit of background on yourself
- Context or explanation
- Make the connection to the listener
- What you are asking for
- A closing
Creating Your Elevator Pitch
1 - Clarify your goal Nail down the purpose of the pitch, and what you want to communicate to the listener. Consider the best way to describe your field and the type of job you’re pursuing.
2 - Put it on paper Write down everything you would want a prospective employer to know about your skills, accomplishments, and work experiences that are relevant to the position. Then mercilessly delete everything that’s not critical to your pitch. Keep editing until you’ve got the speech down to a few key bullet points or sentences.
3 - Format it A good pitch should answer three questions: Who are you? What do you do? What are you looking for? That should take about 15-30 seconds. The next 15-30 seconds should add details about your unique selling proposition, special skills, and specific ways you could help a potential employer.
4 - Tailor the pitch to them, not you It’s important to remember that the employers listening to your speech will be asking, “What is in it for me?” So be sure to focus your message on their needs.
5 - Eliminate jargon You need to make your pitch easy for anyone to understand, so avoid using acronyms and tech-speak that the average person or job interviewer might not understand. The last thing you want to do is make your listener feel stupid or uninformed.
6 - Read your pitch out loud and then edit it again The language you write in is different than how you speak. Practice your pitch out loud to make it sound more natural. While you should practice, you should not memorize your pitch.
7 - Prepare a few variations You might want to say things slightly differently to a potential business employer than you would to a professor you hope to work with. Also, sometimes you’ll just have 15 seconds for a pitch (kind of a short elevator ride). Other times you may have a minute or two. Focus on mastering a few key talking points, then work up ways to customize your speech for particular situations.
Submission
Record and submit
Record yourself giving your pitch (be sure to use the tips in the lessons on virtual presence!). Upload your recording to YouTube as an unlisted video. Then submit your recording in the form here
Deliver your pitch live
During the next team meeting, you will have the opportunity to deliver your pitch in a small group. Your peers will give you feedback and ratings. You will also have the chance to give others feedback. The live pitches will take place during the week of June 3, 2024.
Introduction
📺 Watch the video below to get an overview of the coming week. (0:58)
Objectives: By the end of this week, you will:
- create, manage, and manipulate databases, tables, and records within Airtable.
- Use formulas, and linked records in Airtable.
- customize fields, forms, and views in Airtable.
Due this week
Why Airtable?
Airtable is a game-changing tool that has revolutionized the way businesses manage data. With its user-friendly interface and powerful features, it has quickly become a go-to choice for businesses of all sizes.
Airtable is important because it allows businesses to manage their data in a highly customizable way. Unlike traditional spreadsheets, Airtable is flexible and can be tailored to meet specific business needs. This means that businesses can organize and manage their data in a way that works best for them.
In addition, Airtable's powerful features such as automation and integration with other tools make it a time-saving and error-reducing solution for businesses. With Airtable, teams can collaborate more efficiently, track progress, and manage tasks with ease.
At Kibo, we extensively utilize Airtable across various functions, serving as the foundation for many of our key processes. Examples include:
- Database and automation tool for Try Kibo and Degree admission processes
- Central database for the Students' Information System
- CRM tool for the Marketing and Outreach team
- Tuition Management System
... and much more!
Airtable stands as an invaluable tool that has allowed us to streamline our operations and develop impactful tools within remarkably short timeframes.
Airtable Vs. Spreadsheets
📺 Watch the video below to understand the differences between Airtable and Spreadsheets and their use-cases (19:55)
Key differences between Airtable and Spreadsheets (Google Sheets)
-
Database-like Functionality: Airtable and Google Sheets differ in their approach to data management. While Google Sheets is primarily focused on providing spreadsheet functionality, Airtable takes a more database-like approach. Airtable allows users to create relationships between tables and link records, which can result in a more structured and organized database experience. In contrast, Google Sheets lacks the same level of record linking and relationship management capabilities.
-
Customizable Views: Airtable is known for its diverse range of customizable views, which includes grid, calendar, gallery, and kanban views. These views provide users with the ability to visualize and interact with their data in multiple ways, and can be customized to suit individual needs. This results in a flexible and dynamic experience for users. Conversely, Google Sheets mainly offers a traditional grid view, which can limit the visualization options available to users.
-
Integration and Automation: Airtable offers seemless integration with several third-party services and platforms, which enables users to automate workflows and streamline processes. Airtable's built-in automation capabilities allow users to set up triggers and actions that initiate automated tasks based on specific events or conditions. In contrast, although Google Sheets also provides integration capabilities, its automation features do not match the extent of Airtable's.
-
Advanced Collaboration Features: Airtable provides advanced collaboration capabilities such as real-time collaboration, commenting, and activity logs. These features enable several users to work on the same base concurrently, leave comments for discussion and feedback, and track changes made to the data. Although Google Sheets also supports real-time collaboration, Airtable offers extra collaboration features that enhance team collaboration and communication.
Setting up Airtable
Note: You have not been invited individually but as a group. Therefore, you are required to sign into Airtable using the group email you belong to and the corresponding password. Check here for the required credentials.
Getting Started with Airtable
📺 Watch these videos on getting started with Airtable
Create your foundation (1:24)
Add your information (11:28)
Organize your information (5:08)
Getting started with Airtable (14:53)
Understanding the primary field (16:03)
Team Collaboration in Airtable
📺 Watch the video below to understand how to share your Airtable base with collaborators. (2:32)
Views and Form in Airtable
📺 Watch this video on how to create a view in Airtable (1:04)
📺 Watch this video on how to customize a view in Airtable (2:26)
📺 Watch this video on working with Airtable forms (5:31)
Linking Records and Tables in Airtable
📺 Watch these videos to understand how to link records and tables in Airtable (21:41)
Understanding Table Relationships in a Database
📺 Watch this video to understand the different kinds of table relationships in a database (5:31)
Note: Linking Table (in the video) is also known as a Junction Table.
📺 Watch this video on the principles of building airtable databases like a pro (12:16)
📺 Watch this video on how to create a junction table in Airtable (a continuation from the last video in Linking Records in Airtable) (9:00)
Project: Operations and Customer Communication System
Summit E-commerce Ventures wants an Operations and Customer Communication System and they have contacted you with the following details:
Project Overview:
We want to create an Operations and Customer Communications System using low-code/no-code tools for our e-commerce store. The goal of this system is to streamline our inventory tracking, product management, order processing and fulfillment, and effective communications with customers. We want to ensure real-time visibility into our stock levels and enhance our overall customer experience.
Overview of our current process:
When new orders are received or when we restock products, we update the inventory records in our books to capture these changes and keep our inventory accurate.
To prevent overselling a product, when orders are placed for the product, we set aside the quantity ordered as a reservation.
We carry out an hourly check routine to see if any orders have been placed and a daily routine to check the inventory levels of each product so that we do not run out of products and place orders to the suppliers when the levels are critically low.
During the hourly routine checks, when new orders are received, a dedicated member of staff sends an order confirmation email with all necessary details about the order; including items ordered, quantities, prices, shipping address, and any applicable taxes or fees, to the customer who ordered to let them know that the order has been received and is being processed. Finally, an email is sent when the order has been shipped.
We need your help streamlining this process to make us work better and more efficiently.
Your task:
Design Airtable database to include necessary tables for Inventory management and add the data. Finally, create a form for taking orders.
Provide data:
Make a copy of this data.
Deliverables
- Airtable Base
- Video demo of how your implementation works
Submission:
- Complete this form to submit your project.
Introduction
📺 Watch the video below to get an overview of the coming week. (0:56)
Objectives
By the end of this week, you will:
- use advanced features in Airtable, such as Lookup and Rollup fields, automation, and interfaces.
- write a documentation for a project.
Due this week
Lookup and Rollup Fields
📺 Watch this video on how to use lookup and rollup fields in Airtable. (13:41)
📺 Watch this video on how to use a lookup field in Airtable. (1:45)
📺 Watch this video on how to use a rollup field in Airtable. (7:40)
Airtable Interfaces
Introduction
Airtable's Interface Designer is a user-friendly tool that enables creators to collaborate with end-users easily. It simplifies complex workflows, presents data visually and customizes information for various audiences across organizations.
📺 Watch the video below to explore Airtable's interface designer. (5:57)
📺 Watch the video below on how to create a custom interface with Airtable's interface designer. (4:29)
📺 Watch this guide to building interfaces - a business use case. (25:30)
Automating Tasks with Airtable
Introduction
Airtable Automations is a powerful feature that enables users to automate repetitive tasks and streamline workflows. It works by allowing users to create custom workflows that automatically perform specific actions based on predetermined triggers or conditions.
-
Triggers are the events or conditions that initiate an automation workflow. For example, a trigger could be a new record being created in a table, a field being updated with specific information, or a date passing. With Airtable Automations, users can set up triggers that are specific to their needs.
-
Actions are the tasks that are automatically performed when a trigger occurs. For example, an action could be sending an email, creating a new record in another table, updating a field with specific information, or even posting to social media. Like triggers, actions are customizable and can be tailored to meet individual needs.
To start using Airtable Automations, you must first identify what trigger to use and then select the action you want to automate. You can then set up the automation by selecting the appropriate options in the Airtable Automations interface.
Getting started with Airtable Automations
📺 Watch these videos on getting started with Airtable automations (12:48)
Airtable Triggers and Actions
📺 Watch this video explaining Airtable triggers (3:35)
📺 Watch this video explaining Airtable Actions (3:25)
📺 Watch this video on 8 different ways you can trigger Airtable automations (13:31)
Introduction to JavaScript for Airtable
To effectively understand and utilize scripting in Airtable, you need a foundational grasp of JavaScript. The essential skills and concepts you should be familiar with are:
-
Basic JavaScript Syntax and Data Types
- Variables: Understanding 'var', 'let', and 'const'
- Data Types: Strings, numbers, booleans, arrays, objects, and null/undefined
- Operators: Arithmetic, comparisoon, logical, assignment, and tenary
📺 Watch this video explaining JavaScript Variables and Data Types (18:53)
- Control Structures
- Conditionals: 'if', 'else if', 'else', and 'switch' statements
- Loops: 'for', 'while'
📺 Watch this video explaining JavaScript If, Else and Switch Statements (17:28)
📺 Watch this video explaining JavaScript For Loop and While Loop (7:02)
- Arrays and Objects
- Arrays: Creation, accessing elements, common methods (push, pop, map, filter, etc.)
- Objects: Key-value pairs, accessing and modifying properties, object methods
📺 Watch this video explaining JavaScript Arrays (5:15)
📺 Watch this video explaining JavaScript Objects (23:16)
- Asynchronous Javascript
- Promises: Creating and handling promises
- Async/Await: Writing asynchronous code
📺 Watch this video explaining JavaScript Promises and Async/Await (13:55)
- JSON
- Parsing and Stringifying: Converting Between JavaScript objects and JSON strings.
📺 Watch this video explaining JavaScript JSON Parsing and Stringifying (12:20)
If you are interested in learning more about JavaScript as a programming language, here are some resources you can use:
- Learn JavaScript - Codecademy
- JavaScript Tutorial - W3 Schools
- JavaScript Crash Course for Beginners - Traversy Media
Scripting in Airtable
📺 Watch these videos to learn how to use scripts in Airtable Automation workflows (e.g Delete a Record) (15:47)
📺 Watch this video on the must-have scripts for maximizing efficiency in Airtable (15:29)
Project: Operations and Customer Communication System - Continued
Building on the on the foundation you have laid in the development of the Operations and Customer Communication System for Summit E-Commerce, your task for this week is to (you may use automation where needed):
- Reserve orders until delivered
- Remove orders from reserves when orders are shipped
- Send emails to suppliers when inventory is critically low
- Send order received and order shipped emails to customers when orders are received and when orders are shipped.
- Create an Inventory Management Dashboard using Airtable Interfaces showing products performances with the ability to filter on product categories.
Deliverables
- Video demo of how your implementation works
- Airtable base of your implementation.
Submission:
- Complete this form to submit your project.
Project: Six Months Employee Review
Here is the product requirement document (PRD) for this task.
Six Months Employee Review Automation
Background
Every six months, team managers at Kibo carry out employee performance reviews. When it's time for an employee to be reviewed, the team manager sends a notification via email, which includes a self-evaluation document. However, this manual process is inefficient and time-consuming.
The Six Months Employee Performance Review Automation project aims to develop a system that streamlines the process and eliminates the current manual process. The system will send notifications to employees and their managers every six months for a performance review.
Project Objectives
- Streamline the review process, reduce time and effort.
- Develop a system that sends notifications for performance reviews every six months.
Requirements
- Employees and Managers tables - include necessary fields.
- Automation to send email to employees and their manager every 6 months.
- Employee self-evaluation document.
Workflow
When difference between employee's last review date and today is equal to 6 months:
- Send email notification to employee's work email address.
- Send email notification to employee's manager's email address.
- Update last review date to "today"(date when email notifications were sent out).
Email Template
from: {{employee's manager email}} to: {{employee's email}} subject: Performance Review body: Dear {{employee's first name}}, It's been 6 months since our last performance conversation, so I'd like to schedule some time to discuss your performance since then. Ahead of the conversation, I would love to get your perspective on how things went. Could you please complete this {{self-performance review template}}, and send it to me. We'll plan to have a feedback conversation the first week we return to the office in August. Thank you! {{employee's manager name}} Deliverables
- Video demo of how your implementation works.
- Airtable base of your implementation.
Submission:
- Complete this form to submit your project.
Introduction
📺 Watch the video below to get an overview of the coming week. (1:27)
Instructions
- Find and get in touch with your teammates from the table below
- Choose a team lead
- Create your project's Trello board
- Assign tasks to members of the team
Teams
| Team Name | Team Members |
|---|---|
| Team A | Ashara Chidubem, Ibukunoluwa Ariwodola, Chijama Uchechi, Meshack Korir, Wawira Mercy |
| Team B | Alabi Ayomide, Nafisah Adams, Diana Muiruri, Richard Coker, Nurdin Idris |
| Team C | Adeniyi Oreoluwa, Lucy Kendi, Eze Victory, Mbuthia Esther, Tolulope Abolade |
| Team D | Davy Juniour, Nwafor Samuel, Babubakri Bello, Omowunmi Oluwole-Denton, Joram Nyamawi Mwanyika |
| Team E | Feyishara Bamigboye, Moses Bankole, Sarah Solarin, Chukwudi Nwuju, Uzoamaka Anyaegbuna |
| Team F | Busolo Wendy, Marnin Audu, Adejoke Olaosebikan, Chinedum Okpechi, Ian Munai |
| Team G | Regina Wakari, Laurette Ibekwe, Princewill Onyekah, Samuel Gicheha |
| Team H | Akindele Juwon, Emmanuel Adepoju, Caleb Kegera, Rita Okonkwo |
Presentation
- Tuesday, June 18, 2024, 11 am - 12:30 pm GMT: Teams B and D. Link
- Wednesday, June 19, 2024, 11 am - 12:30 pm GMT: Teams C, E, and G. Link
- Wednesday, June 19, 2024, 1 pm - 2:30 pm GMT: Teams A, F, and H. Link
Note: Presenters will be chosen at random and their performance will determine your performance evaluation for the week, so ensure to carry everyone along and immerse yourself in the team project.
Objectives
By the end of this week, you will:
- Proficiently use Trello for project management
- Engage in collaborative projects focusing on efficient teamwork and communication.
- Complete intermediate level projects with Airtable
Due this week
Documentation
What is documentation?
Documentation is a written or electronic description of any product or service. It helps the end users in understanding the different characteristics, features, and attributes of a physical or intangible product. Other than this, users can get help from documentation to follow a set of instructions in achieving a task.
The instructions that come along when you’re buying a new TV, sofa set, software, or drug, all come with an instruction leaflet on how to use the product. This instruction leaflet is also a piece of documentation.
Source: Technical Writer HQ
Why is documentation important?
Documentation plays a crucial role in a technical team as it helps to ensure that everyone involved in a project is on the same page and has a clear understanding of what needs to be done. It serves as a reference for team members to go back to when they need to refresh their memory about a particular aspect of the project.
Moreover, documentation helps new team members to get up to speed quickly and understand the project's scope, requirements, and design. It also helps to avoid misunderstandings and miscommunications among team members, which can result in costly delays and errors.
Documentation can take many forms, such as technical specifications, user manuals, design documents, project plans, and code comments. Each type of documentation has its own purpose and audience, but all of them help to ensure that the project is well-documented and easy to understand.
In summary, documentation is essential in a technical team as it helps to ensure that everyone is working towards the same goal and has a clear understanding of what needs to be done. It saves time, reduces errors, and helps to avoid misunderstandings, making it a critical part of any successful project.
📖 Read this Linkedin blog post on the importance of documentation
How to Write a Good Documentation
📺 Watch this video by Beth Aitman on how to write an effective documentation. (9:50)
>📺 Watch this video on documenting using Asana. (7:35)
Squad Cup Automation
Product Requirement Document (PRD): Automated Squad Cup Automation
Introduction
The Student Success Team organizes an annual "Squad Cup" for first-year students, fostering teamwork and engagement through a competition where students form squads, participate in various activities, and earn points. The goal of this project is to reduce the time required to manage the Squad Cup by implementing an Airtable-based automated system. You can read more about the Squad Cup here
Objectives
The primary objectives of the Automated Squad Cup Management System are:
- Streamline the submission process for student activities.
- Facilitate efficient approval or rejection of submissions with optional comments.
- Provide real-time communication with students regarding submission status.
- Generate a dynamic leaderboard showcasing squad performance.
Features
1. Submission Form:
- Create an Airtable form for students to submit their completed activities.
- Include fields for choosing an activity, who made the submission, what squad is the submitter a part of, and a link serving as "evidence."
- Store submissions in the
submissionstable.2. Approval Workflow:
- Implement a system for the Student Experience Team to mark submissions as "approved" or "not approved."
- Allow optional comments for feedback.
3. Automated Emails:
- Send emails to students (and copy the Student Experience Team) regardingtheir submission status and any comments.
4. Leaderboard:
- Design a dynamic leaderboard within Airtable.
- Ensure the leaderboard is accessible through a shareable link for transparency.
Implementation
1. Tables:
- Create necessary tables for
students,submissions, andleaderboarddata.- Establish relationships between tables for data consistency.
2. Formulas:
- Implement basic formulas for calculating points earned per squad and updating the leaderboard.
3. Automations:
- Trigger email notifications based on submission status.
4. Interfaces:
- Use Airtable interfaces to display the leaderboard in an easily accessible format.
Testing
- Conduct thorough testing to ensure the system's functionality, including form submission, approval process, email notifications, and leaderboard updates.
- To confirm your email automation works, you may want to update one of the student emails to your email, e.g., “youremail+studentdemo@emailprovider.com”
Tools and Resources
- Refer to This spreadsheet containing sample squads and activities for testing purposes.
Timeline
- This product should be made available to the Students' Experience Team on or before June 14, 2024.
Deliverables
- A video explaining how your base works, and showing the workflow from a student submitting an entry to the cup to a students' experience team member evaluating it, and the student receiving email feedback. The video is intended to help the student experience team understand how to use the base
- A google docs writeup documenting the technical design of the base. This writeup should help another member of the team understand how the base is built, and how to make improvements.
Submission
- Complete this form to submit your project.
Introduction
📺 Watch the video below to get an overview of the coming week. (1:27)
Objectives
By the end of this week, you will:
- understand the basics of Zapier and its role in automating workflows
- understand how to build basic zaps to connect different apps and automate tasks
- understand how to test and troubleshoot zaps
- develop critical thinking skills to analyze and solve complex automation challenges.
- apply a systematic approach to problem-solving in automation scenarios.
Resources
A shared Zapier account has been created for the program and you can find the login credentials in this doc.
Due this week
Why Zapier?
📺 Why and how we use Zapier at Kibo
📺 Watch the following videos to learn why many organizations choose to use Zapier (5:31)
What is Zapier?
📺 Watch this Zapier 101 video (5:45)
📺 Watch this Zapier Tutorial for Beginners video (8:30)
Zapier Integrations
Zapier offers integrations with hundreds of apps, including popular tools like Airtable, Google Sheets, Gmail, Slack, Trello, Asana, and more. You can create custom workflows that connect any combination of these apps, or choose from pre-built templates that are designed to automate common tasks.
Zapier integrations are a great way to save time and streamline your business processes.
Below are examples of how to connect Zapier with two of the most used applications at Kibo and other businesses.
📺 Watch these videos on connecting Airtable and Google Sheets using Zapier (10:50)
Troubleshooting your Zaps
📺 Watch this video on Zapier errors and how to troubleshoot them (5:45)
Google Forms
Google Forms is one of the most reliable and versatile tools available for data collection. With its user-friendly interface and robust features, Google Forms makes it easy to create customizable surveys, quizzes, and feedback forms. Plus, the data collected is automatically organized and stored on Google Sheets, making it easy to analyze and share with others.
So, whether you're a small business owner or a student conducting research for a project, Google Forms is a powerful tool for collecting data and gaining valuable insights.
At Kibo, we use Google forms internally for surveys, course feedbacks, lead generation, and other administrative tasks. By using Google Forms, we are able to gather valuable data from employees, students, and leads in a quick and efficient way.
Watch the videos below to learn how to build, format, and collect data with Google Forms.
📺 Google Forms Tutorial (29:15)
📺 Data Validation in Google Forms (14:38)
Additional Resources
Zapier Short Courses
- Zapier product walkthrough (17 min)
- Troubleshooting your zaps (35 min)
- Filters and Paths by Zapier (20 min)
- Formatter by Zapier (43 min)
- Timing your Zaps (18 min)
- Build workflows with Zapier Tables (31 min)
- Triggering zaps with Webhooks (19 min)
Zapier Workflow Solutions
- Automate getting new leads into your pipeline (17 min)
- Automate converting leads (43 min)
- Automate qualifying and nurturing leads (42 min)
- Automate lead generation (82 min)
- Build an automated client onboarding system (31 min)
- How to automate data extraction (54 min)
- How to sync a sales tech stack (28 min)
Problem Solving
Problem solving is the process of identifying, analyzing, and resolving issues or obstacles that prevent the achievement of a desired goal or outcome. It involves critical thinking, creativity, and the application of logical reasoning to find effective solutions to complex problems.
Effective problem solving requires a systematic approach to gather information, define the problem, consider possible solutions, make decisions, and take action to implement the best solution.
Watch the videos below to understand how to effectively problem solve.
📺 Watch this video on 15 strategies to improve your problem solving skills (14:17)
📺 Watch this video on a 5 step formula to solve any problem (7:28)
📺 Watch this video on how to solve problems in four steps: The IDEA model (5:23)
📺 Watch this video on how to think like a programmer: Learn to solve problems (5:43)
Employee Time-off Automation
Product Requirement Document (PRD): Automated Employee Time-Off Management
Introduction
Every year, employees are entitled to 22 working days paid time off (PTO). The objective of this project is to implement an automated system for managing employees time-off processing within the organization. This system aims to streamline the application and approval of time-off requests, ensuring efficient communication between employees and their managers.
Objectives
The key objectives of this project are:
- Utilize Airtable as the database to store and manage time-off requests, approval status, and leave days balances.
- Automate the time-off request process.
- Notify managers via email when employees apply for time-off.
- Facilitate manager approval or rejection of time-off requests within Airtable.
- Notify employees of the approval status via email.
- Deduct approved time-off days from the employee's total allocated leave days, with updates reflected in Airtable and added in the email sent to the employee.
Features
1. Time-Off Application:
- Create a form for employees to submit time-off requests.
- Include fields for the number of days requested and any relevant notes.
2. Manager Notification:
- Send a notification to the respective manager when an employee applies for time-off.
3. Approval Workflow:
- Allow managers to approve or reject time-off requests.
- Include optional comments for feedback.
4. Employee Notification:
- Set up email notification automation to inform employees of the approval status of their time-off requests.
5. Leave Deduction:
- Deduct approved time-off days from the employee's total leave balance.
Implementation
1. Tables:
Create necessary tables for
employees,managersandtime-off requests. Include only necessary fields required for this implementation.Establish relationships between tables for data consistency.
Setup fields for approval status, and employee leave balances. Leave days should automatically reset to 22 days at the start of a new year.
2. Airtable Automation:
Trigger email notification for manager's approval based on time-off request submission.
Trigger email notification to employee when manager completes time-off request review with approval status.
4. Leave Deduction Logic:
- Calculate and deduct approved time-off days from the employee's total leave balance.
Employee Leave Application Workflow
- Create a Google Form for employees to complete to request for leave days (ensure proper validation)
- On form submission, transfer the request to Airtable
- Ensure all communication automations work as needed
Testing
- Conduct comprehensive testing to validate the functionality of the system, including time-off request submission, manager approval, email notifications, and leave deduction.
Timeline
- This product should be made available to the HR manager on or before June 21, 2024.
Deliverables
- Video explaining how your implementation works, and showing the workflow from an employee submitting a leave request to a manager receiving the application notifications, approving or rejecting the request, and the employee receiving the manager's response. The video is intended to help the HR Manager understand how to use the base.
- A google docs writeup documenting the technical design of the base. This writeup should help another member of the team understand how the base is built, and how to make improvements.
Submission
- Complete this form to submit your project.
Introduction
In the module on "Speaking Wel", we discussed verbal communication skills with a focus on powerful introductions and virtual presence. In this module, we'll focus on another aspect of verbal communication: giving presentations. Whether it's pitching your ideas to teammates or delivering a tech talk at a conference, presenting well is key to career growth. Public speaking and presentation skills enable technical professionals to convey their insights and get buy-in for their ideas. Unlocking opportunities (especially leadership opportunities) requires technical mastery and strong communication skills.
Learning Outcomes
This module will help you craft and deliver effective presentations. After completing the module, you will:
- Articulate the importance of presentation skills for technical professionals
- Identify and overcome common challenges associated with public speaking.
- Develop and deliver presentations that are clear, concise, and engaging for a technical and non-technical audience
- Design effective slides and visuals to support your presentations
Case Study
Meet Felix, a final-year student studying Architecture and Data Analytics at Jomo Kenyatta University. He's participating in a 2-month virtual internship at Newcastle Partners, a consulting firm in Bristol. As part of a team designing a new city park, Felix is asked to create proposal for the park's visitor center. He's given a few weeks to prepare, then present his findings and recommendations to a group that includes his fellow interns, their manager Michael, and senior consultants at Newcastle Partners.
Felix is excited about this task. He believes the visitor center can set the stage for the entire experience of the park. For two weeks, he immerses himself in extensive research, watching videos of other parks layouts, and reading articles.
A few days before the presentation, Felix has gathered a lot of facts and has many ideas. He opens a blank slide to prepare the presentation, but struggles to figure out how to approach it. So, he decides to write instead. He writes a 5-page summary and proposal. He enjoys drafting the summary, and realizes that he has in-depth knowledge of the topics.
The night before the presentation, Felix still has not put together his slides, a task he dreads because he doesn't enjoy design. He finally picks a template from Powerpoint, then adds the text from his written summary on the slides. Where possible, be breaks it up into bullet points to make it easier to read and digest. When he's describing examples from other places, he takes screenshots of images of those visitor centers and adds them to his slides. Some of the images are low-resolution, but he assumes bad visuals are better than no visuals.
All in all, his slide presentation comes to about 30 pages. He only has 20 minutes for his presentation, but he believes he can get through it. He practices reading the first few slides, and he's able to do each one in about 30 seconds. He doesn't do a full practice, but he's confident based on the first slides and his deep knowledge of the material.
On the day of the presentation, Felix feels a wave of nervousness. When it is his time to present, he struggles to share the screen with only his presentation slides, and not also show his summary report. He fixes it after a few minutes, but the rough start has heightened his nerves. He wills himself to calm down, and begins his presentation. His slides, filled with lengthy paragraphs, were difficult for the audience to follow. Felix often read directly from the slides, rather than elaborating on the points, which made his delivery monotonous and unengaging. He did not pause to ask questions or invite interaction, which resulted in a one-sided presentation.
When the 20 minutes are up, the timer goes off with about 10 slides still left to go. Felix ends the presentation abruptly, without a clear summary of key points or a compelling conclusion. He asks if anyone has questions.
His manager Michael says:
Coach Felix
❓ Imagine you are Felix's manager Michael and you are writing him a brief email to give feedback on his presentation. What would you say to him?
Share your draft email in Slack.
Introduction to Public Speaking
The Importance of Public Speaking
📺 Watch the video below on the Importance of Public Speaking.
According to the video, public speaking matters for:
- Career Development: being a good public speaker enhances your career, and is a sign of leadership
- Personal Development: becoming a good presenter can boost your confidence
- Finding your voice: public speaking allows you to share your unique point of view and perspectives with the world
- Benefitting others: the audience gets to learn from your knowledge and experiences
There is a misconception that technical professionals don't need people in the field of tech do not need public speaking as a communication skill for their profession. But everyone needs to know how they can speak in public to inform, influence, and persuade.
Self-Assessment
❓ Complete the quiz below to assess your current public speaking competency level. Please note that this quiz is not meant to label you but more to help you know where you stand as a public speaker now and what areas we should work on developing together.
Discuss
❓ After taking the quiz, what are some of the areas you want to develop to become better at public speaking? Share your thoughts in Slack.
How to give effective presentations
“There are two types of speakers: those that are nervous and those that are liars.” - Mark Twain
In this lesson, we'll focus on two skills that will help you give effective presentations: (1) crafting your message, and (2) delivering with confidence.
Crafting your message
As with all communication, delivering a compelling presentation depends on the message and the recepient. Before diving into flashy slides or captivating delivery, you must first understand who your audience is and decide what the key takeaways of the presentation should be.
Clarify on the messages you want to deliver, and who the recepients are will provide a strong foundation for your presentation, and help you align your content and structure with your main objectives.
Once you consider audience and key messages, then it's time to pick a presentation structure.
📺 Watch the video below for 7 ways to structure your presentations
Delivering with confidence
When you're getting ready for a presentation, it's normal to feel nervous, or perhaps even overwhelmed. Depending on your comfort-level with public speaking, your feelings about giving presentations might range from slight nervousness to extreme fear and panic. In either case, it is possible to deliver presentations with confidence.
📺 Watch the video below to learn about the 3 Ps to becoming more confident as a public speaker.
📺 Watch the video below to learn about how to manage anxiety as a public speaker.
Both videos share tips on delivery which can be summarized in three broad areas:
Practice!
- Rehearse Out Loud: Run through your presentation multiple times to to become familiar with the content and flow
- Record Yourself: Record yourself practicing and then watch it back. This allows you to identify areas for improvement in body language, vocal variety, and clarity of your message.
- Give a Mock Presentation: Give a mock presentation to peers or friends in the similar environment as what you'll do in real life. Practice using the same tool (e.g., zoom or slides) that you will use in the real presentation. Time yourself, and commit to finishing even if you make a mistake.
Focus on Posture and Physicality (Virtual Presentations)
- Maintain Eye Contact: Position your camera at eye level, and look directly into the camera to simulate eye contact with your audience
- Sit Up Straight: Sit up straight with your shoulders and back engaged. Good posture projects confidence and helps with voice projection.
- Control your Movements: Use deliberate gestures and avoid fidgeting to keep the audience's attention.
Engage the audience
- Vary Your Vocal Delivery: Avoid a monotone voice. Use variations in pace, volume, and pitch to keep your audience engaged and highlight important points.
- Interactive Questions: Incorporate questions throughout your presentation to encourage audience participation, even virtually. Utilize chat functions or polling tools to keep them actively involved.
- Encourage Feedback: Invite questions and comments during and after the presentation to create a dialogue.
Presentation Visuals
"The best presentations designers don't create slides that make them look smart. They create slides that make their audience feel smart." - Analyst Academy
The Power of Visuals: Captivate Your Audience
In today's information-dense world, our attention spans are shorter than ever. Text-heavy slides can quickly overwhelm and disengage your audience. This is where visuals come in as powerful allies. Strategic use of visuals can transform your presentation from a lecture to an engaging and memorable experience.
Visuals can:
- Simplify Complex Information: Charts, graphs, and diagrams can effectively condense complex data into easily digestible formats.
- Boost Audience Retention: People remember visuals much better than text alone. Compelling visuals can significantly enhance the recall of your key points.
- Increase Engagement: Visuals break up text-heavy slides, adding dynamism and keeping your audience visually stimulated.
- Evoke Emotion: Images and videos can evoke emotions and create a lasting impression on your audience.
For the rest of the lesson, we'll discuss how to create effective slides for presentations.
Creating Slides
📺 Watch the video below on how to make presentations that don't stink (9:58)
Designing technical slides
Most of the time, as technical professionals, you'll be creating presentations to explain complex topics. You will need to help your audience understand and process a lot of dense information.
📺 Watch the video below on tips from designing effective presentations from the consulting industry (11:52)
Project: Presentation
In this project, you'll prepare and deliver a 10-minute presentation.
Presentation requirements
The presentation should help the audience understand how to build an automation using AirTable, Zapier, and/or any of the automation tools you've encountered so far. The presentation should use one of your projects (e.g., Squad Cup or Employee Time Off) as an example and walk the audience through how to build this automation. At the end of your presentation, the audience should:
- Have a general understanding of the capability of your automation tools (i.e., Airtable or Zapier)
- Understand your project's goals, and how the automations helped accomplish the goal
Your presentation must include an accompanying slide deck with appropriate visuals.
Submission
Record and submit
Record yourself giving your presentation. Upload your recording to YouTube as an unlisted video. Then submit your recording in the form here
Deliver your presentation live
More information about the live presentation will be shared with you in the coming week.
Introduction
📺 Watch the video below to get an overview of the coming week. (1:08)
Objectives
By the end of this week, you will:
- Complete an end-to-end automation workflow using Google Forms, Zapier, and Airtable.
- Understand the remote work scene and how to navigate it.
Due this week
Remote Work Etiquette
Complete Guide to Online Etiquette for Remote Working (8:31)
Effectively from Home: Remote Work Etiquette (5:50)
Work From Home Etiquette: How to stay professional remotely (6:25)
How to Collaborate Effectively (2:25)
The Art of Effective Communication (12:08)
Advisor Check-in Automation
Project Details
After each class, students are expected to complete a form, responding to a series of questions regarding their class experience. These questions include:
- Overall impression of the class.
- The most significant takeaway from the class.
- Their current learning state, categorized into three zones: Comfort, Learning, or Panic.
- An option to express their willingness to be contacted by an advisor by providing their email.
Each student is assigned to a student advisor, and this information is managed in an Airtable database.
Your task is to create a workflow to facilitate communication between students and advisors. The workflow should:
- Take a response from a Google Form.
- Check if the response has an email address – indicating that the student is interested in speaking with their advisor.
- Send an email notification to the student's advisor of the student’s desire to speak with them.
Resources
-
Make a copy of this sample data which includes details about students and their advisors (All fake names and email addresses).
-
To confirm your emails are sending, you may want to update one of the advisors emails to your email.
Deliverables
-
A link to a video explaining how your implementation works, and showing the workflow from a student filling out the form -- with and without indicating a need to speak with their advisor, and an advisor getting notified.
-
A google docs writeup documenting the technical design of the base. This writeup should help another member of the team understand how the base is built, and how to make improvements.
Submission
- Complete this form to submit your project.
Additional Resources
📺 Watch these videos on how to automate invoicing in Airtable (40:03)
📺 Watch these videos on developing a job application tracker with Airtable (120:00)
Introduction
📺 Watch the video below to get an overview of the coming week. (1:51)
Objectives
By the end of this week, you will:
- Understand the versatility of Make in addressing different business needs and scenarios.
- Gain a fundamental understanding of Make as a visual automation platform.
- Build and test scenarios
- Create complex scenarios with conditional logic.
- Develop custom integrations using webhook triggers and actions
Resources
A shared Make and Typeform accounts have been created for the program and you can find th login credentials in this doc
Why Make?
Formerly known as Integromat, Make is a powerful automation tool that allows users to connect different apps and services in order to automate workflows and increase productivity. There are several reasons why Make is considered to be a good automation tool, including:
-
User-Friendly Interface: Make has a user-friendly interface that makes it easy for users to create and manage workflows, even if they have no coding experience. The drag-and-drop interface allows users to easily connect different apps and services to create custom workflows.
-
Wide Range of Integrations: Make has over 1500 integrations with popular apps and services, including Google, Airtable, Typeform, Facebook, Salesforce, and Slack. This means that users can easily automate workflows between different apps and services without having to write any code.
-
Advanced Features: Make offers advanced features that allow users to build complex workflows. For example, users can use conditional logic to automatically route data based on specific conditions, or use loops to iterate over sets of data.
-
Scalability: Make can handle workflows of any size, from simple one-step automations to complex workflows with hundreds of steps. This makes it a good choice for businesses of all sizes.
Watch the video below to learn how we use Make at Kibo (2:35)
Make vs. Zapier
📺 Watch this video comparing Make and Zapier (16:31)
📺 Three reasons Make is better than Zapier (5:56)
Learn Make (formerly Integromat)
📺 Watch this Make tutorial for beginners (30:32)
📺 Some examples of Make Scenarios (22:41)
📺 Make tips (10:33)
Make Triggers
📺 Instant and Scheduled Triggers in Make (5:14)
Make Routers and Filters
📺 How to use Make (formerly Integromat) Routers and Filters (11:27)
Arrays and Collections in Make (formerly Integromat)
📺 Arrays and collections in Make (12:34)
📺 Using Array Iterators in Make (8:22)
📺 Using Array Aggregator in Make (9:56)
Functions in Make (formerly Integromat)
📺 Text Functions in Make (15:21)
📺 Date and Time functions in Make (10:36)
Using Webhooks in Make (formerly Integromat)
📺 Using webhooks in Make (24:05)
Error Handling in Make (formerly Integromat)
📺 Error handling in Make (19:32)
Additional Resources
- Earn a Make certification by completing the Make certification course
📺 Airtable automations with Make (17:06)
📺 Connect Airtable to Make via webhooks (9:58)
A better way to send data via webhook to Make
let webhookURL = "webhook-url-from-make";

let payload = {
    // list of data to be sent via the webhook url to Make
    // e.g
    // "name": "Bidemi Dairo",
    // "program": "Automation Assistants"
    }

let postOptions = {
    method: "post",
    headers: {
        'Content-Type':'application/json',
    },
    body: JSON.stringify(payload)
}

const postResults = (await fetch(webhookURL, postOptions))
Introduction
📺 Watch the video below to get an overview of the coming week. (1:27)
Teams
| Team Name | Team Members |
|---|---|
| Team A | Ashara Chidubem, Ibukunoluwa Ariwodola, Chijama Uchechi, Meshack Korir, Wawira Mercy |
| Team B | Alabi Ayomide, Nafisah Adams, Diana Muiruri, Richard Coker, Nurdin Idris |
| Team C | Adeniyi Oreoluwa, Lucy Kendi, Eze Victory, Tolulope Abolade |
| Team D | Davy Juniour, Nwafor Samuel, Babubakri Bello, Omowunmi Oluwole-Denton, Joram Nyamawi Mwanyika |
| Team E | Feyishara Bamigboye, Moses Bankole, Chukwudi Nwuju, Uzoamaka Anyaegbuna |
| Team F | Busolo Wendy, Marnin Audu, Adejoke Olaosebikan, Ian Munai |
| Team G | Regina Wakari, Laurette Ibekwe, Princewill Onyekah, Samuel Gicheha |
| Team H | Akindele Juwon, Emmanuel Adepoju, Caleb Kegera, Rita Okonkwo |
Objectives
By the end of this week, you will:
- Create engaging and effective surveys and forms
- Gain expertise in implementing advanced question logic enabling you to create dynamic and personalized surveys that adapt based on respondent input.
- Learn to seamlessly integrate Typeform with other tools and platforms, allowing for automated data flow and enhancing the overall efficiency of data collection and processing workflows.
Due this week
Why Typeform?
Typeform is an easy-to-use platform that allows you to create surveys, quizzes, and forms quickly and easily. With a user-friendly interface and a drag-and-drop editor, you can create beautiful and engaging forms in no time.
Typeform provides a range of features that make it an ideal tool for collecting data and feedback from your audience. For example, you can add images, videos, and GIFs to your forms to make them more visually appealing. You can also use logic branching to create personalized experiences for your users, depending on their responses.
Another benefit of using Typeform is that it provides powerful analytics tools that allow you to track user behavior and measure the success of your forms. You can track completion rates, analyze user responses, and gain valuable insights into how your audience interacts with your content.
At Kibo, we have vastly used Typeform for leads generation for our various programs, for surveys and for collecting feedback. Overall, Typeform is a robust data collection tool that help you create engaging and effective forms that deliver results.
Learn Typeform
📺 Creating your first Typeform (2:08)
📺 How to use Typeform (8:44)
📺 Create beautiful conversational forms and surveys (23:55)
Using Typeform Logic
📺 What is logic in Typeform? (0:39)
📺 How to set up logic on your Typeform (4:23)
📺 Add logic to your typeform using the logic map (4:05)
📺 Use logic to hide questios and avoid incomplete submissions (2:32)
📺 Ordering logic in your typeform (4:40)
Variables and Hidden Fields in Typeform
📺 Using variables in Typeform (5:04)
📺 How to add hidden fields to your Typeform (4:39)
📺 How to collect payments with Typeform (3:52)
Try Kibo Application Workflow
Project details
Details about this project can be found here
Deliverables
-
Video explaining how your implementation works, and showing the workflow from an applicant applying to the program for the following scenarios:
- applicant is eligible
- applicant is not eligible
- admissions challenge is sent to applicant
- if admissions challenge is not completed after 3 days, send a reminder
- if admissions challenge is not completed after 7 days, send a final reminder
- if admissions challenge is passed, send admissions notification to applicant and update status to admitted
- if admissions challenge is failed, send admissions challenge retake notification and leave status at applied
- if admitted after 3 days and not enrolled, send enrollment reminder to applicant
- if applicant enrolls, update status to enrolled and send enrollment confirmed email.
-
Google docs writeup documenting the technical design of the base. This writeup should help another member of the team understand how the base is built, and how to make improvements.
Submission
- Complete this form to submit your project.
Introduction
Learning Objectives
- Research and identify industry processes that can benefit from low-code/no-code tools
- Design and implement a solution using low-code/no-code tools to streamline the identified process.
- Create a detailed presentation outlining the industry, company, or business, the identified problem, and the solution implemented using low-code/no-code tools.
- Clearly articulate the benefits of the solution and its potential impact on business processes during the presentation.
Due in two weeks
Capstone Project
Project Details
Pick an industry, company, or business and identify a process or aspect of the business that can benefit from low-code/no-code tools to enhance the efficiency of their workflows and processes. Utilize the knowledge of the tools you have learned to create a solution for the identified problem.
Create a presentation outlining the selected industry, company, or business, the identified problem, and the solution built using low-code/no-code tools. The presentation should highlight the solution's benefits and potential impact on the business processes.
The focus should be on the advantages of low-code/no-code tools in streamlining workflows and enhancing the efficiency of business processes.
Your project should do at least one of the following:
- Data extraction from email. Use the extracted data to create new items in Airtable, or update an existing record.
- Attachments extraction from emails, uploaded to Google Drive and the corresponding record in Airtable is updated with the document's Google Drive link.
- Attachments extraction from forms, uploaded to Google Drive and the corresponding record in Airtable is updated with the document's Google Drive link.
Deliverables
- A project proposal explaining the problem you want to solve and your proposed plan to solving it (to be submitted on Monday, 15 July, 2024)
- A link to a video explaining how your solution works
- A Product Requirement Document (PRD)
- A slide deck
Deadline
Friday, July 22, 2024
Submission
Introduction to Job Search
Now that you've completed your technical training for becoming an Automation Assistant, the next step is to begin learning by doing, i.e., applying and growing your knowledge at work.
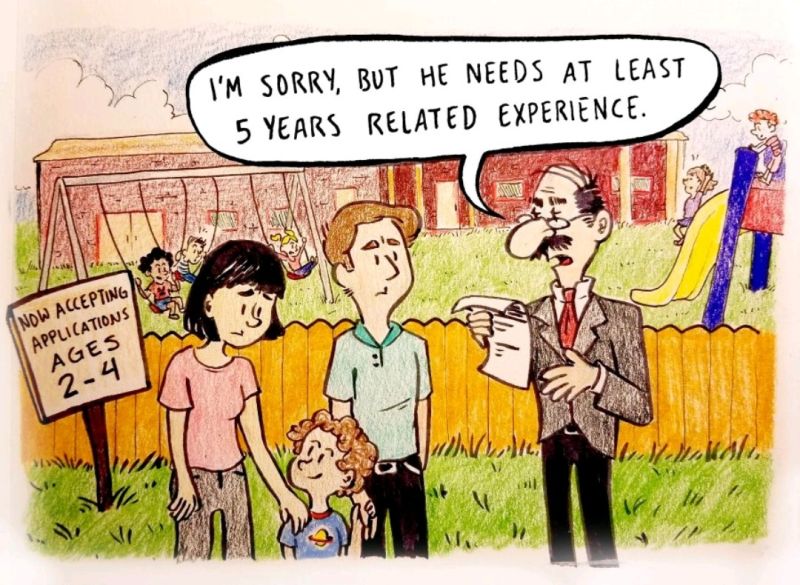
Getting an entry-level internship or job can be tough. Many entry-level jobs require experience and so early job seekers feel like they are caught in a bind: without being given an opportunity to start, how does one gain experience? Situations like this can leave job seekers feeling frustrated and at the mercy of an impossible system.
🤔 So, what’s an entry-level job seeker to do?
While getting a job can be challenging, it is not impossible and millions of people do it each week. The key to a successful job search is to take an analytical and proactive approach. While academic institutions, mentors, or others may provide support, you and you alone are responsible for your success.
📢📢 Let’s say it again louder for the people in the back: You and you alone are responsible for your success!
In this module, you'll prepare for landing a job sby creating artifacts and preparing for interviews. While resources are provided, it will be up to you to do the work, and execute a solid job search.
Learning Outcomes
After completing the module, you will:
- Develop a career narrative to effectively frame your skills and experiences
- Craft a resume that stands out to employers
- Provide thoughtful critique of your own resume and that of a peer
- Craft a LinkedIn profile to build your professional network and connect to opportunities
- Create a portfolio to share examples of your work
- Prepare and deliver strong answers to common interview questions
The Power of Storytelling
Into the Mind of Employers
A job application is a communication between you and representatives of your target company (e.g., recruiters, HR managers, hiring managers), with the purpose of convincing them that you:
- Possess all the technical and non-technical skills required to succeed in the role
- Are a good fit for the culture of their company
- Are their best (read: least risky) option out of all the other people that have applied for the same role.
This is a pretty tall order, so you will need to pull out all the tools in your communications toolkit to succeed.
When it comes to the job search, most people fail at the very first step of the communication process (i.e., the planning step) because they don’t understand the purpose of their communication nor their audience. So, with this in mind. Have you ever thought about what potential employers are thinking when they post a job advertisement and review submissions? Have you taken a step to think about their context, their motivations, or their challenges?
Most employers are trying to hire multiple roles at a time across different teams, and the pressures that they face are immense. Let’s think about this: What is on the mind of employers when they are hiring? What are they dealing with?
-
Employers are risk-averse
- Recruitment is expensive, so employers are looking for people who are likely to succeed.
- Few employees are willing to take a bet on “potential”, they often want to see evidence of skills through previous demonstration of these skills.
-
Employers are overwhelmed
- Your application is only one of hundreds or thousands of applications that they have to review. If you don’t stand out from the crowd, you don’t stand a chance.
- Make it easy for them to see that you have demonstrated the skills required to succeed in the role. Do not ask them to connect the dots for you.
- Small mistakes (e.g., poor grammar, typos) can get you screened out before someone even takes a close look at your application.
- Go to where they are. Attend events and build your network so that you can meet people connected to these employers. This could mean attending conferences, participating in hackathons, attending meet-ups, etc. Employers don’t have time to seek you out, so you must work to put yourself within their sphere of awareness.
Now that you have a little insight into the mind of the employer, it’s time to think about what this means for the way you should approach your job search. Throughout the hiring process, you have numerous opportunities to communiate with (risk-averse and overwhelmed) potential employers, and demonstrate that you are the candidate they are looking for. These communication channels include:
- When you apply:
- Your resume
- Your cover letter
- Your LinkedIn
- Your portfolio or website
- When you interview:
- Your interview skills
- Your performance on any recruitment tasks
Some candidates see the above channels as tedious things that they have to complete in order to land a job. Sort of like pointless hoops they have to jump through. This is why a lot of people are now using tools like ChatGPT to help them craft generic resumes and cover letters.
However, this is the wrong mindset. Each channel above is a valuable interaction with the employer and a powerful opportunity for you to tell your unique story. Most employers have an idea of the skills, mindsets, and experiences they are looking for when they post a job. The job description often includes details of the required and recommended skills, and an understanding of the company’s work culture and values can give you hints about the desired mindsets. To have a shot at landing a job, every interaction a representative of the company has with you needs to be a vote for the fact that you possess what they are looking for. You need to do the work to make it easy for them to see that you possess these skills. And you also need to do it in a way that is memorable and unique so that you stand out from the hundreds or thousands of other applicants. One of the most effective ways to do this is to use storytelling when crafting your resume, cover letter, etc.
The Power of Storytelling
One of the most powerful ways to use these channels to really connect with employers is through the medium of storytelling. Storytelling is a fundamental human activity that forms the basis of how we think, organize, and remember information. (source)
📖 Read this NPR article on the power of storytelling to pursuade.
Then:
📖 Read this Harvard Business Review article on landing a job with storytelling.
From the article, we learned 4 tips on how to use storytelling to help you land your next role:
Tip 1: Begin with your audience in mind.
Tip 2: Have a theme and promote it throughout your job hunt.
Tip 3: Give context to highlight your why.
Tip 4: End your stories with clearly stated resolutions.
Crafting a Career Narrative
One way of using storytelling effectively in your job search is to have a strong career narrative. There are numerous templates you can use to create your career narrative. In this section, you can see one approach in the video below and another approach in the linked article.
📺 Watch the following video for an introduction to career narratives.
📖 Read the following article on how to craft a career story/narrative.
In the next sections, we will apply your career narrative orally (in introductions), in written form (e.g., your resume) and digitally (e.g., your LinkedIn and portfolio).
Powerful Introductions
Meet John
John, a 1st-year computer science undergrad from Nairobi, nervously settled into his study space for his first Zoom interview. His heart pounded as he checked the lighting, tested the audio, and adjusted the angle of his webcam. He wanted to make sure he looked and sounded his best for the interview. He joined the call and came face to face with his interviewer, Peter.
Peter greeted him with a friendly smile and gave him context about the structure of the interview before diving into the inevitable opener: "Tell me about yourself."
John felt a mixture of anxiety and excitement. It was the kind of question he'd rehearsed countless times in front of the mirror, but now, facing a real interview, the words seemed to slip away. Taking a deep breath, he leaned forward and began to speak.
"Well, I'm a first-year computer science student at Kibo School of Technology. I've always been fascinated by how technology can solve real-world problems. Growing up, I spent hours tinkering with computers, trying to understand how they worked. That curiosity led me to pursue computer science as my major."
As he spoke, John could feel the tension easing. He continued, "During high school, I participated in coding competitions and even developed a simple app that helped local businesses keep track of their inventory. It wasn't anything groundbreaking, but it taught me the value of practical solutions." The interviewer nodded, encouraging him to go on.
"On campus, I've been involved in a few coding projects with my peers, and I've also taken on a role in a student tech club. It's been a great learning experience, collaborating with others who share my passion for technology. I believe that this combination of hands-on projects and teamwork has honed my problem-solving skills."
John paused, briefly reflecting on his journey so far. He then concluded, "In essence, I'm a driven and curious individual, eager to contribute my skills and learn from the industry. I'm here to absorb as much as I can and make a meaningful impact."
The interviewer appreciated John's candid response. "That's great to hear," they said, genuinely impressed. "Tell me about a specific project or challenge you've faced and how you tackled it."
As the conversation flowed into more technical details, John felt a sense of confidence building. The nerves of the initial question had faded, replaced by the enthusiasm to share his experiences and knowledge. The interview became a genuine exchange, and by the end, John couldn't help but feel a sense of accomplishment. The simple, honest approach to "tell me about yourself" had set the tone for a successful interview, showcasing both his passion for computer science and his ability to articulate it under pressure.
When searching for a job, there are numerous situations that will require you to introduce yourself to people. These range from very formal situations like Job Interviews to more informal contexts such as Career Fairs, Networking Events, or Informational Interviews with industry professionals. This question can come in a variety of formats, such as:
- "Can you tell me a bit about yourself?"
- This is the most straightforward and commonly used variation of the question. It invites you to provide a brief overview of your background.
- "Walk me through your resume."
- This request prompts you to discuss your professional journey chronologically, starting from your education to your current position.
- "Share a little about your background and what brought you here."
- This phrasing invites a more narrative and personal touch, encouraging you to discuss not only your professional journey but also the factors that led you to the present situation.
Or there might be no question at all, and instead, you are trying to capture the attention and interest of a potential professional contact unprompted. However the situation arises, it is important for you to use your introduction to spark interest in who you are. While John was able to do this successfully, most students struggle with this. Here is an example of the experience of one of John’s classmates, Sarah.
Meet Sarah
As Sarah sat down for her Zoom interview with Peter, she fidgeted with her hair, a clear sign of her nervousness. Peter began with the same question: "Tell me about yourself."
Sarah's mind raced, and for a moment, she drew a blank. The weight of the question pressed on her, and her initial attempt at an answer felt disjointed. "Uh, well, I'm Sarah. I'm a computer science student, and, um, I've always liked computers and stuff." Peter raised an eyebrow, awaiting a more substantial response.
Sarah's discomfort grew, and she stumbled through a brief overview of her academic background. "I graduated from high school last year and joined the computer science program at Kibo School because, you know, I thought it would be interesting."
The interviewer, sensing Sarah's struggle, tried to guide her with a follow-up question, "Can you share a bit about any projects or experiences that have shaped your interest in computer science?" Caught off guard, Sarah hesitated. "Um, well, not really. I mean, I've done some coding assignments for class, but nothing major. I guess I'm still figuring things out." The uncomfortable silence hung in the air as the interviewer waited for more substance. Sarah's anxiety intensified, and her attempt to articulate her journey in computer science felt forced and unconvincing.
Discuss
❓ Think back to your interview for the Automation Assistant program. The first question that we ask all candidates is: Tell me about yourself. Reflect on your experience answering that question by responding to the following questions.
- Was your experience positive like John’s or negative like Sarah's?
- How well do you think you answered the question? What did you do well? What could you have improved?
- Did you specifically prepare to answer that question?
If your experience was not positive, that’s ok. Most people struggle to introduce themselves, especially in high-stakes situations like interviews. While a lot of things can go wrong when trying to introduce yourself, here are the top 10 errors that people make:
- Lack of Focus: It's easy to veer off-topic and provide irrelevant details, especially when individuals are unsure about what aspects of their background to emphasize.
- Overwhelming Nervousness: The pressure of the interview setting can make individuals nervous, leading to stumbling over words, forgetting key details, or providing vague responses.
- Balancing Personal and Professional Information: Striking the right balance between sharing personal anecdotes and professional achievements can be challenging. Some people may struggle to decide how much personal information is appropriate in a professional setting.
- Difficulty Prioritizing Information: Deciding which aspects of one's background, skills, or experiences to highlight can be a struggle. This is especially true when individuals have varied experiences and are unsure about what the interviewer is looking for.
- Underestimating the Question: Some may underestimate the importance of the question and provide overly brief or generic answers, missing the opportunity to create a positive first impression.
- Lack of Preparation: Not having a well-thought-out response can result in a rambling, disorganized answer. Adequate preparation is crucial to ensuring a concise and impactful reply.
- Fear of Oversharing or Undersharing: Striking the right level of detail is crucial. People might fear sharing too much personal information or, conversely, not providing enough context to make their response compelling.
- Difficulty Connecting Past Experiences to the Role: Linking past experiences to the requirements of the job can be challenging, especially if the person hasn't thoroughly researched the position beforehand.
- Cultural Differences: In some cultures, there may be different expectations regarding how much personal information is appropriate to share in a professional context, leading to potential discomfort.
- Not Tailoring the Response: Failing to tailor the response to the specific job or industry can make the answer seem generic and less compelling. Customizing the information to match the requirements of the position is crucial.
Structuring Your Introduction
📺 Watch the following video for some tips on how to approach self-introductions in interviews, specifically for first-year university students.
Here is a structure that you can use when crafting and practicing your introduction:
- Start with a Concise Introduction: Begin with a brief introduction that includes your name and current professional status or role.
- Express Your Interest and Motivation: Convey your genuine interest in the position or field. Share what motivates you and why you are excited about the opportunity.
- Provide a Snapshot of Your Professional Background: Offer a concise overview of your professional background. Mention your education, relevant work experience, and any key milestones or achievements.
- Highlight Key Skills and Strengths: Transition to highlighting your key skills and strengths. Focus on qualities that are directly relevant to the role you are applying for or the context of the introduction.
- Connect Your Experiences to the Role: Articulate how your past experiences have prepared you for the current opportunity. Emphasize specific achievements or projects that demonstrate your capabilities.
- Wrap Up with a Future-oriented Statement: Conclude by expressing your enthusiasm for the future and how you see your skills and experiences contributing to the success of the team or organization.
Your career narrative is a great starting point for creating your self-introduction or elevator pitch. It will help you determine your overall message, as well as the main themes that you want to touch on. Utilizing your career narrative as a starting point will also ensure that your self-introduction is consistent with the way you present yourself on your resume, LinkedIn, and other hiring artifacts.
Practice
❓ Imagine you are in the first round of interviews for an Automation Assistant entry-level position. The interviewer asks you: “Tell me about yourself”. Using what you have learned in this section, create each of the following:
- A 150-300 word career narrative. Note: You can use the guidance provided in the "Do You Have a Career Narrative?" lesson.
- A 150 - 300 word written introduction to answer the "Tell me about yourself" question.
- A 30 - 60 second video of yourself giving your introduction.
Keep a copy of your written narrative and introduction in a document. You will refer to them as you prepare your application artifacts (e.g., resume).
Crafting a Killer Resume
This lesson will help you craft a resume that effectively describes your skills, experience, education, and fit for a job.
Why Does Your Resume Matter?
📺 Watch this video on how to write a resume for software engineering (10 mins)
As we learn in the video:
- The goal of a resume is to stand out to a recruiter. As you craft your resume, consider the perspective of the recruiter, what they are looking for, and how many applicants they are reviewing
- Beyond what's written, the most important thing in a resume is readability
- Your resume should be one page
The Risks of a Bad Resume
A bad resume is poisonous to your internship or job search. Here is why:
- Missed Opportunities: A bad resume may fail to capture the attention of hiring managers, causing you to miss out on potential job opportunities.
- Elimination from Consideration: Many employers receive numerous resumes for a single position. If your resume doesn't stand out or is riddled with errors, it may be quickly eliminated from consideration.
- Negative Impression: A poorly written or formatted resume can create a negative impression of your professionalism and attention to detail. Employers may assume that if you can't present yourself well on paper, you may not be diligent in your work.
- Overlooked Skills and Achievements: If your resume lacks clarity and fails to effectively communicate your skills, experience, and accomplishments, employers may struggle to understand your potential value to their organization. Additionally, a bad resume may not effectively highlight your relevant skills and achievements. This can lead employers to overlook important qualifications that could make you a strong candidate.
Meet Jane
Meet Jane, a 2nd-year Kibo student in Accra with a passion for technology and a desire to secure a data science internship. Unfortunately, Jane has a poorly crafted resume that is getting in the way of her even getting an interview from the companies she applies to. Let’s look through a critique of her resume and discuss the issues with her current version.
Objective Statement: Jane's resume begins with a vague and generic objective statement. It reads: "To obtain an internship in the field of computer science to enhance my skills and contribute to the growth of a dynamic company."
Risk: The lack of specificity in the objective statement fails to communicate Jane's unique skills and goals, making it less appealing to potential employers. Instead of an objective statement, Jane could use a summary or tagline to showcase her career narrative and give context to the rest of the information on her resume.
Educational Background: Jane's educational background is listed, but she has not highlighted any relevant coursework, projects, or achievements during her studies.
Risk: The resume does not showcase Jane's academic strengths or provide any evidence of her practical skills, leaving employers uncertain about her qualifications.
Work Experience: The work experience section is limited to a part-time job unrelated to computer science, and it lacks details about responsibilities and achievements.
Risk: Employers may question the relevance of Jane's work experience and wonder if she has the practical skills needed for a computer science internship.
Skills Section: Jane has a generic list of skills without providing any context or evidence of proficiency. She includes vague terms like "good communication skills" without specifying how these skills were applied.
Risk: The lack of specificity in the skills section makes it challenging for employers to assess Jane's actual capabilities, and it raises doubts about the depth of her technical skills.
Formatting Issues: Jane's resume has inconsistent formatting, with varying font sizes, inconsistent spacing, and random bolding of text.
Risk: The poor formatting makes the resume difficult to read and suggests a lack of attention to detail, potentially reflecting on Jane's work habits.
Grammar and Spelling Errors: The resume contains multiple spelling and grammatical errors, such as typos and incorrect verb tenses.
Risk: These errors convey a lack of professionalism and attention to detail, raising concerns about the quality of Jane's work.
Lack of Tailoring: Jane uses the same resume for every internship application without customizing it for each position. The resume lacks specific details about how her skills align with the requirements of the job.
Risk: Employers may perceive Jane as disinterested or unaware of the specific needs of their organization, reducing her chances of being considered for the internship.
Length Jane’s resume is 4 pages long.
Risk: Employers aren’t going to read through a 4-page resume, especially not for an internship role. More information isn’t better because it means that the important details are hidden among the irrelevant. Jane needs to cut her resume down to just one page.
Read on to learn how Jane should have gone about creating her resume. One of your assignments for this lesson will be to create (or update) your resume using the template and process outlined below.
Sections of a Resume
Sections in a resume can vary, but a strong resume generally includes a summary of your work experience, education, and skills. For this class, you will create a resume with:
- Contact Information (name, email, city/state, links to GitHub, LinkedIn, and a portfolio)
- Summary or tagline
- Skills: programming languages, technologies, tools
- Experience
- Education
- Additional: Languages, Certifications & Training, Awards
General Resume Tips
- Keep it concise: A student resume should be one page long. In the middle of your career, you might have enough important information to extend to two pages.
- Use keywords. When you're applying for jobs online, your resume will likely be scanned by an applicant tracking system (ATS) for keywords that match the job description. To make sure your resume makes it past the ATS, include relevant keywords throughout your resume, such as in your work experience, education, and skills sections.
- Integrate your career narrative: Think about how you can integrate your career narrative into your resume. It might show up as part of your summary or tagline. The skills and experiences that you include on your resume may be in support of your career narrative.
- Proofread your resume: Typos and grammatical errors hurt your chances of getting the job. Don't knock yourself out.
- Get feedback: Ask a friend, family member, or career counselor to review your resume and give you feedback. They might catch errors you missed or suggest improvements.
How to Create Your Resume
The first step to creating your resume is refining the content. At this stage, you should not focus on formatting. As you update the information, the formatting will get thrown off -- that's ok. Do not spend time trying to fix the formatting. Formatting is a distraction!
Step 1: Download the resume template document
Make a copy of the template by clicking the blue "Use Template" button. You are then going to complete the sections in the following order:
- Basics and contact information
- Education
- Experience
- Additional
- Summary
Step 2: Update name and contact information
Replace the name, phone number, location, LinkedIn, and GitHub address. If you have a separate portfolio website, add that as well.
Step 3: Add your education experience
Add your 2-3 most recent education experiences. You should not add anything before secondary school.
Step 4: Complete your professional experience
The experience section shows potential employers what you have done in the past and what you are capable of. Like all parts of your resume, it should be clear, concise, and to the point. The goal of the experience section is to show your value. The title or role you held matters far less than demonstrating the impact you had. When writing about your experience, you want to answer the questions:
- What did you do?
- How did you do it?
- What impact did it have?
Keep the following in mind when writing bullet points for your experience:
Use strong action verbs and explain how you did the work.
The video calls these "power verbs." They help convey what you accomplished and are easier to read and more concise.
| Don’t Write… | Instead Write… |
|---|---|
| 🛑 As an intern at the company, I completed many mission-critical features in the UI | ✅ Built a user login integration with Facebook that increased sign-ups by 20% |
| 🛑 Helped the office become more efficient by going paperless | ✅ Implemented an electronic ticketing system which sped up operations and reduced ticketing errors |
Show impact and quantify your results
Explain why your work matters. Whenever possible, quantify the results of your work.
| Don’t Write… | Instead Write… |
|---|---|
| 🛑 I increased sales | ✅ I increased sales by 15% in my first year |
| 🛑 I was responsible for developing marketing campaigns | ✅ Developed marketing campaigns that increased website traffic |
Step 5: Include additional information
- Add a list of relevant technical skills (e.g., programming languages) and tools you are comfortable with
- If you have relevant certifications and training, add them
- Optionally, you may add languages you speak and your interests/hobbies
Step 6: Add your summary
Once you have finished adding all of the sections, update the summary.
Step 7: Trim as needed
Optimizing Your LinkedIn Profile
A professional web presence is critical for job searching. This lesson will focus on LinkedIn because it is the largest professional networking site. I routinely look for people to hire or share opportunities with, and their LinkedIn profile is the first place I go.
Why Does LinkedIn Matter?
With over 740 million members in over 200 countries, LinkedIn is a powerful tool to build your professional network, and connect to potential employers and industry professionals. A LinkedIn profile helps you showcase your skills, experience, and accomplishments. According to LinkedIn:
- Job seekers who are "open to new opportunities" on the platform are 40% more likely to receive messages from recruiters
- 90% of recruiters use LinkedIn to find potential candidates
LinkedIn profile examples
Below are some examples of LinkedIn profiles from Kibo staff and mentors:
- Akin, a Kibo mentor and Software Engineer
- Bidemi, Data Analyst at Kibo
- Cami, Kibo mentor and Engineering Manager at Meta
- Robb, Kibo co-founder and Head of Curriculum
- Ope, Kibo co-founder and CEO
🤔 Do you notice any common features of the LinkedIn profiles of the Kibo staff and mentors listed above?
How to Optimize Your LinkedIn Profile
This section walks you through updating your LinkedIn profile. If the content in a particular section does not apply to you, i.e., if that section of your profile does not need to be updated, then you can skip it.
To begin, if you don't already have a LinkedIn account, sign up for one here: https://www.linkedin.com/signup
1. Update your name
Your display name should be listed as First Name, Last Name. In many African countries, it is customary to write your surname first. But, since the most common global pattern is first then last, please update your profile to match this pattern and prevent confusion with potential employers.
2. Update your profile photo
Add a profile photo. The photo should be professional, clearly show your face and be high resolution.
Professional doesn't mean formal. You don't need to wear a suit (unless you want to!) and it's perfectly fine to show your personality! But you should make sure that
- Your face is visible (it helps for interviewers to recognize you!)
- The photo is of high quality
- There are no inappropriate or distracting images or logos
3. Update your URL
Your LinkedIn profile URL appears in the navigation bar when someone is looking at your profile.

The url for Ope's profile is linkedin.com/in/opebukola
You should customize this URL so that it's easier to deduce your first and last name. To do so, follow the steps on this page to find and customize your profile URL.
4. Write a professional headline
Your LinkedIn headline is a brief description that is shown at the top of your profile page. It also appears next to your name in the search results. Your professional headline can be:
- Your current position or title, e.g., "Software Engineer Intern" or "Aspiring automation assistant and computer science student", similar to Tofunmi or Ebun
- A description of your skills and interests, e.g., Samuel has: "Software Engineering Fellow at Headstarter AI | AI & Automation Specialist | Software Developer | Cybersecurity Enthusiast | Low-Code & No-Code Developer | Python | React |"
5. Update your experience and education Update this section to include jobs, volunteer, and work experience you've had recently. Use similar language to your resume.