Sharing your work
Some of the sites you’ve made in this class are just for practice. Others are really cool, and you should be proud of them! You might want to show them off 🤔
This lesson is a collection of tips for making your site nicer for sharing.
Test your site
⚠️ Test your site ⚠️
- Load your site.
- Note any issues or areas for improvement. Is there anything that’s unclear?
- Fix those areas
The most basic tip is also the most important. You need to test your site.
More testing strategies
Some testing strategies that you might not think of immediately:
- Devices: Test your site on different devices, at different widths. Make sure it looks right when it’s a different size.
- Share with others: Show your site to other people, and ask them for feedback. They will notice things that you don’t.
- Remember that users don't know anything: Consider what someone else will know when they come to your site. The purpose of your site may be obvious to you, but it will not be obvious to them.
There are a lot of tools and tricks for testing websites to make sure they are great. Lighthouse is a tool built right into the Browser DevTools, which will make suggestions geared towards improving performance and accessibility.
Write a Readme
If you are sharing your code with developers or with an employer, you should write a Readme file.
A Readme is a file that explains what the project is about. It explains things like what you were thinking, who the project is for, what tools you used, and how someone might contribute.
Readme files
On Github and Replit, the Readme file serves as a landing page for a project. Since Github is a social site for developers, Readme pages are a really important way of communicating to other developers.
If you visit the Github page for the DevTools Scavenger Hunt, you’ll see that the Readme explains what the site is for, and links to more information about Kibo. The expectation is that other developers might see this page, and read the Readme to learn about the site and about Kibo.
If you are putting your work on Github, other developers might find it! The best thing you can do to make your online developer profile stand out (other than make great projects) is to write clear a Readme for your project.
Title and Favicon
What shows up in the tab bar for the page is the title and favicon.

You can control these!
- The
<title>tag determines what text shows in the tab bar. - A file typically called
favicon.icocontrols the icon for the site.
Further reading: MDN on Title and Favicon
See MDN’s guide on metadata in the <head> tag.
MDN also has more information about showing different versions of the favicon depending on the screen size.
Sharing meta tags
When you share a link to a site on Discord, there’s a preview of the site. It shows the title, an image, and a description of what you’ll find if you click the link.
You can control how that preview looks!
The <title> tag determines what title will show in the social preview. In addition, various <meta> tags control how other elements of the preview will show.
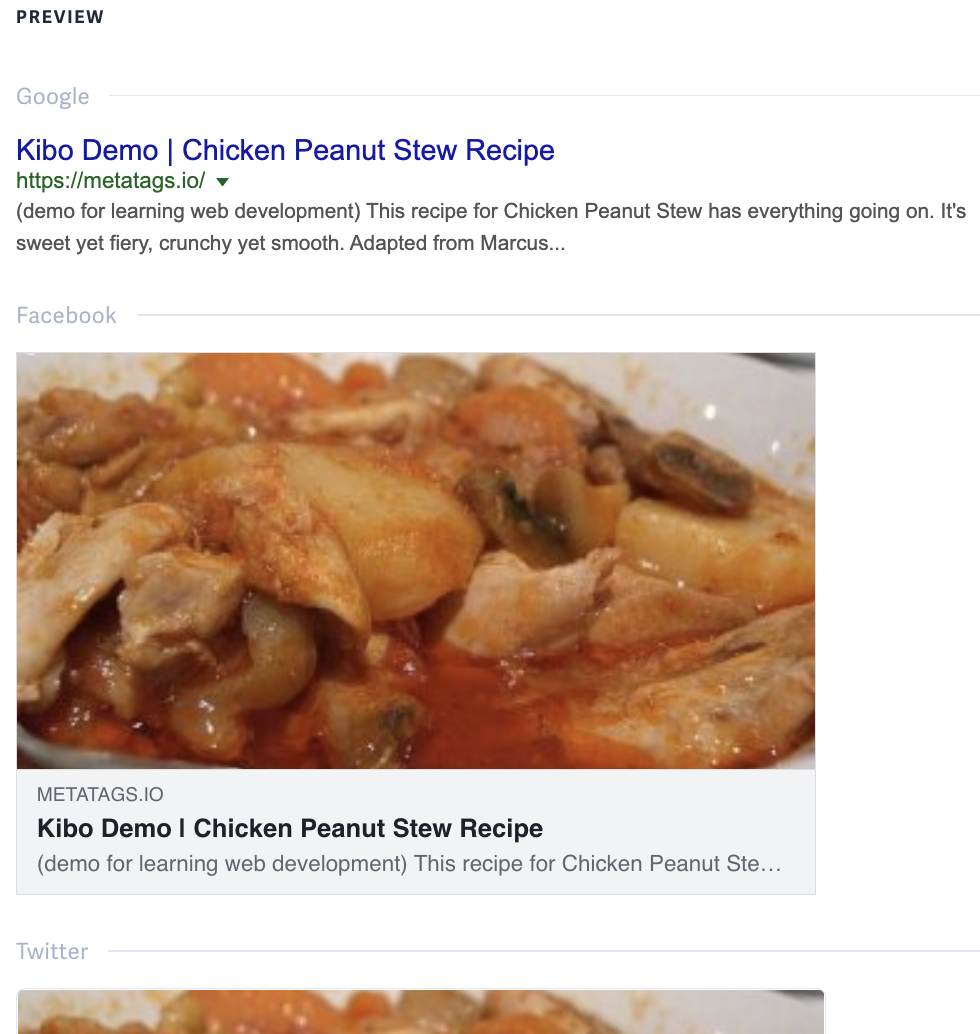
Meta tags demo
Here are the meta tags for the peanut stew recipe page, and the result:
<!-- Primary Meta Tags -->
<title>Kibo Demo | Chicken Peanut Stew Recipe</title>
<meta name="title" content="Kibo Demo | Chicken Peanut Stew Recipe">
<meta name="description" content="(demo for learning web development)
This recipe for Chicken Peanut Stew has everything going on. It's sweet yet fiery, crunchy yet smooth. Adapted from Marcus Samuelsson.">

<!-- Open Graph / Facebook -->
<meta property="og:type" content="website">
<meta property="og:url" content="https://metatags.io/">
<meta property="og:title" content="Kibo Demo | Chicken Peanut Stew Recipe">
<meta property="og:description" content="(demo for learning web development)
This recipe for Chicken Peanut Stew has everything going on. It's sweet yet fiery, crunchy yet smooth. Adapted from Marcus Samuelsson.">
<meta property="og:image" content="https://metatags.io/assets/meta-tags-16a33a6a8531e519cc0936fbba0ad904e52d35f34a46c97a2c9f6f7dd7d336f2.png">

<!-- Twitter -->
<meta property="twitter:card" content="summary_large_image">
<meta property="twitter:url" content="https://metatags.io/">
<meta property="twitter:title" content="Kibo Demo | Chicken Peanut Stew Recipe">
<meta property="twitter:description" content="(demo for learning web development)
This recipe for Chicken Peanut Stew has everything going on. It's sweet yet fiery, crunchy yet smooth. Adapted from Marcus Samuelsson.">
<meta property="twitter:image" content="https://metatags.io/assets/meta-tags-16a33a6a8531e519cc0936fbba0ad904e52d35f34a46c97a2c9f6f7dd7d336f2.png">
🏷️ Metatags.io lets you build and preview the
<meta>tags for multiple sites at once. It also has a bunch of helpful tips about what the different tags mean, and how they are relevant to how a brand is perceived on social media, in search, and more.Try it: go to Metatags.io and generate the meta tags for your site.
When should you share your site?
For some people, sharing comes naturally. Others are more shy, and hesitate to share their work.
We encourage you to share your work early. Here’s (just some) of the reasons why:
- It’s motivating when others see what you’ve learned and created.
- You’ll get feedback about what you’ve made, which helps you learn
- Sharing your project helps others to learn
Sometimes sharing is uncomfortable!
It’s okay to tell people when you share “I’m just a beginner, and this was my student project”, if that helps you feel better about sharing your work.